Welding Shade Chart: The Complete Guide to Picking the Right Lens Shade (OSHA & ANSI Tables for 2026)
The complete welding shade chart explained: OSHA lens shade tables for SMAW, MIG, TIG, plasma and cutting, plus…
READ ARTICLE →Last updated: October 2026
Two nights before a charity fabrication event, a welder I know unboxed the $29 auto-darkening helmet he’d ordered on a marketplace impulse. First arc: the lens darkened — he thought. He ran a 3/8-inch fillet, lifted his hood, and felt that familiar gritty sting behind his eyelids. By midnight, both eyes were bloodshot and streaming. By morning, he couldn’t open them without pain. Photokeratitis — arc flash — from a helmet that claimed to auto-darken.
The hospital ophthalmologist’s comment stuck with him: “The helmet protected the lens of your helmet, not the lens of your eye.”
That story is the reason this question — “Are auto-darkening welding helmets safe?” — deserves a real answer instead of a marketing slogan. Because the truthful answer has two halves:
This guide gives you both halves: how the technology actually works, the standards that separate real protection from wishful thinking, shade selection charts, failure modes and how to prevent them, the health science behind arc flash, buying criteria, testing procedures, and the myths that refuse to die. By the end, you’ll be able to evaluate any helmet — yours, a coworker’s, or the one in your cart — in about sixty seconds.
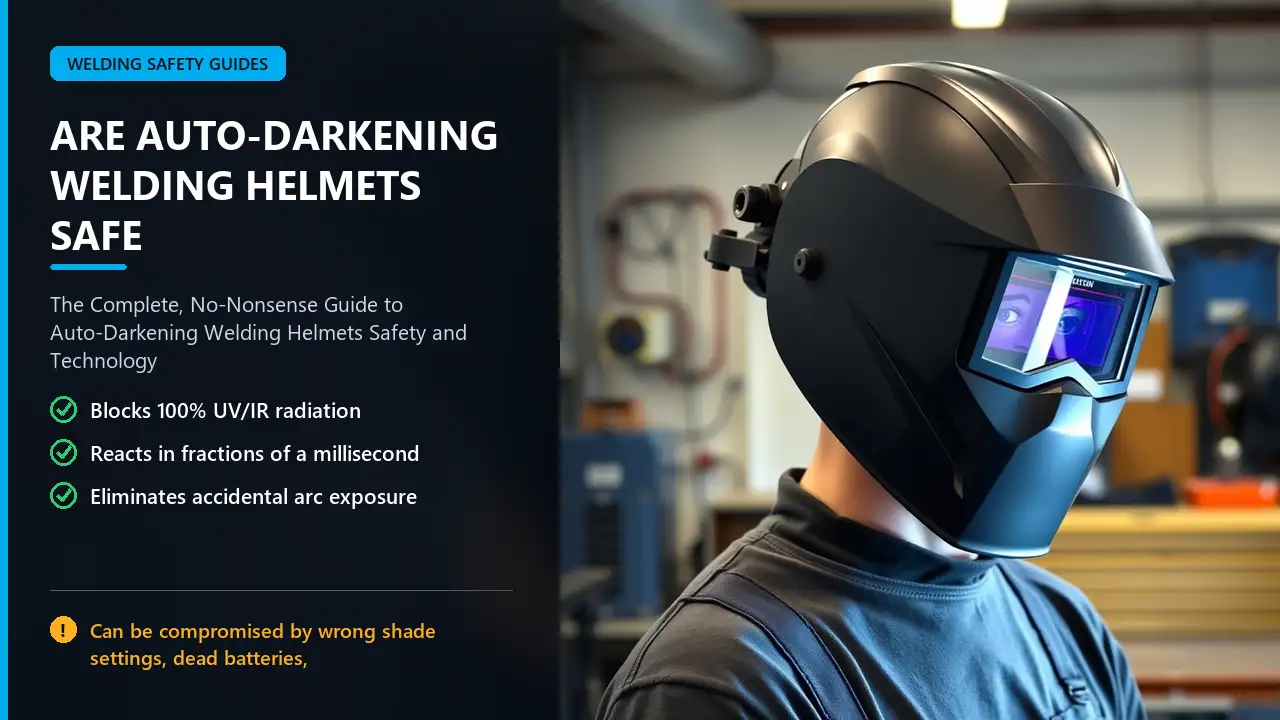
Auto-darkening welding helmets are safe when three conditions hold:
Meet those three and an ADF delivers protection that exceeds a passive helmet in practice, because it removes the biggest exposure risk in traditional welding: the flip. Every time a welder nods a passive hood up and down, there’s a moment of mis-coordination — an arc struck a fraction of a second too early, a hood not yet down — and that moment is exactly how welders get flash burns. The ADF is already dark before your finger finishes the trigger.
Fail any of the three conditions — a no-name helmet with unverifiable claims, a shade set too light, a sensor smeared with spatter — and the protection degrades or vanishes while still looking like protection. That gap between apparent and actual safety is where eye injuries hide.
The rest of this article teaches you to close that gap permanently.
A modern auto-darkening filter is a small optical computer sandwiched between lens covers. Understanding it takes sixty seconds and eliminates most of the fear around the technology.
A typical ADF cartridge contains, front to back:
A certified ADF’s light state is typically shade 2 to 4 — noticeably tinted, like light sunglasses. Two reasons:
So even in its “see-through” state, an ADF is already filtering — a fundamentally different situation from clear glass. Our piece on how do auto-darkening welding helmets work and how does a welding helmet work cover the same mechanics from the passive-helmet side.
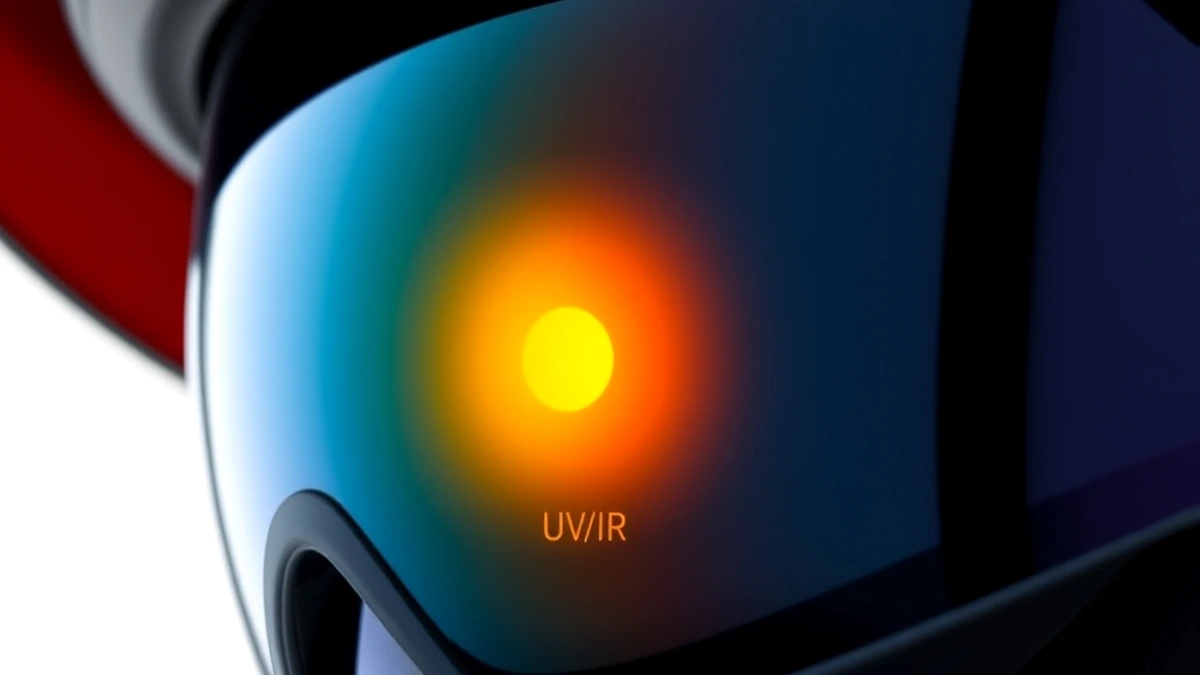
This claim appears on every helmet box, and it’s mostly true — but precision matters.
Infrared (IR): welding arcs emit significant IR. The passive absorber layer in certified filters blocks essentially all of it at all times. No power required.
Ultraviolet (UV): the arc’s UV output is the agent behind photokeratitis (arc flash) and contributes to long-term corneal and lens damage. Certified ADFs block UV-A, UV-B, and UV-C across the arc spectrum in both light and dark states — because the blocking happens in the passive layer, not the powered one.
Visible light: this is where protection is conditional. The LC layers handle visible light, and the LC layers need power. If the battery dies or the circuit fails, the visible-light protection may not engage — while UV/IR protection persists. That distinction matters: a dead battery won’t give you an IR burn, but it can let through enough visible arc light to flash your retina and cornea. This is why battery indicators and pre-weld checks are part of responsible ADF use, and why some models are specified to fail into a fixed dark shade rather than remaining light.
The standard’s role: certification testing verifies that a filter, across its rated range, transmits no more than the permitted UV and IR and meets impact requirements. When someone says “my helmet blocks 100% of UV/IR,” the meaningful follow-up is: “certified by whom, and is the marking on the shell?” — covered in the standards section.
For context on why this matters more than people think, the eye-health research is summarized in welding damage to your eyes and what happens without a helmet.
Safety questions deserve real numbers and real medicine, not vibes.
The cornea — the eye’s clear front window — is essentially sunburned by intense UV. Symptoms:
Ophthalmology references (American Academy of Ophthalmology) identify welding arc exposure as a well-known cause of photokeratitis, alongside snow blindness and sunburn — same mechanism, different wavelength. The cornea heals, but nobody should accumulate corneal UV doses as a lifestyle.
The eye’s internal lens focuses UV onto delicate structures. Decades of occupational research has examined whether welders carry elevated cataract or pterygium risk; occupational medicine consistently treats unprotected arc exposure as a modifiable risk factor for lens damage. This is the medical logic behind mandatory eye protection standards — the calculation isn’t about one bad day, it’s about thirty years of shifts.
The arc’s intense visible spectrum — including high-energy blue wavelengths — is the reason shade selection exists on top of UV/IR blocking. An ADF set too light for the amperage lets excessive visible energy reach the retina. This is not hypothetical: it’s precisely why process-and-amperage shade charts exist and why “I’ll just run shade 9 for everything” is a habit that trades long-term retinal health for marginal visibility.
UV that burns corneas burns skin too. Uncovered forearms near a stinger develop chronic photo-damage — “welder’s tan” is cumulative UV injury, and occupational dermatology takes it seriously. Helmets protect eyes; clothing protects everything else. See weld sunburn for the skin-side discussion.
Every eye-protection standard — ANSI/ISEA Z87.1, OSHA’s 1910.133, EN 166/175 — exists because the arc’s output is orders of magnitude beyond safe casual viewing. An ADF is a system for staying inside those limits without giving up visibility between welds. When the system is intact, the injury pathway is closed. When it’s compromised, you’re welding behind tinted glass with no idea what’s getting through.
Standards are the difference between “safe” as a claim and “safe” as a tested fact. Here’s the landscape.
The governing U.S. standard — Occupational and Educational Personal Eye and Face Protection — is ANSI/ISEA Z87.1 (current revision: 2020). It covers:
Z87 (basic impact) or Z87+ (high-impact). For welding environments with flying debris and grinding, Z87+ is the marking to want.9-13/2-4 meaning light state 2–4, dark range 9–13).OSHA ties directly into this: 29 CFR 1910.133 requires eye and face protection meeting ANSI Z87.1 for employees exposed to eye hazards — meaning on a U.S. job site, a non-Z87 helmet isn’t just risky, it’s non-compliant.
EN 379 rates optical quality on four axes (clarity, refractive power, light diffusion, homogeneity), commonly expressed as 1/1/1/2 or 1/1/1/1. Class 1/1/1/1 is top-tier — the image is distortion-free, edges stay sharp, and your eyes don’t work overtime compensating for blur. Budget helmets often land at 1/1/2/2 or worse. This rating is one of the most underused buying criteria in the market, and it directly affects the eye-strain question below.
ANSI Z87 or Z87+ physically molded or printed — not just on the box.DIN 9-13/2-4 or 5-13 for wide-range models).EN 175 / EN 379 marks for European helmets, CSA for Canadian.If the helmet’s only markings are a brand logo and a country of manufacture, treat its protective claims as unverified. We walk through hands-on checks in how to test an auto-darkening welding helmet.
A helmet is only protective if the shade matches the arc. Too light → visible light overexposure. Too dark → you can’t see the puddle → bad welds, compensating posture, and eventually someone lifts the hood to peek. Both failure modes cause injury.
| Process | Amperage | Suggested Shade | Notes |
|---|---|---|---|
| GTAW / TIG (steel, stainless) | ≤ 60 A | 7 – 9 | Soft arc, low light output |
| GTAW / TIG | 60 – 150 A | 9 – 11 | Most common TIG range |
| GTAW / TIG | 150 – 300 A | 11 – 13 | |
| GMAW / MIG (short circuit) | ≤ 130 A | 9 – 11 | |
| GMAW / MIG (spray, high amp) | 130 – 300 A | 11 – 13 | |
| SMAW / Stick (6011, 7018, etc.) | ≤ 100 A | 10 – 11 | |
| SMAW / Stick | 100 – 250 A | 11 – 13 | Most structural stick work |
| SMAW / Stick | > 250 A | 13 – 14 | Wide-range filters only |
| FCAW / Flux core | ≤ 200 A | 10 – 12 | Brighter arc than MIG at same amps |
| Plasma cutting | — | 5 – 9 (or dedicated plasma mode) | Most ADFs handle #4–#9 cutting range |
| Grinding mode | — | 3 – 5 (fixed) | Or manufacturer’s grind setting |
Manufacturer guidance (Lincoln Electric, Miller, 3M, ESAB) tracks these ranges closely; your specific filter’s rating governs — if its range tops out at shade 12, shade 13 isn’t available to you regardless of what a chart suggests.
1/1/1/1 fixes blur, higher DIN fixes brightness).| Setting | Starting Point | Adjust When… |
|---|---|---|
| Sensitivity | Mid-range | Outdoors: raise (ignore sunlight); dim shop: lower (ensure triggering) |
| Delay | Mid-range | Overhead/high-amp: raise (bead glow); low-amp TIG: lower (see crater fill sooner) |
Shade confusion is one of the most common helmet-related complaints — and it connects directly to the flickering and flashing problems discussed in why does my welding helmet flash and why is my welding helmet flickering.
Marketing pages list a dozen numbers. Only three change your safety margin on the arc.
What it is: how long the lens takes to go from light state to fully dark after the sensors detect the arc.
Practical test: strike an arc on scrap with the helmet in normal position. You should never see the arc as a white flash — only as a darkened glow. If you catch even a flicker of bright light before darkening, investigate (sensors, shade setting, battery) before trusting the helmet again.
What it is: the number of photodiodes watching for the arc, and where they sit.
Blocked-sensor failure mode: the single most common “my helmet didn’t darken” report. Grinding residue, weld spatter haze, or a gloved finger covers the sensor; the arc strikes; nothing happens; the welder flinches and looks away — into the arc. Lens covers are cheap; replace them before they’re opaque, and wipe sensors gently with a soft cloth (never abrasive pads, which scratch the coating).
What it is: what keeps the LC cells and circuit alive — and what happens when it doesn’t.
| Power Type | Pros | Cons |
|---|---|---|
| Replaceable battery (CR2032, AAA, or proprietary) | Predictable; works in low-light shops where solar never charges; easy swap | Must carry spares; forgetting spares = dead helmet mid-job |
| Solar-assist | Never needs routine battery changes in well-lit shops; panel charges capacitors continuously | In dark booths or enclosed spaces, solar alone may not keep the charge; still often has a backup cell |
| Rechargeable (Li-ion) | USB charging; strong runtime | Charging cycles age the cell; dead unit mid-job without a cable |
| Hybrid (solar + replaceable backup) | Best of both — solar carries the load, battery guarantees readiness | Slightly more complex; battery still needs periodic replacement |
Critical question: what happens on power loss?
This is the spec most buyers never ask about, and it separates serious helmets from toys:
Battery behavior warnings:
Together, switching time, sensor design, and power behavior determine whether the helmet protects you in the milliseconds that count — and how it behaves on the day something eventually goes wrong. That last part is next.
Yes. Every device can. What matters is how it fails, how often, and what you do about it. Here’s the complete catalogue.
Cause: spatter haze on lens covers, grinding dust, glove or torch occlusion, sticky tape residue from labeling.
Symptom: helmet doesn’t darken, or darkens late/partially.
Prevention: replace lens covers regularly (they cost dollars), wipe sensors each session, mount tape/labels away from sensor windows, keep torch out of sensor line-of-sight when striking the arc.
Risk if ignored: high — this is the classic arc-flash pathway.
Cause: end of life, cold weather, months of storage.
Symptom: slow darkening, partial darkening, light state when it should be dark, darkening not triggering at all.
Prevention: fresh batteries on a schedule (many welders swap annually or at season change), carry spares in the truck, heed low-battery indicators.
Risk if ignored: moderate to high depending on failure state (fail-dark = low risk; fail-light = high).
Cause: no discipline about shade selection; “someone else set it”; shade reset after battery change (many helmets revert to defaults).
Symptom: too light → eye strain, flashing, discomfort during long beads; too dark → can’t see puddle → bad welds and tempted peeking.
Prevention: set shade deliberately for each process; memorize your own settings; recheck after battery changes; use the chart above.
Risk if ignored: moderate (chronic) to high (peeking incidents).
Cause: helmet calibrated in the shop, taken outdoors — sunlight triggers constant darkening; or inverse: dim booth, low sensitivity, arc doesn’t trigger.
Symptom: lens darkens without welding (annoying, harmless) or fails to darken on arc (dangerous).
Prevention: adjust sensitivity at the start of each environment change; many experienced welders keep two profiles in memory (shop/outdoor) if the helmet supports it.
Risk if ignored: moderate to high in the failure direction.
Cause: deep scratches on lens covers and filter face, impact damage, chemical exposure (solvents, certain cleaners degrade coatings), delamination of the cartridge laminate.
Symptom: blurred or distorted image, cloudy view, double images (ghosting), visible damage.
Prevention: never weld with cracked covers; replace scratched covers before they impair vision; use approved cleaners; don’t drop the helmet onto concrete (cartridge misalignment is a real repair-shop item).
Risk if ignored: moderate — primarily through eye strain and the bad welds that follow poor vision.
Cause: manufacturing defect, water ingress, severe impact, electronics age-out.
Symptom: lens stuck light, stuck dark, or erratic.
Risk: depends entirely on failure state — see fail-dark vs. fail-light above.
Mitigation: buy from manufacturers with a safety record and stated failure behavior; replace helmets after major impact (the way you replace a hard hat after a blow).
Not electronic — behavioral. The helmet worked flawlessly for three years, so the lens covers are hazed, the shade is whatever it was last, and the sensors haven’t been wiped since the last job. The device is technically “on”; the system is effectively off. This failure mode produces more injuries than component death does, because nobody suspects it.
| Symptom | Likely Cause | Immediate Action |
|---|---|---|
| No darkening at all | Dead battery / blocked sensors / grind mode on | Check grind mode; wipe sensors; replace battery; test on scrap |
| Late or partial darkening | Low battery / cold / sensitivity too low | Fresh battery; warm up; increase sensitivity |
| Darkens without welding | Sensitivity too high (sunlight) | Raise sensitivity threshold |
| Darkens but looks too bright | Shade set too low | Move up per shade chart |
| Blurry / ghosted image | Scratched covers / damaged filter | Replace covers; service or replace helmet |
| Flickering during weld | Low battery / dirty sensors / loose battery contact | Replace battery; clean contacts; see flickering guide |
| Flashes on strike | Delay too short + slow sensors / mis-set sensitivity | Raise sensitivity; check battery; verify with test |
The frequency of these failures is heavily skewed by two things: helmet quality and maintenance discipline. Which brings us to the biggest real-world risk factor — the helmet itself.
In recent years, industrial safety authorities in North America and Europe have repeatedly warned about counterfeit and substandard welding helmets and filters entering the market through third-party marketplaces — helmets bearing authentic-looking standard marks from manufacturers that do not exist, filters claiming shade ranges and UV/IR blocking they never tested. The U.S. Coast Guard and OSHA have circulated alerts about counterfeit safety equipment generally; welding PPE was among the categories flagged. The broader principle from bodies like NIOSH is simple: protective equipment is only protective if it’s the equipment that was tested.
A counterfeit hard hat is still a shell that mostly works as a shell. A counterfeit auto-darkening filter is a black box — its protection depends entirely on internal components you cannot inspect:
You cannot tell by looking. Under an arc, all of these look like “a helmet that darkens” — until the day the arc’s UV passes through, or the shade is wrong and nobody notices because the image seems fine.
The economics are worth stating plainly: a helmet costs less than a single ophthalmology visit; a counterfeit helmet risks the eyes that a lifetime of welding depends on. For a trade where your vision is your tool, this is not the category to bargain-hunt in.
ADF helmets didn’t replace fixed-shade hoods because marketers said so — they replaced them because the exposure data pointed that way. But passive hoods still have legitimate strengths. Here’s the fair comparison.
| Factor | Auto-Darkening (ADF) | Passive Fixed-Shade |
|---|---|---|
| UV/IR protection | 100% blocked at all times (passive absorber layer) | 100% blocked at all times (filter glass itself) — equal |
| Arc-flash exposure pathway | Largely eliminated — no flip required; already dark before strike | Present — nod/flip timing creates exposure windows; misfires happen |
| Between-weld visibility | Full clear (light state ~2–4) — inspect, position, grind without raising hood | Must raise hood to see; often left up “just for a second” — unsafe habit |
| Shade flexibility | Variable (often 5–13 or 9–13) — one helmet for TIG, MIG, stick, plasma | One shade per lens; multiple lenses or flip-front frame needed for multiple processes |
| Tack welding / stitch work | Large advantage — no repeated flipping, continuous dark protection | Constant flipping; high exposure risk; tacks are where many flash injuries occur |
| Power dependence | Requires battery/solar power; dead battery = degraded protection | None — filter works forever without power |
| Failure complexity | Sensors, circuit, battery, settings can fail | Essentially can’t fail (aside from cracked/missing filter) |
| Cost | $40 (basic) to $500+ (premium) | $10–$50 for a decent shell + lenses |
| Weight / balance | Heavier; more electronics in front of face | Lighter (shell + lens only) |
| Optical quality ceiling | Excellent on top models (EN 379 1/1/1/1); variable on cheap ones | Passive glass lenses are inherently distortion-free (class 1 optical) |
| Durability | Electronics, cartridge, covers — more to damage | A shell and a lens — survives abuse |
| Repairability | Parts (covers, headgear, batteries) easy; cartridge failure = replacement | Lens replacement costs dollars; shell lasts decades |
| Learning curve | Settings discipline required | Shade is fixed — no settings to get wrong |
| Outdoor / bright work | Sensors need sensitivity tuning; sunlight can false-trigger | No tuning — shade behaves identically everywhere |
| Best for | Production welding, tack-heavy work, multi-process shops, beginners who haven’t learned flip timing, anyone prioritizing exposure reduction | Budget builds, harsh environments (heat, grit, electrical interference), minimalists, emergency/preparedness kits, backup hoods |
Workplace experience has long noted the pattern: flash injuries cluster around hood manipulation — striking an arc before the hood is down, glancing under the hood, welding a quick tack without lowering it. The ADF doesn’t make a welder careful; it makes carelessness less likely to matter. For a shop’s injury statistics, that’s the difference that shows up.
Own both. An ADF as the daily driver — for tack work, fit-up, multi-process days, and visibility between welds — and a passive hood as the deliberately simple backup that’s always ready. If the ADF’s battery dies mid-project, the passive hood doesn’t care. The two aren’t rivals in a real toolbox; they cover each other’s failure modes.
For help deciding which type fits your work, see what is a good welding helmet and choose the perfect welding helmet.
Welders report two categories of complaints about ADF helmets: eye fatigue and head/neck fatigue. Both are real; both have identifiable causes; neither is inherent to the technology.
Poor optical class is the leading cause. Remember EN 379’s four-axis rating — a filter at 1/1/2/1 or worse introduces light diffusion and non-uniformity that the eye tries to compensate for continuously. Over an eight-hour shift, that compensation manifests as:
Fix: prioritize the optical class rating in purchasing (1/1/1/1 or 1/1/1/2 for quality work), keep lens covers clean and scratch-free, and verify the shade matches the process. A quality filter at the right shade should make a weld puddle look clearer than any passive hood — not murkier.
Wrong shade produces strain through a different mechanism: too dark forces squinting and posture changes; too light forces constant squinting against brightness. Both tire the eyes and the muscles holding the head at odd angles. Revisit the shade chart.
Dryness and airflow: a sealed helmet with limited ventilation recirculates exhaled air — in a respirator configuration especially, or in hot shops — drying the eyes. Ventilation design, anti-fog treatments, and taking deliberate breaks (lifting the hood, focusing at distance) mitigate this.
Quality ADF helmets weigh roughly 16–22 oz (450–620 g) versus 12–16 oz for a passive shell. That extra weight sits forward of the pivot point — the classic leverage problem that makes a helmet feel heavier than the scale says.
Mitigations that work:
The comfort bottom line: an ADF with good headgear at the right optical class is more comfortable than the alternative workflow of flipping a passive hood — because “comfort” includes not constantly repositioning, not re-gripping, and not squinting. The welders who report ADF discomfort overwhelmingly report it about cheap ADFs — bad optics, bad headgear, bad balance. The complaint is valid; the conclusion that “auto-darkening is uncomfortable” isn’t supported once the variable of quality is controlled.
Certification gets the helmet out of the factory; maintenance keeps it certified in your hands. The routine is short — build it into the same muscle memory as checking your grounding clamp.
This is the test that answers the scariest question — what does my helmet do when it dies?
Interpretation:
– Lens is comfortably dark with no power → fail-dark. Your worst case is “can’t weld well today.”
– Lens is clear with no power → fail-light. Strike the helmet’s status as protection-when-powered-only: batteries become a pre-job safety check every single shift, and a backup passive hood becomes mandatory, not optional.
Record the result — on the helmet’s strap with a paint pen if needed. Future-you should never have to wonder.
General guidance covers most days. These four scenarios deserve specific answers.
Plasma arcs are bright and spectrum-heavy; most welding ADFs cover the cutting range comfortably. Two options:
Watch for the specific hazard: pilot arc and cut start timing. The torch’s pilot may be struck before the work arc — confirm darkening on the pilot if your helmet’s sensitivity is set conservatively. Our dedicated piece — welding helmet for plasma cutting — covers machine-specific settings.
Overhead changes three variables at once:
Many welders also nudge shade up one step overhead — not because the arc got brighter, but because the glowing puddle and slag add visible light you don’t want bleeding in during the delay window.
Prescription glasses under a welding helmet is a solved problem with three tiers:
The key safety note: standard eyeglass lenses are not UV-protected for arc work and they sit in front of your eyes under the filter. They’re acceptable under a certified ADF (which blocks the UV), but they are not substitutes for protection if your helmet fails — for fail-light helmets especially, consider prescription safety glasses with side shields rated for the work. Details in wearing glasses under a welding helmet.
A recurring internet search: can I watch an eclipse with my welding helmet? The technically-true answer is that a certified shade-12+ filter meets the optical density needed for solar viewing. The practical answer: don’t repurpose welding equipment for astronomy.
Our page on viewing an eclipse with a welding helmet walks through the risks in full — the short version is: keep the helmet for arcs, keep certified eclipse glasses for eclipses.
Myth 1: “Auto-darkening helmets aren’t as safe as passive hoods.”
Fact: the passive filter performance — UV/IR blocking — is equivalent in certified products. The ADF adds powered visible-light control on top of an always-on passive barrier, and eliminates flip-induced exposure. On exposure reduction, certified ADFs outperform passive hoods; the condition is certification.
Myth 2: “The light state is clear, so UV gets through when I’m not welding.”
Fact: light states on certified filters are shade 2–4 (tinted), and UV/IR blocking is passive — it does not depend on the light state or the electronics. No arc = no arc radiation; the filter’s barrier is continuous.
Myth 3: “Auto-darkening causes eye damage / cataracts.”
Fact: no credible evidence supports this for certified, correctly-shaded helmets. The mechanisms that damage eyes — UV exposure, excessive visible light at wrong shades — are reduced by proper ADF use and increased by wrong shade settings or counterfeit filters. The technology is not the risk; misconfiguration is.
Myth 4: “I can’t weld precision work through an ADF — the image is electronically degraded.”
Fact: on quality filters (EN 379 class 1/1/1/1 or equivalent), optical quality matches or beats most passive lenses — no distortion, minimal diffusion. Precision TIG work is routinely done through ADFs; poor image quality is a symptom of cheap filters, covered in the eye-strain section.
Myth 5: “Auto-darkening is dangerous because it can fail.”
Fact: failure modes determine danger. Fail-dark behavior plus battery discipline plus backup passive hood reduces the risk envelope below the flip-timing exposure of daily passive use — which is a proven, ongoing exposure pathway, not a hypothetical one.
Myth 6: “They’re too expensive for hobbyists.”
Fact: functional certified helmets start around $40–$60; mid-range models with good optics and sensors sit in the $80–$150 range. Against a $10 passive hood plus months of flip learning plus the value of your eyesight, the math is not close.
Myth 7: “The helmet’s UV protection depends on the battery.”
Fact: UV/IR protection is the passive layer — always present, no power required. Visible-light darkening is what requires power (see the fail-state discussion).
Myth 8: “More sensors means infinitely better protection.”
Fact: two well-placed sensors prevent the overwhelming majority of occlusion failures; additional sensors help with extreme angles and torch geometry. It’s a meaningful spec with diminishing returns — not a safety multiplier you can rank products by alone.
Ranked by how much each factor affects your real protection and daily use — not by marketing priority.
1/1/1/1 is the goal; 1/1/1/2 is acceptable; worse than 1/1/2/2 for long shifts is a bad trade. This spec predicts eye strain better than any other.Situation: first welder, marketplace special, no visible markings beyond a brand name, “auto-darkening” on the listing, price too good to be true.
Assessment: treat as uncertified. Fail-state unknown, shade accuracy unknown, UV/IR claim unverifiable.
Action: buy a certified entry-level helmet from a known brand ($60–$100), keep the cheap one as… nothing — don’t keep it. Verify marks, run the fail-state test, set shade by chart, weld.
Lesson: certification first, price second, features third.
Situation: experienced MIG hand reports the helmet sometimes doesn’t darken on tack welds. Battery replaced last month; response otherwise normal.
Diagnosis: likely sensor occlusion — this shop grinds in position, and spatter haze builds on lens covers within days. Possibly sensitivity set low after moving from a bright bay to a dim cell.
Action: fresh lens covers, sensor wipe, sensitivity re-adjust, functional test at tack-weld angles (torch close, glove near sensor). If it persists, fail-state test and headgear sensor inspection — then warranty or replacement.
Lesson: the most common “electronic failure” is a two-dollar lens cover.
Situation: welding 6″ schedule-40 pipe out of position, 3/32″ 7018 uphill, high amps, glowing bead in view after arc stop.
Setup: shade per ampere (likely 11–12), delay set long (0.5–1 s), sensitivity high enough to trigger from awkward torch angles, fresh lens covers before starting, headgear snug (helmet must not creep forward during the weld).
Why it matters: each variable above maps to a failure mode from the catalogue — wrong shade, premature clear, missed trigger, occluded sensor, unstable fit. Setting them deliberately converts “hope it works overhead” into a controlled process.
Situation: welder strikes an arc; lens stays light; flinches away — eyes already exposed.
Immediate response: stop, set the hood down, assess exposure (pain, tearing, grittiness = probable photokeratitis — see medical attention if severe or persistent), fresh battery, functional test before resuming, swap to backup passive hood if any doubt remains.
Prevention: this exact event never happens to welders who run the fail-state verification on day one and keep a spare battery in the kit. The test costs five minutes; the injury costs a shift — or worse.
Lesson: unknown failure behavior is failure behavior.
Situation: one welder runs TIG stainless in the morning, stick structural in the afternoon, and grinds between.
Efficient setup: variable-shade helmet (5–13 or wider), grind mode on the same helmet, memory preset #1 = TIG shade 9/sensitivity low, preset #2 = stick shade 12/sensitivity high, delay mid for TIG crater work and long for stick out-of-position. Passive backup hangs on the cart. Total per-process setup: two button presses.
Lesson: the ADF’s shade flexibility is the productivity argument; the discipline of presets is the safety argument.
Are auto-darkening welding helmets safe for beginners?
Yes — and arguably safer, because the biggest beginner risk is clumsy flip timing with a passive hood. Beginners benefit most from fail-dark helmets, certified markings, and deliberately-set shades; what beginners must learn alongside technique is settings discipline: set shade, check sensors, test before welding.
What shade should I set my helmet to?
Match process and amperage to the chart above. General starting points: TIG under 100A → shade 8–9; MIG up to 130A → shade 10; stick 100–250A → shade 11–12; above 250A → shade 13. Then verify visibility — you should see the puddle clearly without squinting or peeking.
Can a cheap auto-darkening helmet damage my eyes?
An uncertified one can — because its UV/IR blocking and shade accuracy are unverified. A cheap certified helmet (even in the $40–$60 range) meets the same protection standards as expensive ones; it sacrifices optics, sensors, and comfort, not the core protective claims. The danger zone is unverified product, not low price alone.
Do auto-darkening helmets block 100% of UV and infrared?
Certified filters: yes — UV and IR are blocked passively at all times, powered or not. What requires power is visible light darkening. Verify certification (Z87 / EN 379) rather than trusting box copy.
How long do auto-darkening helmets last?
A quality helmet with normal care lasts many years — shells and headgear are replaceable, lens covers are consumables, batteries are routine maintenance. The filter cartridge has a long but finite life; impact damage, delamination, or intermittent behavior ends it. Treat it like power tools: maintained equipment outlives its original owner’s career.
How often should I replace the battery?
On a schedule, not on failure — annually or seasonally for heavy users, or per the manufacturer’s interval. Carrying a spare and swapping at the first sign of sluggish response is the practice that prevents mid-shift exposure events. See changing a helmet battery.
Can I weld without darkening if I just close my eyes?
No. Eyelids do not block UV adequately for arc work — photokeratitis occurs through closed lids and from looking away from the arc. The exposure that injures welders frequently happens looking away, which is precisely why the filter must trigger regardless of where you’re looking — another argument for multi-sensor helmets.
Is it safe to let someone else look through my helmet at the arc?
No — the light state’s shade 2–4 is for ambient light, not arc viewing at the welder’s working distance for a non-wearer; and a spectator’s helmet position may not align sensors correctly. Sharing a look through the hood is a common way non-welding bystanders get flashed. Hand them their own protection or don’t show them.
Why does my helmet flash or flicker sometimes?
Usually battery, dirty sensors, loose battery contact, or sensitivity settings fighting the environment — all covered in why does my welding helmet flash and why is my welding helmet flickering. Persistent flicker after a battery change means service or replacement, not tolerance.
What happens if my helmet fails while I’m welding?
Stop immediately. Don’t “finish the bead.” Assess exposure symptoms, swap batteries or switch to the backup passive hood, and only resume after a functional test. A helmet that fails mid-bead has already told you its reliability; finish the joint with verified protection, then deal with the helmet.
Are auto-darkening welding helmets safe? Certified, correctly set, and maintained — yes, and measurably safer in daily practice than the flip-timing workflow they replaced. The passive UV/IR barrier is always on; the electronics add visible-light control; and the elimination of hood-flipping removes the exposure pathway responsible for a large share of arc-flash injuries.
But “safe” was never a property of the product alone. It’s a property of the system: a helmet bearing real certification marks, a shade matched to the amperage, sensors that are clean, batteries that are fresh, a fail-state you’ve tested with your own eyes, and a backup passive hood on the cart for the day the electronics don’t cooperate.
The failure modes are known, documented, and preventable — blocked sensors, dead batteries, wrong shades, counterfeit claims, and plain complacency each have a specific countermeasure, and every one of them costs less than a single ophthalmology visit.
Sixty seconds with your current helmet, right now: find the Z87 or EN 379 marks. Check the shade against your chart. Look at the lens covers. Wipe the sensors. Note the battery date. Run the fail-state test once, and write the result on the strap.
That’s the difference between hoping your helmet is safe and knowing it is.