H & L Auto Welding: Inside Philadelphia’s Trusted Exhaust & Auto Welding Shop
A complete guide to H & L Auto Welding in Philadelphia: services, hours, prices, reviews, exhaust welding legality,…
READ ARTICLE →Key Takeaways
The first thing I ever welded was a wobble. It was a length of square tubing clamped to a milk crate in a rented garage, and I was trying to join it to a flat bar so I could hang a shelf that would not sag. The arc started with a sound like frying bacon, the light blew out the camera on my phone, and when I lifted my helmet the two pieces of steel were stuck together at an angle no honest person would call square. The shelf went up anyway. It is still up, slightly crooked, holding paint cans, and every time I walk past it I remember exactly how it felt to make something with my own hands that will outlive me.
That is the quiet appeal of DIY welding projects. You are not assembling flat-pack furniture from a box of particleboard and a bag of cam locks. You are taking a rigid, honest material that has been in the ground for millions of years, and you are persuading it to become something new with heat and intent. A welded joint is not glued and it is not screwed; at the molecular level the two pieces become one piece. When you build a fire pit or a workbench with your own hands, you are not making a decorative gesture. You are making an object that will very likely outlast the house it sits in.
This guide is built for hobby welders and aspiring hobby welders: people with a garage, a limited budget, a healthy fear of electricity, and a stack of project ideas they cannot quite shake. We will walk through why metalworking is worth the mess, what machine family you should actually buy first, what safety gear you genuinely need, how to set up a small shop, how to plan and cut a project before you strike an arc, which joints to practice, and then a structured list of projects that runs from a first-weekend fire pit up to a road-going trailer. Along the way we will cover the mistakes that new welders make, when to skip the DIY route entirely and call a professional, and the sources of inspiration that keep people welding for decades.
Nothing here is invented. There are no fake expert quotes and no borrowed statistics, just practical guidance written the way a welder would explain it to a friend who just dragged a machine home from a swap meet.
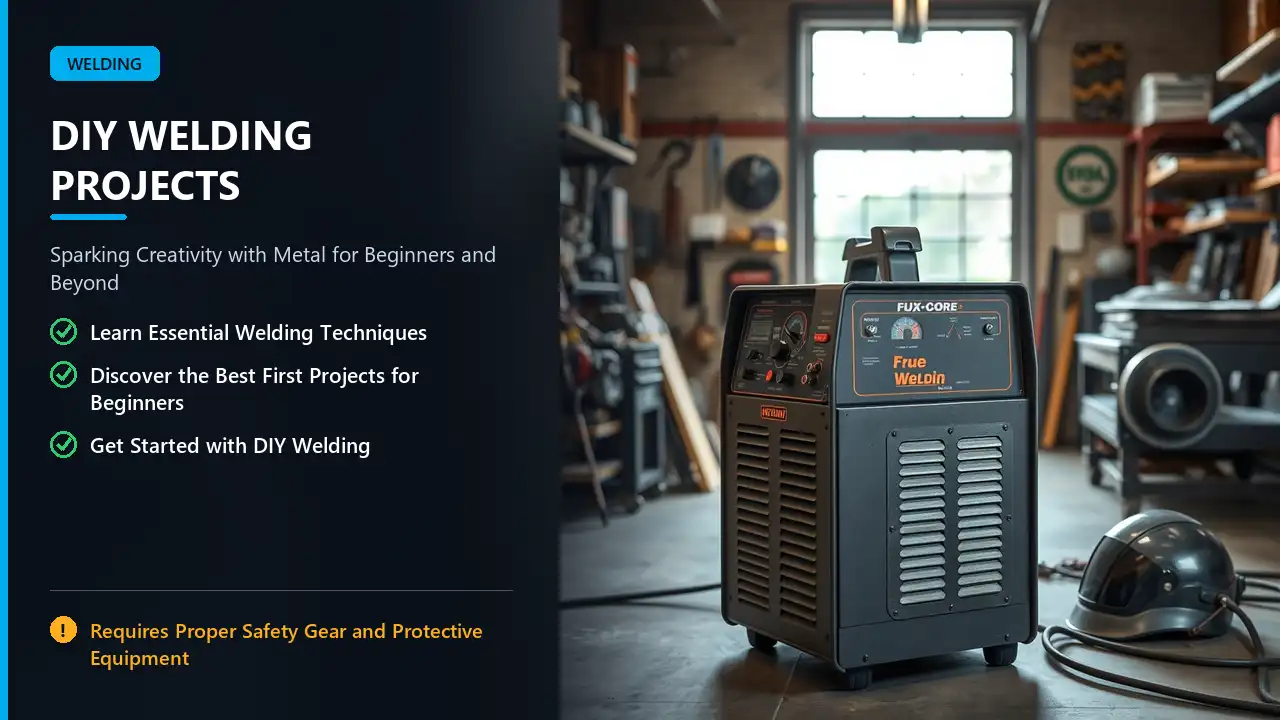
Plenty of hobbies produce finished objects. Woodworking produces tables, knitting produces scarves, and gardening produces tomatoes that taste dramatically better than anything from a supermarket. Welding is different in a few specific ways that are worth understanding before you spend money on a machine.
The output is structural. A wooden shelf sags over a decade. A welded steel shelf does not sag, ever, unless you deliberately overextend it. When you build with steel you are building with the same material used in bridges, skyscrapers, and the frames of the cars you drive. That changes the psychological relationship you have with the object. People do not throw away a welded bar stool. They move it house to house.
The feedback is immediate. You cannot half-pay attention while welding. The puddle tells you everything in real time: if you are moving too fast, if your angle is wrong, if the machine is set too cold. Within about twenty minutes of striking your first arc you already know whether it is going well. That instant loop between action and result is what psychologists call a flow trigger, and it is why people lose entire Saturdays in the garage and emerge hungry, dusty, and happy.
The learning curve is visible. Weld number fifty looks nothing like weld number five, and the difference is obvious to the naked eye. There is no ambiguity about improvement. You can line up your early practice beads next to your later ones and see the progress in physical metal, which is far more motivating than a number on a screen.
It solves real household problems. A broken patio chair, a gate that drags, a ladder rack that does not exist in any shop, a bike that needs a mount, a trailer that needs a new light bracket. Once you can weld, the household repair list shrinks. Instead of searching for a product that almost fits, you make the part that fits exactly. Many welders describe the moment the hobby stops being about making objects and starts being about making solutions.
It rescues scrap. Offcuts, old bed frames, broken hand trucks, donated pallet racking, and the steel shelving that falls apart on the way to the curb all become raw material. Upcycling with a welder is not a talking point; it is how most hobby shops are actually stocked. The first welding table most people own is welded out of scrap they already had.
There is also a social dimension that surprises people. Welding is one of the last hobbies where skill is still passed along informally, over a bench, from someone who has done it for thirty years to someone who has done it for three weeks. Join a local maker space, a farmers market repair stall, or a club and you will find that experienced welders are almost aggressively generous with advice, because everyone remembers being the person holding the stinger upside down.
The honest counterweight is that welding is loud, hot, dirty, and genuinely hazardous if you are careless. You are melting steel at thousands of degrees while generating ultraviolet light and a chemical soup of fumes. The reward is real, but so is the respect the work demands. Everything in this article assumes you take that seriously from day one.
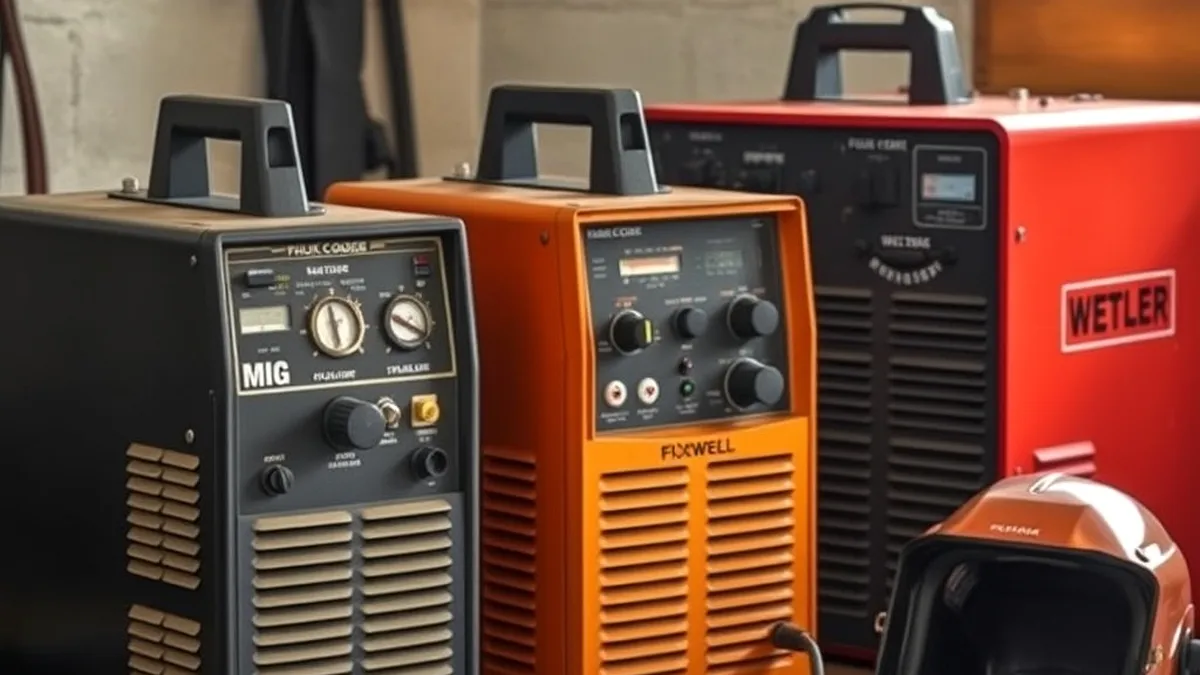
The single most common mistake new welders make is buying the wrong machine, usually by inheriting a relatives ancient stick welder or by purchasing the cheapest box on a shelf without understanding what process it actually runs. Machine choice determines what you can build, where you can build it, and how fast you will get competent. It is worth one honest evening of research.
Three families matter for home use: MIG (gas metal arc welding), flux-core (flux-cored arc welding), and stick (shielded metal arc welding). TIG exists too, and it produces beautiful work, but it is a demanding process that asks for two hands and a great deal of patience, so most people learn it as a second or third skill rather than a first.
| Machine family | Best for | Learning curve | Where it works | Consumable cost |
|---|---|---|---|---|
| Flux-core (FCAW) | First machine, outdoor work, dirty or rusty steel, general fabrication | Fastest initial results, spattery and needs cleanup | Anywhere, no gas bottle needed | Low; wire only |
| MIG (GMAW) | Clean mild steel, sheet metal, furniture, precise neat welds | Gentle and forgiving, slight setup time | Indoors, sheltered; wind disrupts the gas shield | Medium; wire plus bottled gas |
| Stick (SMAW) | Thick steel, outdoor repair, windy days, rusty material | Steepest; requires constant arc-length control | Anywhere, most rugged option | Low to medium; rods |
| TIG (GTAW) | Aluminum, stainless, thin material, cosmetic welds | Hardest; two-handed coordination | Indoors, clean and draft-free | Higher; tungsten, rod, gas |
If you read only one technical article before buying, make it what is flux-core welding, because the process is frequently mis-sold as a cheap form of MIG. Flux-core wire is hollow and packed with a powdered flux compound. As the wire melts, that flux creates its own shielding gas and leaves a layer of slag over the puddle. The practical consequence is enormous for a beginner: no gas bottle, no regulator, no hose, no worry about a breeze blowing your shield away, and no extra rental cost.
The trade-offs are real. Flux-core throws more spatter, the weld is covered in slag that must be chipped and brushed, and the wire is more expensive per pound than solid MIG wire. But for a first machine the equation favors it heavily, because the biggest barrier to improvement is time under the hood, and a flux-core machine lets you drag it into the driveway, the garden, or a field and simply start welding. A closer look at what a dedicated unit offers is in this look at a flux-core welder and its robust welding power.
MIG is the process most people picture when they imagine welding: a trigger gun feeding wire, a bottle of argon and carbon dioxide mix feeding shielding gas, and a weld that comes out looking neat and requires almost no cleanup. It is the natural choice once you are doing a lot of clean, new mild steel, and it is the process behind almost every piece of shop-built furniture you have ever admired.
The catch is the bottle. A shielding gas cylinder means an upfront deposit, a monthly or refill cost, a regulator, a hose, and a rule that you cannot weld outdoors in any meaningful breeze. If your workspace is a garage with the door open, MIG is delightful. If your workspace is a paddock, it is frustrating. The trigger-based control system is explained well in this guide to a wire feed welder and precision welding, which covers the muscle memory of gun angle, stick-out, and travel speed.
Stick welding is the oldest and most portable process. There is no wire feed and no gas bottle, just an electrode holder, a box of rods, and your hands. It performs better than either wire process on rusty, dirty, painted, or out-of-position steel, which makes it the natural tool for repairing farm equipment and towing gear where nothing is ever clean.
The downside is that it is hard to learn. The rod is consumable and shortens as you go, the arc must be held at a consistent distance, and a stick weld is covered in slag that hides mistakes until you chip it. Many hobby welders start with wire and add a stick later, once they can already run a decent bead. If you go this route, understand that most home stick machines are also capable of TIG work with an extra torch, which is a useful upgrade path.
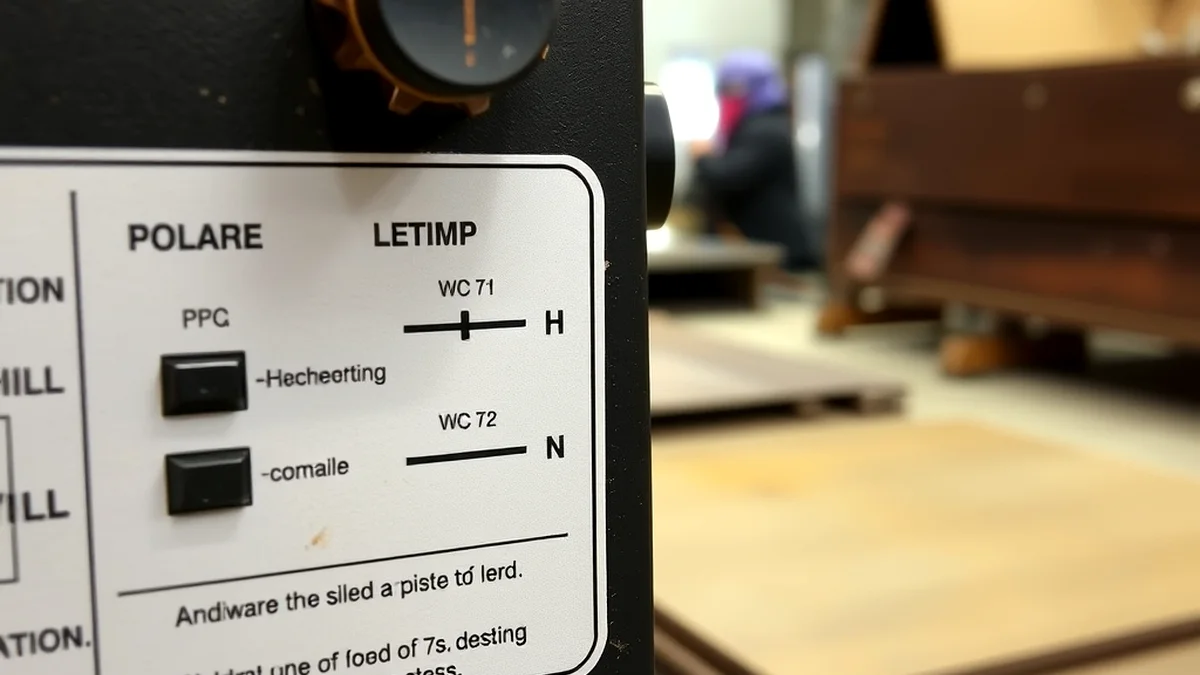
One concept causes more confusion than any other in a first machine, and it is polarity. Direct current electrode negative, direct current electrode positive, and alternating current all change how deeply the arc digs and how much the puddle flows. Solid MIG wire and flux-core wire want opposite polarities, which means a machine set up correctly for one will weld badly with the other. Getting this backwards produces a weld that looks like a row of popcorn. The full explanation lives in this guide to MIG polarity explained for welders, and reading it once will save you an afternoon of confusion.
Pair polarity with wire diameter and you will have the two variables that matter most. Thicker wire carries more amperage and bridges bigger gaps; thinner wire gives control on sheet metal. A practical reference for choosing is this MIG wire size chart, which maps material thickness to wire size and machine settings so you are not guessing.
Buy a machine that runs on the power you already have. Most home garages have a 120 volt circuit, and modern inverter welders on that circuit will happily join 3 millimeter steel, which is the thickness of most beginner projects. Only step up to a 240 volt machine if you already know you will be welding 6 millimeter plate or running long production days, because the cost jump is significant.
Buy a multi-process machine if the price is close, because being able to switch between flux-core and MIG (and sometimes stick) means you can grow into gas without replacing the welder. Check that replacement tips, liners, and contact tips are stocked locally; a machine you cannot get parts for becomes a paperweight in year two. And check the duty cycle, which is the percentage of a ten-minute period the machine can weld before it overheats. A beginner-friendly duty cycle of around 20 to 30 percent at full output is plenty, because you will spend most of your time fitting and clamping anyway.
For a fuller walkthrough of the decision, this guide to the difference between MIG and TIG welding covers process selection from a different angle, and whether TIG is stronger than MIG answers the strength question that comes up in almost every beginner conversation.
Welding generates three simultaneous hazards: intense visible and ultraviolet light that can burn your retina and your skin, molten spatter that sticks and burns, and fumes that you should not be breathing. Each hazard has a specific piece of gear, and the total cost of a complete basic set is less than the cost of a single weekend of emergency medical care.
The helmet. Modern auto-darkening helmets are affordable enough that there is no excuse for a fixed-shade lens. Look for a lens that switches in 1/25,000 of a second or faster, a shade range that covers 9 to 13, and grind mode so you can flip to a light setting for cleanup work. A helmet that fits your head and does not fog is a helmet you will actually wear. Choosing one properly is covered in this guide to choosing the perfect welding helmet.
Skin coverage. Cotton or leather, never synthetics. Polyester and nylon melt, which turns a small spark into a serious burn. A welding jacket or a heavy long-sleeved cotton shirt with the cuffs buttoned, full-length trousers with no cuffs that can catch spatter, and leather boots that cover the ankle. Roll your sleeves down even for a ten-second tack. Every experienced welder has a scar from a moment they thought would be fine.
Hands. Thin gloves for fitting and handling material, heavy welding gloves for welding. Fitting gloves matter because people who skip them handle sharp, hot, and oily steel with bare hands and lose the dexterity needed for precise work when their palms are cut.
Ears and eyes. Safety glasses under the helmet, because the helmet comes off for grinding and grinding throws the same fragments welding does. Ear protection for cutting and grinding, which are often louder than the welding itself.
Lungs. This is the one people defer and should not. Welding fumes contain a mixture of metal oxides, and certain materials are far worse than mild steel. A proper respirator rated for welding fume, fitted to your face, is the difference between a hobby you can keep for thirty years and one you have to give up. Start with this guide to the best welding respirator and buy the mask before you buy the third roll of wire.
Ventilation. Gear does not replace airflow. Weld in an open or well-ventilated space, position yourself so the plume rises away from your face, and use a fan to move air across the work rather than into your breathing zone. This is also the point where you check the official guidance: the Occupational Safety and Health Administration publishes its standard on welding, cutting, and brazing, and while hobby work at home is not the same as a fabrication shop, the document is a clear, free description of the hazards and the controls that work.
A complete safety checklist, including fire watch, extinguisher placement, and electrical grounding, is laid out in this collection of welding safety tips. Read it once before your first session and once a year after that.
You do not need a workshop. You need a corner, a surface, power, and a way to keep sparks away from things that burn. A two-car garage, a covered patio, or even a cleared patch of driveway with a windbreak will do.
The surface. Steel is ideal; a thick plywood sheet over a sturdy table is acceptable for light flux-core work if you keep it bare and check it for embedded spatter that could start a fire. The table should be roughly waist height so you are not stooping, and it should be flat enough that your project sits square. Clamping is half of welding, so bolt or clamp a couple of heavy vises to it and keep a pile of F-clamps, C-clamps, and a magnetic square within arm’s reach.
Power. Dedicate a circuit if you can. A welder running at full draw will trip a shared breaker mid-bead, and stopping suddenly leaves a crater that becomes a crack. Use extension cords rated for the current rather than a household lead from the kitchen drawer.
Fire. Move everything flammable three metres back, keep a charged extinguisher within reach of the door rather than behind the welder, and do a ten minute fire watch after your last bead on any day you worked near timber, cardboard, or dry grass. Sparks travel much further than people expect and continue glowing after the work looks finished.
Storage. Keep your consumables dry and sorted: wire on a spool holder, rods in a sealed box, tips and nozzles in a small parts drawer. Steel offcuts get their own rack sorted by size, because the moment your offcuts are organised, project material cost drops dramatically.
Cutting. You need a way to cut steel to length before you can weld it. The three realistic options are an angle grinder with a cutting disc, a chop saw with an abrasive blade, and a bandsaw. An angle grinder is the cheapest and most versatile, and it doubles as your grinding and finishing tool. A chop saw is faster and more accurate for repeated cuts in tube. A bandsaw is the quiet, precise option if you can stretch to one. Whichever you choose, cutting produces the majority of shop injuries, so respect the guard, secure the work, and wear face protection.
Finishing. New welders weld and then stop, leaving grinding discs, spatter balls, and raw steel that blooms with rust in a week. Build the finishing habit into every project. Knock down the high spots with a grinding or flap disc, run a wire wheel over the whole piece, wipe it down to remove oil and dust, and then apply a coating: primer and paint for indoor pieces, a proper rust-inhibiting primer plus exterior paint or a wax-based rust preventive for outdoor ones. Hot-rolled steel arrives with mill scale, and paint does not stick to it, so a quick wire wheel or flap disc pass before finishing is the difference between a coating that lasts and one that peels in a season.
Corrosion deserves its own mention because it quietly ruins outdoor projects. When two different metals touch in the presence of moisture, one of them corrodes far faster than it should; this is galvanic corrosion, and it is why steel bolts in an aluminum part fail early. If you plan to mix metals, learn how to prevent galvanic corrosion before assembly, because it is far easier to design out than to fix later.

The difference between a project that fits together and a project that fights you is almost always decided at the kitchen table, not at the welding table. Fabrication is a sequence of decisions, and every decision made early is cheap while every decision made late costs money in scrap.
You do not need to be an artist. A rough sketch with dimensions is enough, as long as it answers four questions: what is it for, how big must it be to do that job, what will it be made of, and how will it be joined. A shelf that must hold a vice needs heavier tube than a shelf that holds books. A plant stand on a deck needs to be lighter than one on soft soil. Write the answers down.
From the sketch, produce a cutting list: every piece, its length, its quantity, and its material. Do this in the order the pieces appear in the build, and number them to match the sketch. The discipline feels tedious the first time and feels essential by the third project, because a cutting list turns shopping into arithmetic. You can take it to the steel supplier and know exactly what to ask for, and you can check the pile after cutting and immediately see whether a piece is missing.
A cutting list also exposes design errors before they become scrap. If two pieces of the same length have to fit between two uprights, you now know to subtract the wall thickness twice. Discovering that at the saw costs a minute; discovering it with everything welded except the last piece costs the project.
The sequence in which you weld matters as much as the weld itself. The general rule is: cut everything first, fit everything dry, check square and level, tack everything, check square again, then weld in a pattern that balances heat, and only then finish.
That dry fit is where most problems are caught. Pieces get clamped together with nothing welded, the frame is measured corner to corner, and the two diagonal measurements are compared. If they match, the frame is square. If they differ, something is off, and it is much easier to fix now. Measure diagonals again after tacking, because tacks pull.
A jig is any device that holds your work in the right position so you can concentrate on the puddle. You do not buy jigs; you build them. A simple L-shaped jig made from two strips of flat bar screwed to your table lets you produce identical corners every time. A pair of parallel bars clamped at a fixed distance lets you weld a ladder of shelf supports without measuring each rung. A set of magnets holds a tee joint hands-free while you tack it.
The payoff is repetition. If you are building four identical chair legs, a jig means all four are identical, and identical legs mean the chair sits flat. Without a jig you are relying on your eye four times in a row, and your eye drifts when you are tired. Experienced fabricators treat jig-making as part of the project rather than an overhead, because ten minutes of jig saves an hour of correction.
Steel moves when you heat it. A long weld on one side of a tube pulls that side shorter as it cools, bowing the piece. The fix is not stronger clamps; it is distributing the heat. Weld in short segments, alternate sides, jump from one end of the assembly to the other instead of running continuously, and let the piece cool between passes on thin material. For a longer treatment of what heat actually does to a structure, the principles in how strong is a weld explain why joint preparation and heat input decide strength far more than the number of passes you run.
Almost every DIY project is a variation on four joints. Learn these four on scrap and you can build anything on the list below.
Butt joint. Two pieces edge to edge on the same plane. It is the strongest joint when it is fully penetrated, and it is also the one that burns through most easily because there is nowhere for the heat to go. The trick is a small gap, sometimes none at all, correct travel speed, and accepting that on thin material you will weld in short stitches rather than one continuous run.
Lap joint. One piece overlapping another. It is forgiving and strong enough for most brackets and shelves, and it is where beginners get their first satisfying results because the overlap gives the puddle somewhere to sit. Watch for the edge of the top plate melting away if your angle points directly at it.
Corner joint. Two pieces meeting at an outside edge, the joint you will use on every frame, box, and table. The main risk is melting the corner off, so start the arc on the thicker member and lead the puddle toward the edge.
Tee joint. A piece meeting another at a right angle, forming a T. It is the structural joint of furniture and frames, and it demands symmetry: weld both sides so the joint does not pull the upright to one side. A magnet square holds it while you tack.
When a weld looks wrong, the first question is never whether you have enough talent; it is whether the machine is set correctly. Wire speed and voltage travel together. Too little wire speed relative to voltage and the wire melts back into the contact tip; too much and the wire stubs into the puddle like a machine gun. A bead that stands proud in a tall, narrow ridge is under-voltaged. A bead that lies flat and wide with the plate washed out is over-voltaged.
Work from the chart inside the machine’s door, then fine-tune on scrap of the same thickness as your project. Flux-core settings charts for home machines are worth studying before your first session, and this reference for flux-core welding settings pairs wire size with material thickness and polarity. When you are working in amperage terms rather than dial numbers, this flux-core welding amperage chart gives the mapping.
Three variables decide how a weld looks. Stick-out is the length of wire between the contact tip and the puddle; keep it roughly equal to the wire diameter, and shorten it if the arc wanders. Gun angle means the angle of the gun to the plate, and for a lap or butt joint a slight push or drag of about 10 to 15 degrees works with nearly every wire. Travel speed is the one beginners get wrong most: move too fast and the bead is thin and cold with no fusion, move too slow and you burn through or build a caterpillar of overlapping ripples.
The visual cue is puddle width. A puddle about one and a half to two times the wire diameter, travelling at a steady pace, produces a bead that looks like a row of stacked coins. Practice it on scrap until you can produce that bead on demand, then practice dragging the same bead around a curve and up a vertical piece. Those two variations alone cover most project geometry.
Not all flux-core wire is the same. Some is designed for welding in flat positions on clean steel with shielding gas, some is self-shielded for outdoor use, and some is dual-shield, which needs gas and produces a cleaner, deeper weld. Buying the wrong spool produces a weld that spatters badly no matter what you do with the dials. This breakdown of flux-core wire types explains what the markings on the spool actually mean, and once you move to gas, this guide to MIG welding gas settings covers the argon and carbon dioxide mixes and what each proportion does to penetration and bead profile.
Porosity is the enemy of every weld: gas pockets trapped in the metal that look like pinholes or a worm track under the surface. It is caused by contamination, oil, paint, rust, moisture, a compromised gas shield, or wire speed that is too fast for the voltage. It weakens the joint and it is entirely preventable. A full diagnosis of what causes it and how to eliminate it is in this guide to porosity in welding, and it is worth reading before you blame your machine.
Lack of fusion shows up as a bead sitting on top of the metal instead of tying into it. It happens when you travel too fast, point the gun at the wrong place, or set the machine too cold. A tug test on scrap, where you try to break the weld with a hammer, is the honest way to check whether your settings are fusing properly.
Undercut is a groove melted into the base metal beside the bead, usually from too much voltage or too fast a travel speed. It is a stress raiser, so grind it out and re-weld rather than paint over it.
Spatter is cosmetic but irritating, and it is mostly a settings symptom. When the arc is stable and the wire speed matches the voltage, spatter drops dramatically. Cleaning the material and checking the contact tip for wear also helps more than people expect.
Here is the structured path. Each project lists its difficulty, the materials to buy or salvage, the tools required, and the specific skill it teaches. The idea is that each project asks for one new capability while relying on the ones you already have. Do not skip levels; the projects are ordered so that the muscle memory builds.
1. Steel fire pit. The classic first project, and for good reason: it is forgiving, it is useful, and nobody inspects a fire pit for squareness. Difficulty: beginner. Materials: 3 to 4 millimetre plate or a salvaged steel ring, or 25 to 50 millimetre square tube for a cage-style base, plus short legs. Tools: welder, angle grinder or saw, clamps, square, drill if you want a drain hole. Technique taught: running a consistent bead on flat plate and tacking a frame. Build it by cutting five or six equal plate sections and joining them into a ring on a flat surface, or by welding a square tube frame and dropping a plate floor in. Add legs at least 150 millimetres long so the heat is off the ground, and drill a couple of drainage holes if it will sit outside over winter.
2. Plant stand. Difficulty: beginner. Materials: 20 to 25 millimetre square tube or solid bar, a small offcut of plate or a ring of flat bar for the top. Tools: welder, grinder, clamps, magnetic square, tape measure. Technique taught: cutting four identical legs and welding a tee joint on three planes. This is the project where a jig earns its keep. Make an L-shaped jig, produce four identical legs, then weld them to a top ring. Check the diagonals before final welding, and you will have a stand that does not wobble, which is a surprising source of pride.
3. Wall shelves. Difficulty: beginner. Materials: flat bar for brackets, reclaimed timber for the shelf itself, screws. Tools: welder, grinder, drill, level. Technique taught: lap joints and drilling steel. Weld a flat bar bracket with a lip to hold the timber, mount it to the wall studs, and screw the board down. Because shelves are visible, this is also where you learn to grind and finish properly. Rebuild the bracket a little smaller each time until you can make one you would be happy to have in the kitchen.
4. Garden trellis. Difficulty: beginner to intermediate. Materials: 10 to 12 millimetre round bar or thin square tube, or reclaimed rebar for a rustic look. Tools: welder, grinder or hacksaw, clamps, a flat surface. Technique taught: repetition and heat control on thin material. A trellis is a grid of many small welds, which makes it an excellent practice piece: every intersection is another chance to control heat and avoid warping. Weld from the centre outward, alternate sides, and let it cool between sections. Check the frame for square before you fill it in.
5. Simple coat or tool rack. Difficulty: beginner. Materials: square tube frame, round bar or heavy wire for hooks. Tools: welder, grinder, clamps. Technique taught: bending and joining dissimilar shapes. Cut a frame, weld hooks made from short lengths of round bar bent over the edge of the frame, and mount it. It is a quick win that immediately earns its place in the garage, which is the fastest way to keep a new hobby alive.
6. Welding table. The project every welder eventually builds, and the one that improves every project after it. Difficulty: intermediate. Materials: 3 to 5 millimetre plate for the top, 25 to 40 millimetre square tube for the frame, casters if you want it mobile. Tools: welder, grinder, clamps, square, level, drill. Technique taught: large frame assembly, managing distortion, and working to tolerance. Build the frame first and check it for square repeatedly, then attach the top in a staggered pattern of short welds rather than one long run, which will pull the plate. A flat, heavy, square table makes every subsequent project easier, which is why it is worth doing properly even though it is fiddly.
7. Workbench with vice mount. Difficulty: intermediate. Materials: heavier tube, 40 to 50 millimetre, a thick timber or steel top, and a reinforcing plate where the vice bolts on. Tools: welder, grinder, saw, drill, sockets. Technique taught: designing for load. A workbench has to resist a person standing on it and a hammer hitting it, so think about where the loads go and put the welds where the force travels. Include a lower shelf for stiffness; it doubles as storage and stops the frame racking.
8. Rolling shop cart. Difficulty: intermediate. Materials: square tube, sheet or mesh for shelves, four casters. Tools: welder, grinder, clamps, drill. Technique taught: repetition with a jig and fitting around obstacles. Build two identical side frames using a jig, connect them with stretchers, and weld on shelf rails. Getting four shelves to sit level on a frame that has already warped slightly is a genuinely useful lesson in sequence and heat balance.
9. Basic furniture: bench, coffee table, or stool. Difficulty: intermediate. Materials: square or rectangular tube for legs, plate or timber for the seat, foot caps to protect floors. Tools: welder, grinder, clamps, square, level. Technique taught: appearance, finish, and consistency. Furniture is judged by eye, so this is where you stop welding for strength alone. Grind every visible weld, fill any pinholes, sand, prime, and paint. A simple design executed cleanly looks far better than an ambitious design executed roughly.
10. Garden arbor or heavy gate frame. Difficulty: intermediate. Materials: 25 to 40 millimetre tube, hinges rated for the weight, bracing. Tools: welder, grinder, drill, a helper. Technique taught: diagonal bracing and hanging square. A rectangle without a diagonal folds into a parallelogram under its own weight; welding in a diagonal or a cross brace is the lesson. Hang the gate on temporary posts first, adjust, then mount permanently.
Use this table to pick your next build based on what you have rather than what you want. Cost assumes you already own a welder and basic safety gear, and covers materials and consumables only.
| Project | Difficulty | Typical time | Material cost band | Tools required beyond welder | Skill it teaches |
|---|---|---|---|---|---|
| Steel fire pit | Beginner | 2 to 4 hours | Low | Grinder, clamps, square | Flat plate beads, tacking a frame |
| Plant stand | Beginner | 2 to 3 hours | Low | Grinder, magnetic square, jig | Identical parts, tee joints |
| Wall shelves | Beginner | 3 to 4 hours | Low | Grinder, drill, level | Lap joints, drilling and mounting |
| Garden trellis | Beginner to intermediate | 4 to 6 hours | Low to medium | Grinder or hacksaw, clamps | Repetition, heat control |
| Tool rack | Beginner | 2 hours | Low | Grinder, clamps | Bending and joining shapes |
| Welding table | Intermediate | 6 to 10 hours | Medium | Grinder, square, level, drill | Distortion control, tolerance |
| Workbench with vice | Intermediate | 8 to 12 hours | Medium to high | Grinder, saw, drill, sockets | Load paths, heavy frame build |
| Rolling shop cart | Intermediate | 5 to 8 hours | Medium | Grinder, jig, drill | Repetition, alignment |
| Furniture bench or table | Intermediate | 8 to 14 hours | Medium | Grinder, flap disc, paint kit | Finish quality, aesthetics |
| Garden arbor or gate | Intermediate | 8 to 16 hours | Medium | Grinder, drill, helper, hinges | Diagonal bracing, hanging square |
| Motorcycle or bike rack | Intermediate to advanced | 6 to 12 hours | Medium | Grinder, drill, pads, straps test | Load calculation, vibration |
| Car roof or hitch rack | Advanced | 12 to 24 hours | High | Grinder, bender or pre-bent tube, drill | Road safety, corrosion, loads |
| Utility trailer | Advanced | 40 to 80 hours | High | Grinder, saw, drill, brake, wiring tools | Structural design, certification |
11. Motorcycle, bicycle, and dirt-bike racks. Difficulty: intermediate to advanced. Materials: 25 to 40 millimetre square tube or 25 millimetre round tube, plate gussets, rubber or foam padding, threaded inserts or bolts. Tools: welder, grinder, drill, a way to bend tube or a supplier who bends it for you. Technique taught: designing for dynamic load. A rack that holds a bike still in the garage has to hold it still at 100 kilometres per hour over a bump. Over-build it, gusset the corners, test it with a static load well above the real one before it ever carries a bike, and add retention that works even if a strap fails. Pay attention to how the rack mounts; bolt-on mounts need backing plates and thread protection, and welds that are hidden under paint still need to be ground and inspected first.
12. Hitch-mounted cargo or roof rack. Difficulty: advanced. Materials: tube or channel, a machined or laser-cut hitch tongue if you cannot weld the thickness safely, hardware rated for towing loads. Tools: welder capable of thick sections, grinder, drill, torque wrench. Technique taught: working to a load rating and understanding fatigue. Anything hanging off a vehicle sees vibration for years, and vibration finds the smallest crack. Design generous radii instead of sharp corners, avoid welds exactly at the root of a bracket where stress concentrates, and remember that most regions have rules about what may be carried on a vehicle without approval.
13. Utility trailer. Difficulty: advanced, and the summit of this list. Materials: chassis channel or rectangular tube, axle and hubs, coupler, lights, flooring, brakes where required by law. Tools: welder with good duty cycle, grinder, saw, drill, wiring tools, and ideally a second pair of hands. Technique taught: everything. Trailer frames are where theory becomes non-negotiable: the drawbar must be a continuous load path to the coupler, the corners need gussets, the cross members need correct spacing for the floor, and the whole thing has to be square enough that the axle sits straight. A trailer that is out of alignment tows badly and wears tyres; a trailer with a bad drawbar weld is dangerous. Check the regulations that apply where you live before you cut the first piece, because road-registered trailers are inspected and some jurisdictions require engineering sign-off.
14. Structural pieces: stairs, landings, pergola beams. Difficulty: advanced. Materials: heavy tube or plate, hot-dip galvanised or properly primed sections for outdoors. Tools: welder rated for the section, grinder, level, laser or long spirit level, often a hoist. Technique taught: working to code and to level. If the piece carries people, the tolerance for error shrinks to nothing. Get the design checked before fabrication, keep a record of what you used and where, and do not improvise connections.
15. Repair work on existing machines. Difficulty: variable, and often harder than fabrication because you are working with unknown steel, restricted access, and someone else’s design. Fixing a broken trailer drawbar, a cracked mower deck, or a snapped hand truck is satisfying and economical. This is also where you meet the awkward materials: cast iron, which needs preheat and slow cooling, and galvanised steel, whose coating produces fumes that are genuinely hazardous. A practical starting point is this guide to welding cast iron to steel. Never weld over galvanised coating, paint, or cadmium without removing it first and providing ventilation.
Throughout these projects, keep an eye on the technical foundation. The settings you use on 2 millimetre sheet are not the settings for 6 millimetre plate, and the wire you run in flat position is not always the wire you want out of position. When you move into aluminium or stainless, the rules change again: aluminium needs AC output, pure argon, and scrupulous cleanliness, while stainless needs heat control to avoid warping and discoloration. The settings discipline covered in this TIG welding settings chart applies to any process where you must balance amperage against material thickness.
Mild steel is the beginner material for a reason: it is cheap, widely available, forgiving of imperfect settings, and it welds with every process. Almost every project in this article should be built from mild steel until you have a reason not to.
| Material | Weldability for hobby use | Common project uses | Watch out for |
|---|---|---|---|
| Mild steel tube and plate | Excellent with flux-core or MIG | Frames, tables, stands, fire pits, trailers | Mill scale and oil; wire wheel before welding |
| Reclaimed structural steel | Good, once cleaned | Tables, heavy bases, welding tables | Unknown grade, hidden coatings, embedded dirt in the grinder disc |
| Galvanised steel | Poor until the coating is removed | Fencing, outdoor brackets, salvaged panels | Zinc fumes; strip the coating and ventilate well |
| Stainless steel | Good with TIG or correctly set MIG | Kitchen pieces, sinks, decorative work | Heat tint, warping, and needing the right filler |
| Aluminium | Demanding; needs TIG or spool gun MIG | Ladders, lightweight racks, marine trim | Oxide layer, porosity from contamination, no gas shield in wind |
| Cast iron | Difficult; preheat and slow cool | Machine bases, vintage furniture, repairs | Cracking; needs a specialized filler and patience |
If you intend to join two different metals, stop and research first. Aluminum welded to steel, for example, cannot be fusion welded by normal means because the two form brittle intermetallic compounds, and the correct approaches are mechanical joining, brazing, or a transition joint. The same caution applies to stainless against mild steel. When dissimilar metals must touch in service, galvanic corrosion is the long-term problem, and understanding how to prevent galvanic corrosion will save you from a fastener failing in eighteen months. Likewise, before assuming a repair is beyond you, this piece on welding aluminum to steel explains what is and is not possible and when a mechanical solution is the smart answer.
Salvage deserves respect, too. Scrap from a farm, a skip, or a scrapyard can be wonderful material, but it arrives with unknown history. Cut a test section, look at the end grain, and watch your first few beads closely: steel with a high carbon or alloy content cracks where clean mild steel would not. Coatings are the other hazard. Apart from galvanising, there is paint, primer, oil, and the plating on old furniture tubing. All of it must come off before you weld, and all of it produces something unpleasant when burned.
Rules exist because the failure modes are silent until they are not. None of these require a budget; they require thirty seconds of habit before each session.
Those rules align with professional practice, and if you want the reasoning behind them rather than the list, the OSHA standard on welding, cutting, and brazing sets out the hazard categories clearly. For a home-specific checklist you can print and stick on the wall, this roundup of welding safety tips is the better starting point.
Every new welder makes the same half-dozen mistakes. Knowing them in advance shortens the learning curve considerably.
Mistake one: welding dirty metal. Oil, rust, paint, and mill scale all contaminate the puddle and cause porosity or lack of fusion. The fix costs minutes: wire wheel, flap disc, or solvent wipe, then weld. Make it automatic and your weld quality improves overnight without any change in technique.
Mistake two: buying the wrong consumable. The wrong wire type, the wrong diameter, or the wrong polarity all produce bad welds that look like user error. Match the wire to the material thickness and the process, confirm the polarity on the machine before you start, and keep the packaging so you can check what you loaded. The polarity reference earlier in this article and the MIG polarity guide cover the single most common setup error.
Mistake three: welding everything at once. Beginners run a continuous bead along an entire side and watch the frame bow. Professionals stitch: tack every joint, check square, weld short segments in a balanced sequence, let it cool, and then fill in. On thin material, waiting between passes is the difference between a flat frame and a banana.
Mistake four: chasing arc length. In stick welding especially, holding the rod too far away sputters and loses shielding, while jamming it into the puddle makes it stick. Steady hands come from bracing your forearm on something solid and moving your whole body rather than just your wrist.
Mistake five: skipping the finish. A strong weld that looks rough still looks rough. Grind the high spots, remove spatter, clean the surface, prime, and paint. Finishing is where an amateur project starts to look professional, and it is also where you protect the metal for the next twenty years.
Mistake six: never testing. Do not wait for the finished project to find out your settings were wrong. Run a test bead on the same material, chip the slag, and look at the profile. If you can, do a bend or a hammer test on a scrap weld to see whether it fused. Testing takes two minutes and prevents rebuilding.
Mistake seven: ignoring distortion until the end. If you only check squareness after the final weld, you have already lost. Measure diagonals after cutting, after fit-up, after tacking, and after each side is welded. Corrections get progressively harder, and the first measurement is free.
For the deeper mechanical questions, such as why a weld cracked or why it is weaker than the parent metal, the fundamentals in how strong is a weld and the diagnosis in porosity in welding are the two references worth keeping bookmarked.
Project ideas come from three reliable places.
Your own friction. Walk around your house, yard, and garage with a notebook and write down every place where something does not fit, wobbles, drags, rusts, or has to be held with a strap because nothing is sold for that purpose. This list is the single best source of projects, because you already care about the outcome. The bike that will not fit in the shed, the gutter bracket that broke, the shelf that is 40 millimetres too short for the printer, the firewood rack that collapsed. Each is a small, well-defined problem with an obvious success condition.
Other people’s work. Fabrication shops, farm mechanics, market stall builders, and artists who work in metal are all worth watching. Ask a professional welder what they would build differently on a project you have in mind and you will usually get a five-minute education for free. Industry bodies and technical organisations are also worth a bookmark for background reading: the American Welding Society at aws.org, TWI’s technical knowledge library at twi-global.com, and ESAB’s published resources at esab.com all publish genuinely useful material aimed at practitioners rather than marketers. Even reading a standards abstract will teach you how professionals think about joint preparation and inspection.
Constraints. Sometimes the best brief is a restriction: build something only from what is already in the offcut rack, build it in one afternoon, build it under 200 dollars, or build it without grinding. Constraints force design decisions that produce better objects than unlimited choice does, and they make scrap into a resource rather than a pile.
Keep a project journal. Photograph every build at three stages: cut and fitted, welded and raw, finished and installed. Note the settings you used, the wire, the material thickness, and what went wrong. Within a year you will have a personal reference more useful than any chart, because it records what worked on your machine with your hands in your shop.
Knowing the boundary of your competence is a skill, and it is the mark of a good welder rather than a timid one. There are four clear categories where you should hand the job over.
Anything that carries people. Stairs, landings, balconies, balustrades, overhead mounts, and roof structures are governed by load calculations and building codes. A hobby weld can be perfectly sound and still be uninsurable if it was not designed to the standard that applies to it. This is not a statement about your ability; it is a statement about what gets inspected and what is expected of the person who signed it off.
Anything that tows or holds a vehicle. Trailer drawbars, hitch mounts, roll cages, and load racks on public roads are subject to regulation and to failure modes you cannot test in a driveway. The consequence of a failure at highway speed is not a broken shelf; it is a multi-vehicle incident. If you do build one, expect engineering certification, and be prepared for a professional to tell you the design needs changing.
Anything carrying gas, electricity, or pressurised fluid. Fuel tanks, gas lines, hydraulic manifolds, and pressure vessels have no acceptable margin for a hidden porosity bead inside a joint you cannot inspect. The repair or fabrication belongs in a shop with qualified procedures and the ability to test the result.
Anything involving structural steel in a building. Beams, columns, mezzanines, and anything that interacts with the structure of a house fall under engineering oversight. A professional also makes sense when the job needs a process you do not have: certified aluminium welding on a vehicle or boat, stainless sanitary work for food service, or a qualification you do not hold for a specific code.
There is also a purely economic argument for hiring out. Sometimes your time is worth more than the labour saving, the material is too expensive to risk on a first attempt, or the job needs a machine you would have to buy. A sensible pattern is to attempt the design and the fit-up yourself, then pay a professional for the critical welds if the project is high consequence. Many fabricators are happy to work that way, and you still learn from watching.
A steel fire pit, a plant stand, or a set of wall shelf brackets. All three use mild steel, all three can be built in an afternoon, and all three are forgiving of imperfect welds because the load is low and the appearance is casual. The point of a first project is not the object; it is that you learn to cut accurately, fit accurately, tack, check square, and finish. Pick something you will actually use, so you get the reward of seeing it work.
No. You need a flat, stable surface at roughly waist height, access to power that will not trip mid-bead, ventilation, and a three-metre clear zone around the work. People weld in driveways, on patios, in farm sheds, and in open barns. The two things you cannot compromise on are fire clearance and airflow. If you can weld outdoors or with the door wide open, you remove most of the fume problem in one move.
Yes. Flux-core is used in professional fabrication, including structural and outdoor work, and for a home welder it is more than adequate for furniture, frames, shelves, stands, and repairs. It produces more spatter and more cleanup than gas MIG, but the deposited metal is sound if your settings and technique are right. Many people build their first two years of projects entirely on flux-core and add a gas bottle later for neater work on clean steel.
The honest minimum is a welder, a helmet, gloves, a jacket or heavy cotton clothing, safety glasses, ear protection, a respirator, a grinder, clamps, and a square, plus some steel to practice on. Prices vary widely by country and by machine, so rather than quote a figure that will be wrong by the time you read this, set a budget in these categories and protect the safety portion of it. The most common financial mistake is spending everything on the machine and nothing on protection and consumables, which leaves you unable to actually weld.
Yes. Welding is learned physically rather than academically, and beginners with no trade background often progress quickly because they have no bad habits to unlearn. The skills you need before starting are basic measurement, the ability to follow a simple drawing, and care with power tools. Everything else is built through practice on scrap. If you can build flat-pack furniture and read a tape measure, you have the prerequisites.
If you are running flux-core, a layer of slag over the weld is normal and must be chipped and brushed away; the shiny metal is underneath. If the weld itself is dull, lumpy, or full of holes after cleaning, the usual causes are contaminated material, incorrect polarity, wire speed that does not match the voltage, or a travel speed that is too fast. Check the material first, then the polarity, then the settings on scrap of the same thickness, in that order.
Balance the heat. Tack all four corners before welding any side, weld in short segments rather than long continuous runs, alternate sides of the assembly, and work on a flat surface with the piece clamped. Let the piece cool between passes on thin material. Finally, measure the diagonals frequently rather than once at the end, because correcting a small warp early takes seconds while a large warp can be permanent.
Remove spatter and high spots with a flap disc, wire-wheel the entire surface to remove mill scale and dust, degrease it, then apply a primer designed for steel followed by your topcoat. For outdoor pieces, use an exterior-grade system and pay attention to the underside and any joints where water can sit. Where paint cannot reach, a wax-based or oil-based rust preventive is better than nothing. If you will later weld in the same area, prime only the sections you will not be welding.
Whenever the work carries people or vehicles, holds pressure, moves gas or electricity, or forms part of a building’s structure. Also when the job needs a process you do not have, a certification you do not hold, or a material you have no experience with and cannot afford to ruin. Doing the design and the fit-up yourself and paying for the critical welds is a good middle path, and watching a professional work is one of the fastest educations available.
Conclusion: start small, finish everything, and let the projects teach you. The magic of DIY welding is not that you will produce perfect work on the first try; it is that a crooked shelf you built yourself will teach you more than a hundred hours of watching, and by the tenth project your hands will know what your head is still reading about. Buy a machine that matches your power and your space, spend properly on protection before you spend on accessories, plan each build with a drawing and a cutting list, practice the four joints on scrap, and weld in short balanced passes on clean metal. Work up the ladder: fire pit, plant stand, shelves, trellis, welding table, workbench, furniture, then the big builds that carry loads and people. Keep the safety rules non-negotiable, keep a journal of settings and photographs, and be honest about where your competence ends so that the projects you do build stay standing for decades. Spark the creativity, respect the arc, and make something out of metal this weekend.