MIG Basics: The Complete Beginner’s Guide to MIG Welding (Setup, Settings & Technique)
Learn MIG basics from scratch: how GMAW works, machine setup, wire and gas choices, transfer modes, technique, troubleshooting…
READ ARTICLE →The frame arrived on my bench looking perfectly fine. It was a small stainless steel shelving unit for a coffee bar, about forty inches wide, mitred at the corners, with neat little beads stacked along each joint. Somebody had taken their time with it. The beads were even, the corners were square, and the metal had been wiped down so it gleamed under the shop light. The owner had one complaint: ten days after it was installed, every single weld line was growing orange freckles, and the freckles were spreading.
I asked what wire and gas the shop had used. The answer was the reel that came bundled with the welder, ER70S-6 mild steel wire, and a bottle of straight carbon dioxide, because that is what they used for everything else in the shop. Nothing about that setup is mysterious, and nothing about it is a crime. It just has nothing to do with stainless steel. Mild steel wire carries no chromium, so the weld metal cannot form the passive oxide film that makes stainless stainless. The weld was literally a line of carbon steel welded into a stainless frame, and carbon steel rusts. It rusted on schedule.
That story is the whole article in miniature, because the question it hides is not really “can a MIG welder do it.” It can. Any decent MIG welder can lay a bead on 304 stainless with the right reel and the right bottle. The real question is whether your setup lets the finished joint keep the properties you bought the stainless for, and that is a question of wire, gas, cleaning, and heat control rather than raw machine power.
Can you weld stainless steel with a MIG welder? Yes. Stainless steel welds beautifully with a MIG welder, provided you feed it stainless filler wire such as ER308L, shield it with an argon-rich gas such as a 98/2 argon-CO2 blend or a helium tri-mix, keep carbon steel contamination and heat input under control, and clean the joint before and after welding. A MIG welder running mild steel wire and pure CO2 will technically fuse stainless all day long, and every one of those welds will fail the only test that matters, which is whether the finished piece still resists corrosion.
This guide covers the entire process end to end: why stainless behaves differently from mild steel under the arc, which grades are genuinely weldable, exactly which wire goes with which grade, what goes into the shielding gas and why the wrong bottle ruins the weld invisibly, how to set the machine, how to move the gun, what heat tint and back-side sugaring are, when you should reach for TIG instead, and the mistakes that send first-time stainless jobs back to the scrap bin. Whether you are repairing a handrail, fabricating a kitchen counter, or fixing an exhaust, the material below is the same material the fabricator with the orange freckles never got.
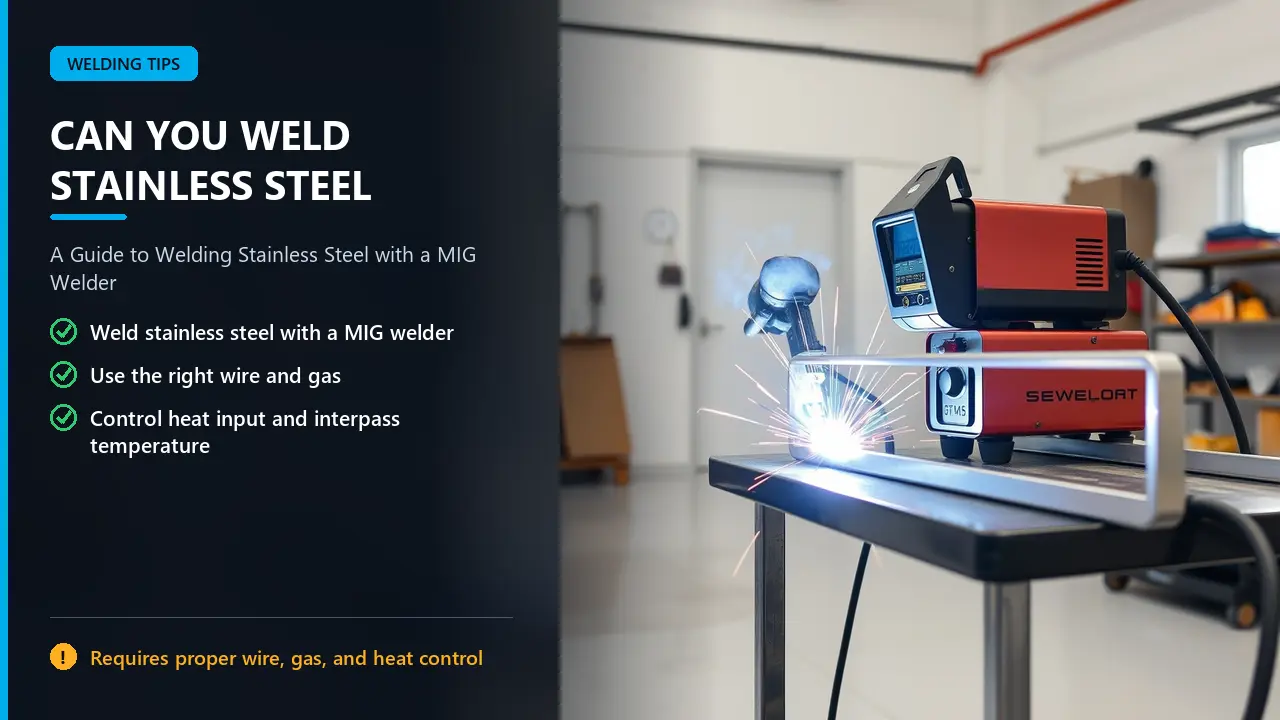
The rest of this article turns each of those bullet points into something you can act on at the machine. If you only remember one thing, remember the wire and gas pairing, because that is where good stainless jobs are quietly ruined.
Mild steel is forgiving. It wets out smoothly, it tolerates a range of voltages, it does not care much if your gas bottle is a little stale, and if the bead looks decent it usually is decent. Stainless steel is less generous. The same gun, the same technique, and the same operator can produce a gorgeous mild steel bead and a rejected stainless bead within ten minutes, and the reasons are entirely physical.
Stainless steel is defined by chromium. At roughly 10.5 percent chromium or more, the alloy forms a thin, self-healing chromium oxide film on its surface, which is what people mean when they say the material “resists corrosion.” That film is only a few molecules thick, and it reforms instantly when scratched. This is why a stainless sink survives decades of dishwater while a carbon steel plate survives a rainy week. You can read the general metallurgy over at the stainless steel overview on Wikipedia, but the welding consequence is simple: anything you do that starves the surface of chromium, or contaminates it with iron, attacks the film directly.
Under the arc there are two ways to lose that film. The first is chemical, through oxidation while the metal is hot, which shows up as heat tint, the straw, blue, gray, and black banding around the bead. The second is metallurgical, through chromium carbides forming at the grain boundaries when the metal sits too long in a narrow temperature window. Both are driven by heat, and both are controlled by the same habits: modest heat input, good shielding, and a cool interpass temperature.
Stainless steel conducts heat at roughly one-third the rate of mild steel and expands about fifty percent more for the same temperature rise. In the shop that combination translates into one annoying behavior: the heat you put in stays where you put it, and the panel distorts around it. A long continuous bead on a stainless sheet will bow the sheet faster than the same bead on mild steel, which is why experienced stainless hands weld in short segments, jump around the joint, and clamp the workpiece as if their reputation depends on it.
Lower thermal conductivity also means the puddle stays fluid a little longer and the surrounding metal does not act as a heat sink the way mild steel does. The practical effect is that you can weld stainless at lower settings than you might expect. Running the same voltage and wire speed you use for mild steel on 16-gauge stainless is a common first mistake, and the result is either burn-through or a wide, sugary-looking bead with heavy tint.
Here is the metallurgical trap that separates a durable stainless weld from one that corrodes in service. When austenitic stainless steel such as 304 or 316 sits in the range of roughly 800 to 1600 °F (about 425 to 870 °C), carbon in the alloy migrates to the grain boundaries and combines with chromium to form chromium carbides. The chromium comes from the metal immediately adjacent to the boundary, leaving those zones depleted below the 10.5 percent threshold. That condition is called sensitization, and a sensitized zone corrodes intergranularly, which is a fancy way of saying it rusts along the grain structure while the rest of the sheet looks fine. The mechanism is ordinary physical metallurgy, and the reference treatments published by ASM International describe it in far more depth than any shop conversation will.
Three things cause sensitization in practice. Holding a small part at welding temperature for too long. Welding slowly with excessive heat input. And letting a heavy section cool down at a crawl right through that temperature window instead of moving on. The countermeasures are equally practical. Use the low-carbon L grades of filler wire, which contain 0.03 percent carbon or less and simply do not have enough carbon to form meaningful carbides. Keep heat input low. Keep the interpass temperature down, with a common shop ceiling of about 300 °F (150 °C) for austenitic material. And on thick sections, do not stop for lunch in the middle of a root pass.
The same window explains why welders are taught not to let a stainless part preheat unnecessarily and not to use a heavy carbon steel backing bar that soaks up heat and holds the joint hot. Everything you do to shorten the time stainless spends between 800 and 1600 °F improves the corrosion performance of the finished weld.
It is worth being blunt about this, because it is the single most common way stainless work is ruined without anyone noticing during fabrication. A weld made on 304 stainless with ER70S-6 wire and 100 percent CO2 will look like a weld. It will fuse, it will hold a load, it may even pass a visual inspection. What it will not do is resist corrosion, and here is exactly why.
The filler metal becomes the weld. If the filler is mild steel, the weld bead is mild steel, with roughly 0.06 to 0.10 percent chromium in it, essentially none. There is no chromium, there is no chance of forming a passive film, and the bead begins oxidizing the moment the shielding gas clears it. Around the bead you have a heat-affected zone in the stainless that has been pushed through the sensitization range with excessive heat while being shielded by a gas mixture that dissociates into plenty of free oxygen. The result is a bright sheet with a rust-colored line down the middle, exactly like the coffee bar frame.
The gas makes it worse. Pure carbon dioxide is a reactive shielding gas; the arc breaks CO2 into carbon monoxide and free oxygen, and both of those species interact with the hot weld pool. On mild steel, that reactivity is useful, it cleans and stabilizes the arc at low cost. On stainless it drives carbon into the weld and oxidizes the chromium that should be protecting the surface. Welding stainless with a bare steel wire under CO2 is therefore a double failure: the filler has no chromium to begin with, and the gas strips away what little protection the base metal had. Welders sometimes call the black, crumbly oxide this produces “sugaring” when it happens on the back side of a joint, and it is not a cosmetic problem. It is a zone of metal that has given up its alloy.
The correct pairing, which we will get into in detail, is stainless filler wire plus an argon-dominant gas. Argon is inert, it does not donate oxygen or carbon to the pool, and a small controlled addition of CO2 or oxygen stabilizes the arc without wrecking the chemistry. That is the entire principle behind every gas recommendation in this article.
“Stainless steel” covers a family of alloys with wildly different weldability, so the grade matters before you ever strike an arc. The good news for MIG work is that the grades you are most likely to encounter in a shop, a kitchen, a handrail job, or an automotive project are all straightforward.
| Grade | Type | MIG weldability | Recommended filler | Where you meet it |
|---|---|---|---|---|
| 304 / 304L | Austenitic, 18Cr-8Ni | Excellent, the default stainless job | ER308L | Kitchen equipment, railings, tanks, trim, most sheet work |
| 316 / 316L | Austenitic with molybdenum | Excellent, slightly more prone to hot cracking if overworked | ER316L | Marine, chemical, pharmaceutical, coastal architectural work |
| 430 | Ferritic, no nickel | Good, but the heat-affected zone loses ductility | ER430, or ER308L / ER309L for tougher joints | Appliance trim, automotive molding, decorative panels |
| 201 | Austenitic, manganese stabilized | Fair to good, more sensitive to heat and contamination | ER308L | Budget substitution for 304 in trim and cookware |
| 410 | Martensitic, hardenable | Difficult, needs preheat and often post-weld treatment | ER410 or ER309L | Turbine parts, valves, fasteners |
| 2205 duplex | Duplex austenitic-ferritic | Possible but procedure-critical, heat input window is narrow | Matching duplex filler such as ER2209 | Process piping, pressure vessels, offshore |
The overwhelming majority of real-world MIG stainless work is 304 and 316, and both behave beautifully if you follow the wire and gas rules. 304 is the workhorse; it is weldable over a wide range of thicknesses, tolerates short-circuit transfer on thin sheet, and forgives a slightly imperfect setup better than any other grade. 316 adds molybdenum for chloride resistance, which is why it shows up near the ocean and in chemical environments, and it welds almost identically to 304 as long as you use a matching filler and respect the heat.
The ferritic grade 430 deserves its own warning. It contains no nickel, its heat-affected zone grows coarse grains and becomes brittle, and it is more prone to cracking than the austenitic grades. It is still very weldable, particularly for the decorative and appliance applications where it is used, but keep the heat down, consider a small preheat for thicker sections, and know that many fabricators deliberately use a 308L or 309L filler on 430 to put a tougher, more ductile weld metal into the joint at the cost of an exact color match. Martensitic and duplex grades are a different discipline with narrow procedure windows; if you are running production work on those, you are probably following a written procedure rather than a magazine article, and the process guides from the technical knowledge base at TWI are a better reference than any shop rule of thumb.
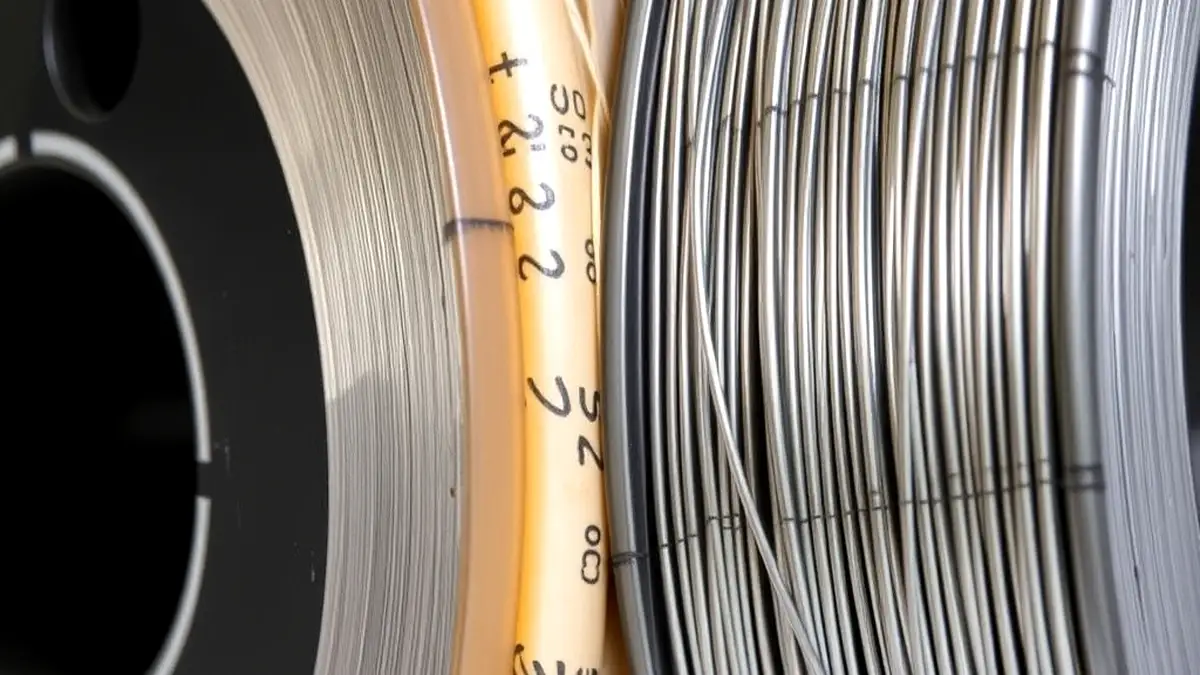
If this article has one non-negotiable, it is the wire. Gas can be imperfect and still produce an acceptable weld on a non-critical part. Heat input can be a little high and cost you some grain-boundary chromium that pickling later fixes. But mild steel filler in a stainless joint is unfixable; you have to cut it out. The selection itself takes about thirty seconds once you know the mapping.
| Base metal | Filler wire | Why |
|---|---|---|
| 304 / 304L stainless | ER308L | Composition-matched austenitic filler, L grade keeps carbon low enough to avoid sensitization |
| 316 / 316L stainless | ER316L | Carries molybdenum so the weld metal matches the base metal’s corrosion resistance |
| 304 or 316 to mild steel | ER309L | Higher chromium and nickel content buffers dilution from the carbon steel side, resists hard spots and cracking |
| 430 stainless | ER430 for color match, ER308L or ER309L for toughness | Matching filler keeps appearance; austenitic fillers add ductility to a brittle-prone joint |
| Cast iron to stainless | ER309L or a nickel-based wire | Nickel-rich weld metal absorbs the carbon and softens the transition, the same logic used in cast iron to steel welding |
| Dissimilar stainless combinations | ER309L generally, matching filler for equal-corrosion joints | 309L is the universal problem solver when the two sides are not the same alloy |
The classification tells you the alloy family and the carbon level. ER stands for electrode rod, 308 is the alloy family, and L means low carbon, capped at 0.03 percent. Those designations come from the classification system maintained by the American Welding Society, which is why the same ER numbers appear on reels from every manufacturer and can be specified with confidence. Standard ER308 can carry up to 0.08 percent carbon, which is enough to form carbides during welding on a section that holds heat. The L wire costs a few dollars more per pound and eliminates that failure mode almost entirely. On anything that will see moisture, food, chemicals, or salt, buy the L wire without thinking about it. On a garage shelf bracket, standard wire will probably be fine, but the price difference rarely justifies the mental overhead of remembering which reel is on the machine.
There are also variants worth knowing about. Silicon-heavy grades such as ER308LSi flow a little better and are popular for automated and robotic work. Copper-coated wires are standard for MIG because the coating improves current transfer and corrosion on the reel. And the nickel-based welding wires occupy the far end of the spectrum for dissimilar joints, high-temperature service, and overlay work where plain stainless fillers are not enough. For ordinary fabrication, though, ER308L and ER316L cover nearly everything.
Joining stainless to carbon steel is common, on everything from kitchen sinks welded to mild steel frames to stainless cladding on structural members, and it is where ER309L earns its reputation. The reasoning is dilution. When the arc melts both sides of the joint, the weld pool ends up as a blend of the two metals, and the carbon steel side drags the chromium content down. 309L carries about 23 percent chromium and 13 percent nickel, which gives the pool enough alloy reserve to stay austenitic and corrosion-resistant even after it has been diluted by plain steel.
Two cautions on dissimilar joints. First, the galvanic question does not go away just because the weld held; when stainless and carbon steel sit together in an electrolyte, one of them pays. The practical guidance in preventing galvanic corrosion applies directly to assemblies like this. Second, be honest about which side matters. If the stainless side is the corrosion-critical surface, protect it, clean it, and consider whether the mild steel should be painted or isolated rather than ground flush and polished into the stainless, which contaminates it permanently.
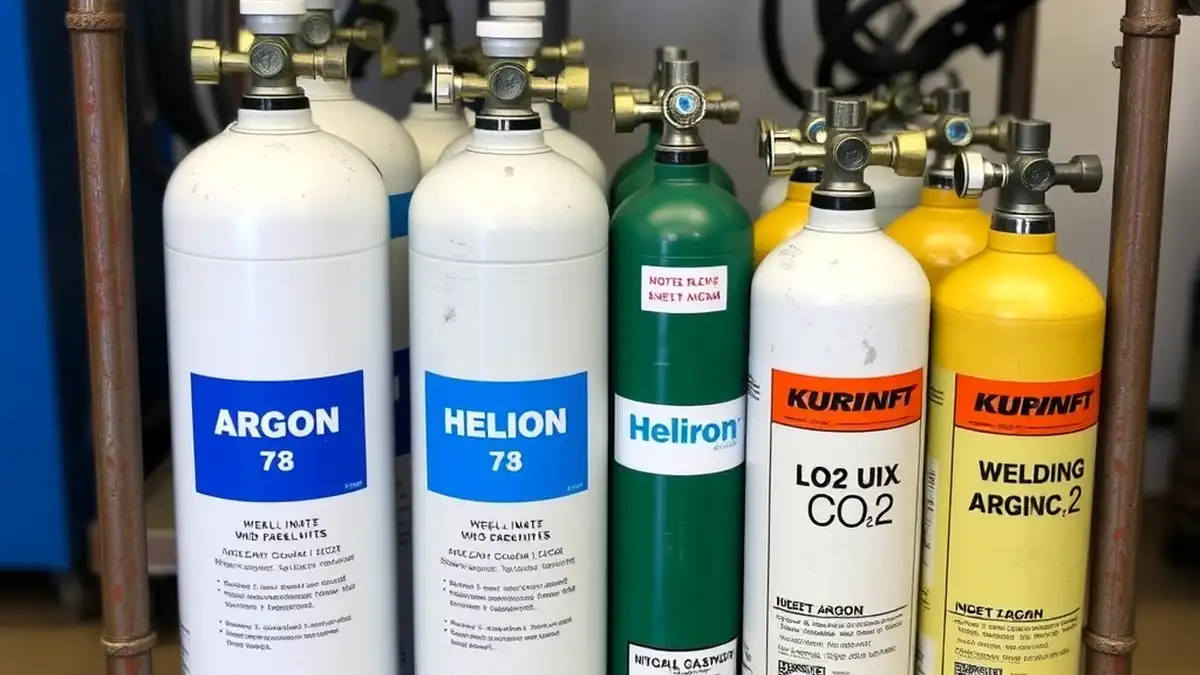
Here is where the internet gives you five confident and contradictory answers, so it helps to know what each ingredient in a shielding gas mixture actually does. Argon is inert, easy to ionize, and gives a stable arc. It is the base of every stainless MIG mixture and the reason spray transfer is possible at all. Carbon dioxide is reactive: it stabilizes short-circuit transfer at low voltages, adds penetration, and lowers the cost of the bottle, but it also dissociates in the arc and hands carbon and oxygen to the weld pool. Helium conducts heat better than argon, deepens penetration, widens the bead, and runs hotter at the same settings, which is why it appears in premium tri-mixes. Oxygen appears in some industrial mixes in tiny amounts for the same reason CO2 does, arc stability, with the same cost to corrosion resistance.
| Gas mixture | Typical use | Pros | Cons |
|---|---|---|---|
| 98% Ar / 2% CO2 | Short-circuit MIG on stainless sheet, the all-round shop default | Clean arc, minimal spatter, negligible carbon pickup, best corrosion retention | Slightly less penetration than higher-CO2 mixes, costs more than CO2 |
| 95% Ar / 5% CO2 | Short circuit and transition work on thicker sheet and tube | Good balance of stability and penetration, still low carbon pickup | Noticeably more spatter than 98/2, marginal corrosion cost on critical work |
| 90% Ar / 10% CO2 | Heavier sections, productivity-focused fabrication | Deeper penetration, forgiving arc starts, cheaper than tri-mix | More spatter, more carbon in the bead, some loss of corrosion resistance |
| Tri-mix 90% He / 7.5% Ar / 2.5% CO2 | Higher-performance work, thicker material, vertical and out-of-position | Deeper penetration, fast travel, fluid puddle, excellent bead shape | Expensive bottle, hotter arc, can burn thin sheet if settings are not reduced |
| Tri-mix 85% Ar / 15% He / 5% CO2 and similar | Alternative commercial blends for heavier fabrication | Argon-heavy cost profile with some helium benefit | Marginal benefit over 95/5 on sheet work |
| 100% CO2 | Not for stainless | Cheap, deep penetration on steel | Heavy spatter, unstable arc on stainless, carbon pickup, destroys corrosion resistance |
| 100% argon | Not for GMAW on steel or stainless | Works for GTAW and aluminum | Unstable, erratic short-circuit arc on stainless, poor bead profile |
The pattern in that table is unambiguous. Keep CO2 at 5 percent or below for stainless where corrosion matters, treat 10 percent as a productivity compromise for non-critical work, and reach for a helium tri-mix when you need penetration and travel speed on heavier sections. The bottle labeled straight CO2 that works so well on mild steel is the wrong bottle for this job, and switching it in and out of the same regulator is how mix-ups happen. If your shop runs both, label the bottles, dedicate regulators, and make it a habit rather than a decision made mid-job. Our MIG gas settings guide covers flow rates and dialing in the regulator in more depth, and the same principles apply once the mixture itself is correct.
A flow rate of about 15 to 25 cubic feet per hour covers almost all stainless MIG work, with 20 CFH as a sensible starting point for a standard 350 cubic inch nozzle in still air. Push it much past 25 and the shielding stream becomes turbulent, which paradoxically pulls surrounding air into the arc instead of keeping it out. The symptoms of too much flow look exactly like too little flow: porosity, tinting, and a hissing, unstable arc. If you are welding outdoors or near a shop door, screen the work area rather than cranking the flow, because no flow rate survives a breeze.
Check the bottle when you think about gas at all. A regulator that reads fine on an empty bottle will lie to you, and a partially blocked tip or a spatter-clogged nozzle produces a starved weld that looks like a gas problem because it is one. If you are chasing bubbles in the bead, the checklist in porosity in welding runs through the full sequence from wire to wind.
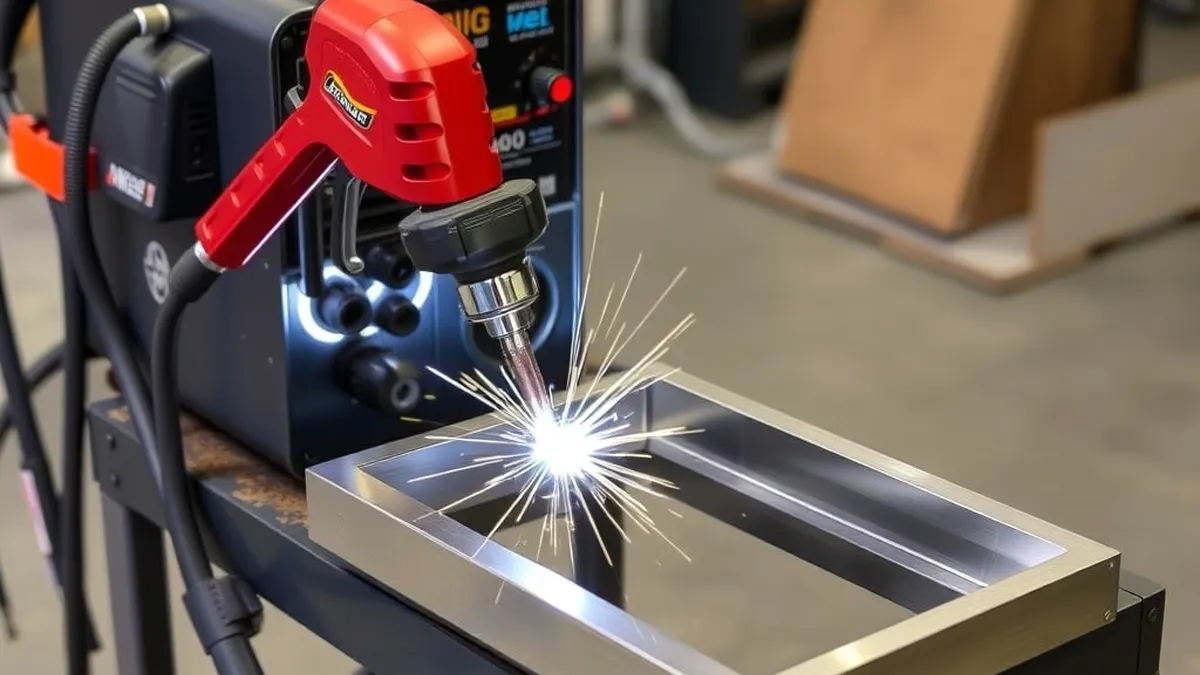
With the right wire and the right bottle on the machine, the settings conversation becomes a normal one, the same conversation you have with mild steel except tuned down a notch. The first housekeeping item is polarity: stainless MIG runs on electrode positive, DCEP, the same polarity as every other gas metal arc application. If your machine has a polarity switch and you have been running flux core, flip it. An incorrectly set machine gives you a lazy arc, poor penetration, and a bead that sits on the surface like a caterpillar, and you can confirm the setup against the MIG polarity explained guide in about a minute.
Transfer mode is the term for how the wire crosses the arc gap, and it changes the character of the weld more than any other single setting.
Short-circuit transfer is the default for stainless sheet. The wire touches the work, short-circuits, melts off, repeats hundreds of times per second, and delivers relatively little heat per unit of deposited metal. That low heat input is exactly what thin stainless needs. The trade-off is shallow penetration, which means joint fit-up matters more than it does on mild steel, because a wide root gap will not be filled by a short-circuit bead no matter how generous you are with the wire.
Spray transfer is a stream of fine droplets across a continuous arc, and it needs an argon-rich gas and enough voltage to sustain it, typically 24 volts and up with real amperage behind the wire. On stainless it gives deep penetration, a smooth bead, and high deposition rates on thicker material, and the argon-dominant mixtures recommended here are exactly what spray wants. The cost is heat: spray pours energy into the part, so it belongs on sections thick enough to take it and on assemblies rigid enough not to bow.
Pulsed spray, available on machines that advertise a pulse mode, splits the difference by switching between a peak current that detaches a droplet and a background current that holds the puddle without melting much base metal. It is genuinely excellent for stainless, particularly out of position and on thin sections where you want spray-like penetration with short-circuit-level heat. If your machine has it, use it on stainless before anything else.
Globular transfer, the lumpy middle ground where large droplets cross the arc under gravity, is what you get when voltage is too low for spray but wire speed is too high for short circuit. It spatters, it penetrates unevenly, and on stainless it produces the kind of messy bead that needs grinding. If your weld looks like it was thrown at the joint, raise the voltage or drop the wire speed until the arc goes quiet.
Machine dials are labeled in volts and inches per minute on most welders, sometimes with an amperage equivalent printed on the chart under the door. The ranges below are starting points for .030 and .035 inch ER308L wire on 304 stainless in flat position with a 98/2 or tri-mix gas; treat them as a test-plate starting line rather than gospel, and make your own beads on scrap of the same thickness before committing to the joint. Wire sizing itself is covered in depth in the MIG wire size chart.
| Material thickness | Wire size | Transfer | Volts | Wire feed (ipm) | Rough amperage |
|---|---|---|---|---|---|
| 24 to 22 gauge (0.024-0.031) | .030 | Short circuit | 15.0 – 16.5 | 150 – 200 | 55 – 80 |
| 20 to 18 gauge (0.036-0.048) | .030 | Short circuit | 16.5 – 18.0 | 200 – 260 | 80 – 110 |
| 16 to 14 gauge (0.060-0.075) | .030 / .035 | Short circuit | 17.5 – 19.5 | 250 – 330 | 110 – 145 |
| 1/8 inch (0.125) | .035 | Short circuit or pulse | 19.0 – 21.5 | 330 – 420 | 145 – 190 |
| 3/16 to 1/4 inch | .035 | Spray or pulse | 24 – 28 | 350 – 500 | 180 – 250 |
| Fillet and lap joints, all gauges | either | As above, plus 1 to 2 volts for edge fusion | add 0.5 – 1.5 | same range | same range |
Two habits will save you more time than any chart. First, dial in on scrap of the same thickness, in the same position, with the same gas, and look at the bead rather than the display. Second, remember that stainless wants slightly less heat than mild steel at the same thickness because it conducts heat away slowly and holds it in the puddle. If your normal mild steel recipe is giving you flat, wide, heavily tinted beads on stainless, back the voltage off half a volt at a time before you touch anything else. The wire you feed, the contact tip it passes through, and the arc behavior that results are covered in the MIG welding electrode guide, and the fundamentals of running a stable arc are the same across every material.
Settings get you a workable puddle; technique is what turns it into a joint that looks and performs like it should. None of this is exotic, and if you can MIG weld mild steel you already own about ninety percent of the skill.
On stainless, push the gun. A forehand angle, roughly 10 to 15 degrees from vertical with the gun pointing in the direction of travel, drives the shielding gas ahead of the puddle, exposes the leading edge of the joint to the arc for better fusion, and gives the bead a flatter, cleaner profile. Dragging stainless with a MIG gun tends to trap gas, fold oxide into the leading edge, and leave a narrower, higher bead with more spatter at the toes.
Push angle is only half of the geometry. Keep the contact tip somewhere between a quarter and three-eighths of an inch from the work; too long a stickout drops amperage at the wire tip and gives you cold, ropey deposition, while jamming the nozzle into the puddle blows shielding away and contaminates the weld. Travel speed should be brisk enough that the bead lays down at roughly one and a half to two times the wire diameter in width, without a separate crown. If the puddle is balling up ahead of you, slow down or add wire; if you are racing to keep up with a pool that will not stay put, slow the feed and drop the voltage.
Weave sparingly. A slight oscillation to tie into both toes of a fillet is fine, and on a wide joint you can stack stringers rather than running one fat weave, which puts extra heat into the center of the joint for no benefit. Stringer beads on stainless are not a style preference, they are heat management, and they are one of the easiest changes a welder can make to reduce distortion on sheet work. The broader craft of puddle control, gun angle, and travel speed is the backbone of the welding tips for beginners series, and nothing in it changes when the wire turns shiny.
Short-circuit transfer has limited fill capability, so the joint has to be built for it. A tight butt joint on 16-gauge stainless, with the edges squared and a gap no wider than the wire diameter, welds beautifully from one side. The same joint opened up to an eighth of an inch will blow through the edges before the bridge closes. On thicker material, a 45 to 60 degree V-groove with a root face of about a sixteenth of an inch gives the first pass something to fuse into.
Clamp the workpiece to a heavier fixture, a steel table, or a backing bar, because stainless distorts freely and every tack you place should be fighting that. Tack in four places minimum on a rectangular frame, work from the center outward, and alternate sides on a long seam rather than running one continuous line from end to end. Wherever possible, let the assembly hold itself square while it cools, then release the clamps and check the diagonals.
Everything about stainless quality circles back to heat, so it is worth making the controls explicit rather than hoping the bead comes out right.
Heat input is roughly proportional to amps times volts divided by travel speed, and you can manipulate all three. Lower amperage, achieved through lower wire speed and voltage, reduces the total energy delivered. Faster travel spreads the same energy over more inches of joint. Shorter weld segments, with pauses between them, let the part shed heat instead of accumulating it. On a stainless sheet fabrication, the typical winning recipe is the lowest setting that still produces full fusion, welded in short stitches with the gun moving.
Interpass temperature is the ceiling on how hot the material can be when you start the next pass. For austenitic grades like 304 and 316, most shops hold the maximum at about 300 °F (150 °C), with some procedures allowing up to 350 °F (175 °C) on thicker sections. The number exists to keep the material out of the sensitization window and to limit distortion. Practical ways to stay under it: weld short segments, let the part air cool, use a heat sink or a wet rag on the back side of thin sheet if distortion is a battle, and never stack pass on pass in the same spot without checking temperature. A cheap infrared thermometer held over the joint between passes answers the question in a second.
Preheat is generally not required for austenitic stainless, and on thin sheet it is actively harmful because it extends the time in the danger zone. Heavy sections over roughly one inch and the martensitic grades are the exceptions, where a modest preheat around 300 to 400 °F prevents cracking by slowing the cooling rate. If you find yourself needing preheat on ordinary 304 sheet work, the actual problem is almost always a joint that is too restrained, a gap that is too wide, or heat input that is too high.
Stainless steel is clean about how it is treated, and the two contamination sources that ruin welds are grease and iron. Both are entirely preventable.
Carbon steel particles embedded in a stainless surface will rust. They will rust in a way that makes the surrounding stainless look diseased, and they cannot be polished out once they have been smeared into the surface under a grinding wheel. This is why stainless shops keep separate wire brushes, separate grinding discs, separate clamps, and separate pliers, all of them stainless-safe and never used on mild steel. A brush that has touched a rusted bolt once is finished for stainless work.
The cleaning routine before welding is short: wipe the joint and about an inch either side with acetone or a dedicated degreaser to remove oils and fingerprints; wire brush with a stainless brush in one direction to break the surface oxide; and remove mill scale or heat marks with a fresh abrasive disc or a flap wheel designated to stainless. Mark your tools. Wipe again after fit-up, because the clamps and your own hands put oil back on. The payoff is immediate in the arc: clean stainless arcs quietly, wet out smoothly, and produce almost no spatter compared with the same joint welded straight off the saw.
Post-weld cleaning is not optional on anything that has to resist corrosion or look good. Spatter comes off with a stainless-safe scraper or a light pass of a conditioning disc; never hammer it off with a chipping hammer that has been on steel. Heat tint, if light, responds to pickling paste, a passivating solution, or mechanical polishing with a Scotch-Brite type wheel. Heavier oxide needs actual removal, because tint is not a stain sitting on the surface, it is a thickened, chromium-depleted oxide layer that has to come off to expose the sound metal underneath. More on that in the next section.
One more contamination path deserves a mention: the gas itself. A regulator that has been on a CO2 bottle, a hose with moisture in it, or a nozzle packed with spatter will all deliver something other than clean argon to the puddle. If the first inch of every weld comes out porous no matter what you do, look at the gas train before you doubt the wire. The full diagnosis sequence is in porosity in welding, and it applies word for word to stainless.
Discoloration around a stainless weld is the most visible sign that heat got away from you, and it is worth understanding at the metallurgical level rather than treating it as a cosmetic annoyance.
The tint spectrum is a thermometer you can read with your eyes. A light straw or gold color indicates modest exposure; blue and purple indicate more; dark gray, brown, and black indicate heavy oxide growth where significant chromium has been consumed. Underneath a heavy tint, the base metal is depleted of chromium, and the corrosion resistance in that band is compromised until the oxide is removed. Food, pharmaceutical, and architectural specifications routinely reject visibly discolored welds for exactly this reason, not because of how they look in a photograph but because the color is evidence of what happened to the alloy.
The cure is upstream. Less heat, faster travel, better gas coverage, correct wire, and a lower interpass temperature produce silver or light straw beads as a matter of course. When tint does appear, mechanical polishing with a dedicated conditioning disc, pickling paste, or a passivation bath restores the surface. Pickling dissolves the oxide and the depleted layer beneath it using an acid mixture, while passivation rebuilds the passive film chemically. Both are standard shop operations, and both should be done with proper gloves, ventilation, and eye protection, because the pastes are aggressive.
The face of the weld is the part you can see, so it is the part people worry about. The root, the back side of the joint, is where the real failures hide. When the back of an open joint is exposed to air while the arc is running, the hot root oxidizes violently, producing a dark, crumbly, cindered surface that welders call sugaring. It is a layer of alloy that has been destroyed rather than merely discolored, and on a pipe, a tank, or a food-contact vessel, it is a corrosion site and a crack initiator sitting where no inspection will find it.
The fix is back purging: filling the inside of the joint with an inert gas, argon, and letting it flow gently while the root is welded. The procedure is not complicated. Seal the ends of the pipe or vessel, introduce argon at a low flow, let it displace the air for a few minutes, and put a small vent hole at the far end so the purge does not over-pressurize. A common shop target is a purge flow around 5 to 15 CFH inside the cavity, but the real test is oxygen content: a lit match or an oxygen meter at the vent tells you when the air is gone. Weld the root, keep the purge running until the metal has cooled below dull red, then move on.
When does the root need purging? On pressure vessels, sanitary piping, food and pharmaceutical process work, and any weld where the root will be exposed to the product or to a corrosive atmosphere, always. On an open-root cosmetic joint where only the face will ever be seen, a mechanical fit-up with a backing bar may be enough. On thin sheet butt joints with full penetration from one side, there is no back side to purge, so the concern disappears. If you are unsure, err toward purging; the cost is a bottle of argon and a few minutes, and the alternative is a component that fails from the inside out.
Flux-cored wire does exist for stainless steel, and it is worth knowing about even though this article recommends gas-shielded MIG as the default. There are two broad families: gas-shielded duplex wires that carry a flux inside a tubular sheath and still require an argon-based external gas, and self-shielded wires that generate their own protection from the flux. Stainless versions of both exist under the AWS classification system, with designations like E308LT1-1 for a gas-shielded 308L-class wire.
The practical comparison favors MIG for most stainless work. Solid ER308L wire gives better puddle visibility, less slag to chip, finer control on thin sheet, and lower heat input. Flux-cored stainless deposits faster and tolerates wind, dirty joint conditions, and out-of-position work better, which is why it shows up in structural and shipboard applications. The slag has to be removed between passes, spatter is generally higher, and the bead profile needs more cleanup, and those are real costs in a kitchen fabrication shop where appearance is part of the deliverable. If you already run flux core on mild steel and want the background, the what is flux core welding primer explains the process, the flux core wire types page covers the classification differences, and the flux core settings and amperage chart resources show how the parameters shift compared with solid wire.
Self-shielded flux core on stainless deserves a specific caution: because the flux chemistry is designed to protect a hot puddle, the resulting weld metal and slag regime can mask poor shielding and heavy oxidation. On a corrosion-critical part, gas-shielded MIG or TIG keeps the process visible, which is exactly what you want when the chemistry of the bead is the whole point.
MIG is not the only way to weld stainless, and pretending otherwise would be bad advice. Each process trades speed against control, and the right answer depends on thickness, position, appearance requirements, and where the weld will spend its life. The detailed breakdown of how the two leading processes differ sits in MIG versus TIG welding, and the strength question has its own treatment in is TIG stronger than MIG.
| Process | Speed | Heat control | Cosmetic quality | Best fit on stainless |
|---|---|---|---|---|
| GMAW (MIG) | Fast, continuous wire, minimal cleanup | Good, especially in short circuit or pulse | Good with clean setup, some spatter possible | Sheet and tube fabrication, frames, tanks, repairs, production work |
| GTAW (TIG) | Slow, one hand feeds filler | Excellent, the finest heat control available | Best-in-class, no spatter, full visibility | Sanitary piping, thin-wall work, food and pharma, show welds, root passes |
| SMAW (stick) | Moderate | Moderate, coating makes the puddle harder to read | Roughest, slag and spatter | Outdoor repair, structural, positions and conditions where gas will not hold |
| FCAW (flux core) | Fast, high deposition | Moderate | Slag covered, needs chipping | Thicker structural stainless, windy conditions, out-of-position production |
The honest summary is this. If you own a MIG welder and you are making a stainless table frame, an exhaust section, a sink cutout, or a repair on a piece of shop equipment, MIG is the correct tool and you should not feel like you are settling. If you are welding 16-inch sanitary pipe to a food plant specification, fabricating a thin-wall instrument line, or building something where the bead itself is the product, TIG wins and no amount of MIG technique will close the gap. TIG settings have their own discipline, and the TIG welding settings chart is the place to start if you go that direction.
Stick welding stainless with electrodes such as E308-16 and E309-16 remains genuinely useful for field work. The flux coating protects the puddle from wind, the equipment is simple, and a skilled stick welder can join stainless in a position and a location where a MIG gun cannot reach or a gas bottle cannot go. The cost is deposition efficiency, cleanup, and bead appearance, which is why it is a repair process rather than a fabrication process for most people. Flux core sits between the two, high deposition with self-protection, useful on thicker work and increasingly common in structural stainless, as covered in the flux core resources linked earlier.
One comparison worth making explicitly, because the same question comes up for every material, is stainless versus aluminum on a MIG welder. The answer is that the machine often does less than you think: aluminum demands a spool gun or push-pull feeder and 100 percent argon, while stainless demands stainless wire and an argon-rich mix. The full reasoning sits in can you weld aluminum with a MIG welder, and the gas selection differences are laid out in what gas do you use to weld aluminum. Different consumables, same basic machine, and the same habit of matching the process to the material.
To pull the whole method together, here is how a typical stainless MIG job runs, using a custom 304 stainless exhaust section as the example because it exercises every skill in this article at once.
Material and prep. Two lengths of 1.5 inch 304 stainless tubing, 16 gauge, cut square and deburred. Both mating ends wiped with acetone. A stainless wire brush taken from the shelf marked stainless, brushed along the joint line until the surface broke its shine. A fit-up checked against a straightedge, gap held at about the wire diameter, tacked in four places with the tacks placed on the outside of the final bead path so they get consumed by the weld rather than sitting under it.
Setup. Reel of .030 ER308L, drive rolls nip checked so the wire feeds without slipping but is not crushed. Bottle of 98 percent argon and 2 percent CO2, regulator set to about 20 CFH, nozzle cleaned, contact tip replaced because the old one had an oblong bore from arcing. Polarity confirmed as electrode positive. Settings for this thickness on short circuit: 17.5 volts and about 240 inches per minute of wire feed, dialed in on a scrap offcut of the same tubing until the arc went quiet and the bead wetted into both edges instead of sitting on top of them.
Welding. Push technique, 15 degrees of forward lean, stickout at three-eighths of an inch, travel speed fast enough that the straw-colored bead followed the arc without pooling ahead of it. Stitch welding on the visible faces, inch on and inch off, jumping between the two sides of the joint rather than running a continuous line that would pull the assembly out of alignment. A thermometer check between passes kept the tube under the interpass ceiling. Each short segment was allowed to air cool before the next one went in.
Finish. The face of the weld came out light straw to silver, which is the visual signature of correct heat and correct gas. Light spatter was wiped with a conditioning disc, the heat marks at the edges of the heat-affected zone were cleaned back with a Scotch-Brite type wheel, and the assembly was checked for warpage with a straightedge before the clamps came off. No grinding was needed, because the bead had been laid in correctly the first time.
The whole job, including prep, took less time than the trip to the auto parts store would have. That is the argument for MIG on stainless in one sentence: it is fast enough that doing it right costs less than doing it wrong.
Every one of these has been seen in a real shop, and each one is cheap to prevent.
| Mistake | What it does | The fix |
|---|---|---|
| Mild steel wire on stainless | Weld metal has no chromium, bead rusts, corrosion resistance gone | ER308L or ER316L only, label the reels |
| 100 percent CO2 shielding | Carbon pickup, heavy spatter, unstable arc, oxidized bead | 98/2, 95/5, 90/10, or helium tri-mix |
| Carbon steel brushes and discs | Iron particles embedded in the surface rust in place | Dedicated stainless tooling, stored separately |
| Welding greasy or fingerprinted joints | Porosity, inclusions, contaminated bead | Acetone wipe after final fit-up |
| Heat settings copied from mild steel | Burn-through, wide tinted beads, distortion | Drop voltage half a volt at a time, test on scrap |
| Long continuous beads on sheet | Panel bows, interpass temperature climbs | Stitch weld, jump around, clamp the work |
| Wide root gaps on thin butt joints | Blow-through before the joint bridges | Tight fit-up, or step up to TIG for the root |
| Skipping post-weld cleaning | Tint left on the surface, corrosion initiates there | Pickle, passivate, or mechanically clean |
| No purge on a critical root | Sugaring destroys the back side of the joint | Argon back purge with a vent, verified |
| Dragging the gun | Narrow high bead, gas entrapment, more spatter | Push, 10 to 15 degrees of forward angle |
| Ignoring wind and drafts | Shielding stripped from the puddle, porosity | Screen the area, do not just raise the flow |
| Running a bottle with a stale regulator | Silent gas starvation mid-job | Check bottle age, dedicate regulators to mixes |
The pattern behind the list is worth internalizing: almost every stainless welding failure is a preparation failure rather than a skill failure. Wire, gas, cleanliness, heat, in that order. A welder who has never held a torch but who gets those four right will produce a usable bead on stainless; a talented welder who gets them wrong will produce a beautiful bead that fails.
When something goes wrong at the machine, work through the symptom rather than guessing at random adjustments.
| Symptom | Most likely cause | Fix |
|---|---|---|
| Orange freckles along the bead days after welding | Mild steel wire, iron contamination, or carbon steel tooling | Change to stainless wire, replace contaminated tools, grind out and re-weld |
| Heavy blue or black tint | Excessive heat input or poor gas coverage | Lower settings, faster travel, check flow and nozzle |
| Porosity and pinholes | Wind, low flow, dirty joint, moisture, worn contact tip | Screen the area, verify 15-25 CFH, clean with acetone, replace tip |
| Spatter heavy beads | Too much CO2, voltage too low, stickout too long | Switch to a lower-CO2 mix, raise voltage, shorten stickout |
| Cold, ropey bead sitting on the surface | Insufficient voltage or amperage, travel too fast | Add half a volt at a time, slow slightly, confirm DCEP |
| Burn-through on thin sheet | Heat too high, gap too wide, dwell in one spot | Drop settings, tighten fit-up, stitch and keep moving |
| Cracking at the bead toe | Restraint, wrong filler for the grade, excessive heat | Check filler selection, reduce heat, improve fit-up |
| Root side crumbly and black | No purge, root exposed to air | Argon back purge, or mechanical backing |
| Arc wandering and erratic feed | Worn liner, kinked wire, bad ground, poor polarity | Replace liner, check drive roll nip, clean ground clamp |
Notice how often the answer is a consumable rather than a dial. That is characteristic of stainless work: the wire, the gas, the tip, and the cleanliness determine most of the outcome before you ever touch the voltage knob.
Welding stainless is not more dangerous than welding mild steel in the dramatic sense, but it has one hazard that deserves specific attention: hexavalent chromium. When stainless steel is heated in an arc, a small amount of chromium converts to hexavalent chromium, a known carcinogen and respiratory irritant, which is also why the fume plume from stainless sometimes looks different and smells different from mild steel fume. The controls are straightforward and they are the same controls that apply to all fume, plus a little more rigor.
Ventilate. A fume extractor at the arc, or at minimum good cross-ventilation that moves the plume away from your breathing zone, does most of the work. Wear respiratory protection appropriate to the job; a quality half-mask with the right cartridge is inexpensive insurance, and the best welding respirator picks cover the options that actually hold up in a shop. Keep your helmet, gloves, and leathers in good condition, wear fire-resistant clothing, and protect the eyes and skin from both the arc and the grinding dust. The general shop rules are collected in welding safety tips, and the regulatory baseline for any workplace welding operation is set out by OSHA’s welding, cutting, and brazing standard.
Two additional notes specific to stainless. Pickling paste and passivation chemicals are acids and need gloves, eye protection, and ventilation of their own, separate from welding PPE. And grinding dust from stainless, like any stainless particulate, should not be breathed or allowed to settle on carbon steel tooling, where it will rust and contaminate the next job.
Yes. Any MIG welder capable of running solid wire on steel can weld stainless, because the process is identical and only the consumables change. You need a reel of stainless filler wire, an argon-rich shielding gas, and settings tuned slightly cooler than mild steel. Machines with a pulse mode or a stainless program make thin work easier, but they are an advantage rather than a requirement.
For most sheet and tube work, 98 percent argon with 2 percent CO2 is the default: stable arc, minimal spatter, negligible carbon pickup. 95/5 and 90/10 give more penetration at some cost in spatter and corrosion resistance, and a helium tri-mix such as 90 percent helium, 7.5 percent argon, and 2.5 percent CO2 is the premium choice for thicker material and out-of-position work. Never use 100 percent CO2 on stainless.
You can, and the weld will hold mechanically while rusting in place. Mild steel wire contains no chromium, so the bead cannot passivate. Within days to weeks the weld line shows orange oxide, and the corrosion resistance you selected the material for is gone. Use ER308L for 304, ER316L for 316, and ER309L when joining stainless to carbon steel.
ER308L. It is the composition-matched low-carbon filler for the 304 family, and the L grade minimizes carbide formation during welding. ER316L is acceptable if the part will see chlorides and you do not have 308L on hand, but matching filler is always the cleaner engineering choice.
Heat tint is an oxide layer whose thickness, and therefore color, reflects how much heat the surface saw. Blue, gray, and black tint indicate heavy oxidation with chromium depletion underneath, which compromises corrosion resistance until it is removed. Reduce heat input, travel faster, improve shielding, and clean the tint afterward with pickling paste, passivation, or mechanical polishing.
On pressure vessels, sanitary and food-contact piping, and any root that will be exposed to a corrosive product, yes. Without an argon purge the root oxidizes into a crumbly, chromium-depleted layer called sugaring. On thin sheet welded from one side with full penetration, or on open-frame work where only the face is visible, purging is unnecessary.
For austenitic grades like 304 and 316, hold the maximum interpass temperature around 300 °F (150 °C), with up to 350 °F (175 °C) acceptable on some thicker procedures. The ceiling keeps the material out of the sensitization range where chromium carbides form at grain boundaries, and it limits distortion on sheet. An inexpensive infrared thermometer between passes is the simplest way to stay compliant.
It depends on the job. MIG is faster, easier to learn, and ideal for sheet fabrication, frames, tanks, and repairs. TIG offers finer heat control and superior bead quality for thin-wall, sanitary, and cosmetic work. A welder who can do both can take on anything, and the practical differences are covered in MIG versus TIG welding.
Nine times out of ten it is shielding: wind, a blocked nozzle, a flow rate that is too high and turbulent, or an empty bottle. The other culprits are a greasy joint, a worn contact tip, or moisture in the liner. Clean the joint with acetone, replace the tip, verify the flow with a gauge, and screen the work area before changing anything on the machine.
Yes, using ER309L filler. The higher chromium and nickel content of 309L absorbs dilution from the carbon steel side and keeps the weld metal austenitic and crack-resistant. Watch for galvanic corrosion in service, especially outdoors or in wet conditions, and isolate or protect the carbon steel side where you can. The same dissimilar-metal logic applies across the shop, as the cast iron to steel welding guide demonstrates with a much less cooperative base metal.
Yes, you can weld stainless steel with a MIG welder, and if you set the job up correctly you should. MIG is fast, forgiving enough for a beginner, productive enough for production, and entirely capable of producing corrosion-resistant, structurally sound stainless welds that last as long as the base metal around them. The catch is that the machine is the least important part of the equation. A cheap welder with ER308L wire, a bottle of 98/2 argon-CO2, a clean joint, and a cool bead will outperform an expensive welder loaded with mild steel wire and straight CO2 every single time, and it will keep outperforming it for years in service.
Run through the checklist one last time before your next stainless job: stainless filler matched to the grade, argon-rich gas with CO2 kept low, dedicated cleaning tools, tight fit-up, settings tuned cooler than mild steel, short stitch welds with a low interpass temperature, a purge wherever the root will be exposed, and post-weld cleaning to remove tint. That is the entire method, and none of it requires a new machine or a decade of practice, only the discipline to treat stainless as its own material rather than as steel that happens to be shiny.
From the coffee bar frame with the orange freckles to a full kitchen build, the variable that decides whether the metal still looks and performs like stainless six months later is never the welder. It is the wire in the feeder, the gas in the bottle, and the heat you let into the joint. Get those three things right, and a MIG welder is not just capable on stainless, it is the most efficient tool in the shop for the job.