Begin with the right equipment and a clean workspace for welding. Always prioritize safety by wearing protective gear.
Welding can be a rewarding skill to master, offering opportunities for creative and structural projects ranging from art to infrastructure. As a beginner, the plethora of information available might seem overwhelming, but focusing on core techniques and best practices is key.
Ensuring your environment is prepped and understanding the type of metal involved sets the stage for a successful weld. Consistency in practice, coupled with knowledge of the materials and methods, will drive your proficiency. The welding community is vast, and numerous resources are at your disposal, from detailed guides to tutorial videos, all aimed at helping you lay strong, reliable welds as you begin this hands-on journey.
Getting Started
Embarking on your welding journey can be exciting yet overwhelming. Before the sparks start flying, grasping the basics sets a solid foundation. Today, let’s focus on the initial steps every novice welder should embrace.
Choosing The Right Welding Process
Welding comes in various forms, each suited to different tasks. Below, find a simplified breakdown:
- MIG Welding: Ideal for versatility and ease of use.
- TIG Welding: Perfect for precision on thinner materials.
- Stick Welding: Adaptable for outdoor conditions and sturdy metals.
Select a process that aligns with your project needs and comfort level.
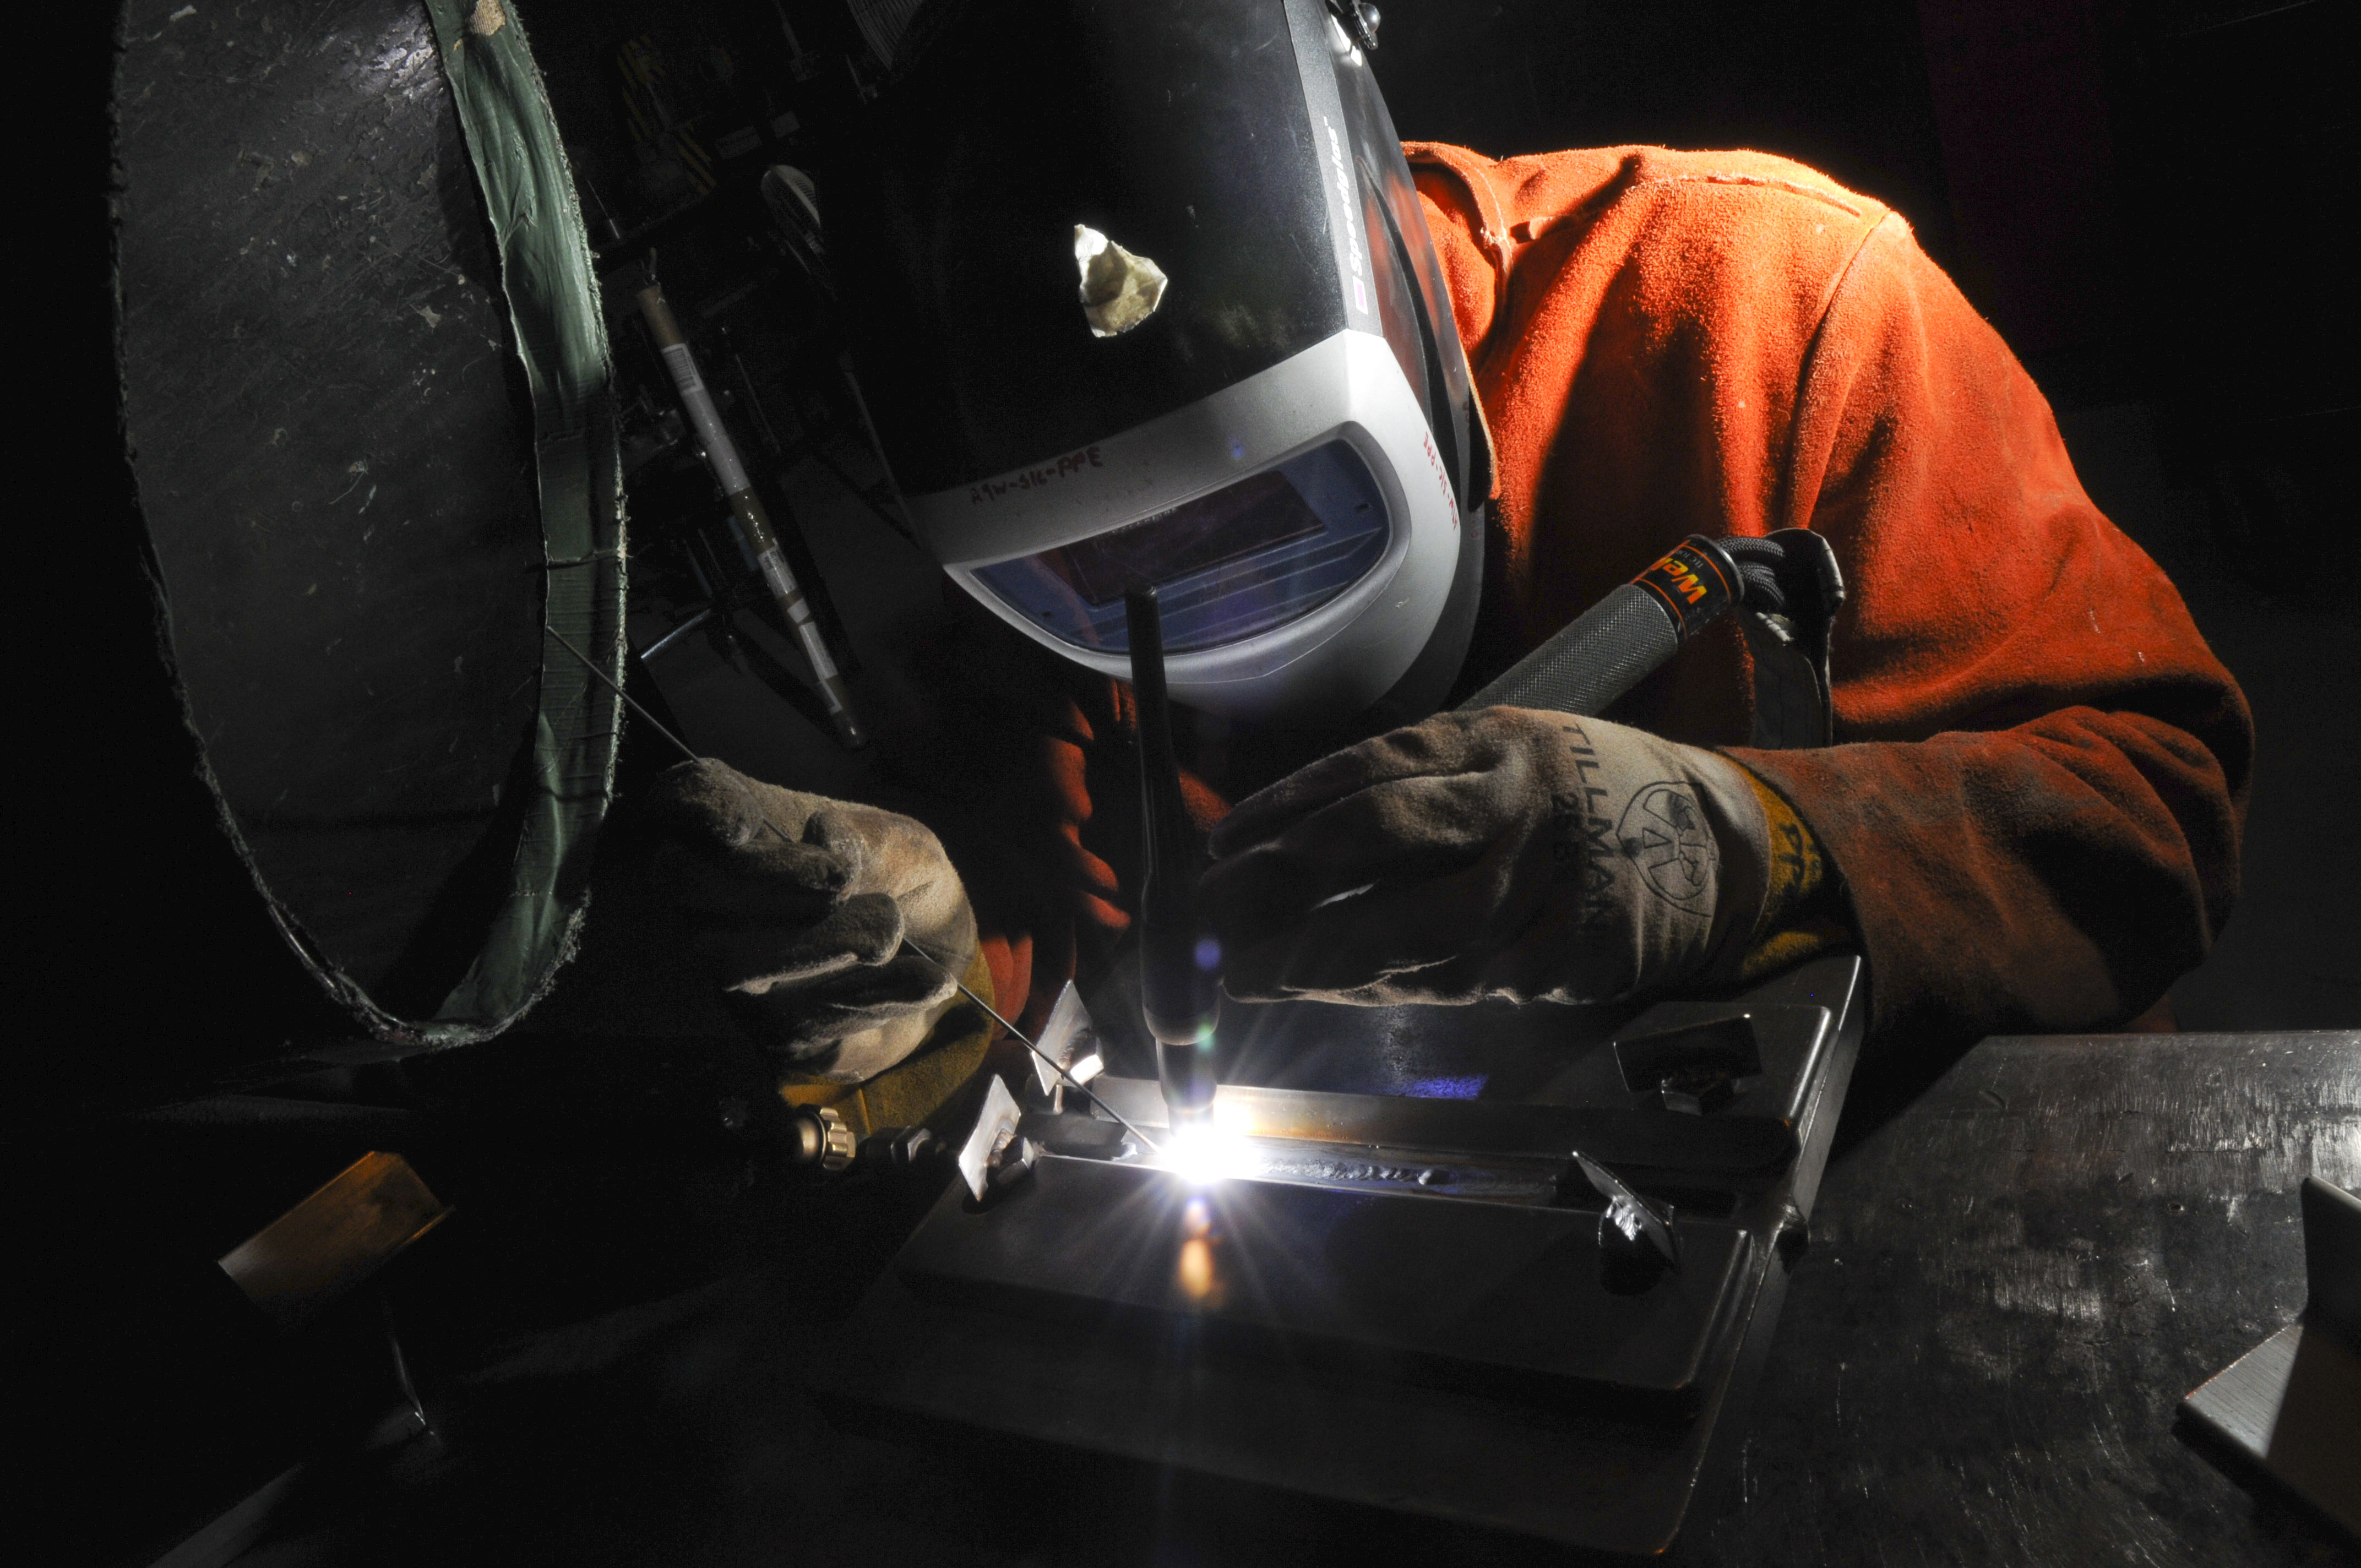
Selecting The Proper Safety Gear
Protection is paramount in welding. Ensure complete safety with the right gear:
| Gear | Importance |
|---|---|
| Helmet with Visor | Guards eyes and face from sparks. |
| Gloves | Shields hands from heat and cuts. |
| Apron or Jacket | Protects skin and clothing from sparks. |
| Boots | Covers feet against falling debris. |
Investing in quality safety equipment cannot be overstated. Prioritize comfort alongside protection to maintain focus on the task.
Understanding Metal Preparation
Before the sparks start flying, every good weld begins with metal preparation. Proper preparation is crucial. It’s the foundation for a strong and reliable weld. Let’s dive into the key steps for getting your metals ready.
Cleaning And Preparing The Metal Surfaces
Clean metal is a must. Dirt, rust, or oil can weaken your weld. Here’s how to prep:
- Remove surface dirt with a brush.
- Wipe oils away with a clean rag and solvent.
- Sand or grind off paint and rust.
After cleaning, your metals will have a shiny, bare surface. This is perfect for welding.
Using The Correct Filler Material
Using the right filler material is essential. It ensures your weld holds strong.
| Metal Type | Filler Material |
|---|---|
| Steel | Steel-based filler |
| Aluminum | Aluminum-based filler |
| Stainless Steel | Stainless steel-based filler |
Match your filler to your metal. This ensures compatibility and strength.
Mastering Basic Welding Techniques
Embarking on your welding journey opens a world of creative and practical possibilities. Whether planning to craft art or fix household items, mastering the basic welding techniques is crucial. This guide introduces fundamental practices that help beginners make strong, durable welds.
Setting Up Your Welding Machine
Before striking an arc, setting up your welding machine correctly is essential. Follow these steps:
- Read the manual: Every machine is unique. Knowing your equipment is key.
- Select the right electrode: Choose according to the metal type and thickness.
- Adjust voltage and amperage: Match these settings with the electrode and metal.
- Check gas and hoses (for MIG/TIG welding): Ensure no leaks and gas is flowing.
Proper setup promotes better weld quality and user safety.
Practicing Control Of The Welding Gun
Controlling the welding gun determines the weld’s strength and appearance. Try these tips:
- Steady your hand: Support your welding hand for smoother movements.
- Maintain proper speed: Move steadily for even bead formation.
- Hold the right angle: Typically, a 15 to 30-degree angle works well.
- Practice on scrap metal: Get comfortable with the welding gun before starting on actual projects.
Credit: en.wikipedia.org
Troubleshooting Common Issues
Stepping into the world of welding brings its share of challenges, especially for novices. In troubleshooting common issues, beginners might encounter problems such as spatter, slag, undercut, and burn-through. Let’s dive into effective methods for resolving these frequent headaches, ensuring a smoother welding journey.
Dealing With Spatter And Slag
Spatter and slag can be problematic, but worry not. Here are some fast fixes:
- Adjust Amperage: Lower the amperage if it’s too high.
- Check Gas Flow: Ensure proper gas flow and nozzle cleanliness.
- Use Anti-Spatter: Apply anti-spatter spray to prevent sticking.
After welding, let the work cool. Use a chipping hammer or wire brush to remove slag.
Avoiding Undercut And Burn-through
Undercut and burn-through are common but avoidable with these steps:
| Issue | Cause | Solution |
|---|---|---|
| Undercut | High heat or speed | Reduce travel speed, lower heat settings |
| Burn-Through | Thin materials or excess heat | Use lower amperage, increase travel speed |
Practice helps. Begin with scrap metal. This builds skill before tackling complex projects.
Exploring Different Joint Types
Welders join materials with different joint types. Each type serves a unique purpose. Beginners need to learn about them. Strong and reliable welding starts with knowing joint types. This guide dives into the most common joints.
Understanding Butt Joints
Butt joints are basic and common. They join two pieces end to end. Imagine two pipes lined up on the same path. This is what a butt joint looks like. Below are some key points:
- They are used for simple structures.
- They are often the first joint type beginners learn.
- Good for materials of the same thickness.
Remember to clean your material edges before starting. This ensures a cleaner and stronger weld.
Tackling Lap Joints And T-joints
Lap joints join two pieces that overlap. Think of stacking two coins. This is a lap joint. Let’s break down the essentials:
- Great for joining different thicknesses.
- Offers a larger weld surface area.
- Requires precision to avoid weak welds.
T-Joints resemble the letter ‘T’. One piece stands upright on another. Here’s how to handle them:
- Prepare the surface with proper cleaning.
- Ensure the upright piece is perfectly perpendicular.
- Weld both sides for strength.
With T-joints, focus on penetration to fuse the pieces solidly together.
Learning Welding Positions
Starting on your welding journey means understanding the basics of welding positions. Each position has its own techniques and challenges. Let’s dive into how you can master these fundamental skills for a solid foundation in welding.
Mastering Flat Position Welding
Flat position welding is great for beginners. It’s the easiest technique to learn. Here are some tips to perfect your skill:
- Keep the electrode at a 15-degree angle.
- Maintain a steady hand for straight runs.
- Control heat input to avoid burn-through.
Practice consistently on scrap metal. You will get the hang of it faster.
Grasping Horizontal And Vertical Welding
Horizontal and vertical welding positions are trickier. They require more skill and control. Follow these tips:
| Position | Tips |
|---|---|
| Horizontal |
|
| Vertical |
|
Remember to keep a steady pace and check your weld pool frequently.
Practicing Welding Safety
Welcome to the crucial topic of Practicing Welding Safety. As a beginner in welding, it’s vital to understand safety protocols. Welding can be hazardous without proper precautions. This section will guide you on how to stay safe and reduce risks. Follow these tips to ensure a safe welding environment.
Ensuring Proper Ventilation
Welding produces fumes and gases that can be harmful. To protect your health, adequate ventilation is necessary. There are several ways to achieve this:
- Work in a well-ventilated area.
- Use exhaust systems to remove fumes.
- Keep your head out of the fume plume.
Airflow in your workspace is essential. Make sure that you have either natural or mechanical ventilation systems in place.
Handling Welding Equipment Safely
Handling equipment with care is key. Here are steps to ensure your safety:
- Inspect equipment before use.
- Wear appropriate personal protective gear.
- Connect and operate machinery as instructed.
Always double-check connections and settings on your welder. Prevent accidents by following the manufacturer’s guidelines.
Understanding Welding Alloys
Welding is an art that fuses pieces into a single form. To excel, beginners must understand the metals they join. Alloys vary in behavior when heated. This section decodes the mystery behind welding alloys. Beginners can start their journey with confidence.
Grasping The Difference Between Steel, Aluminum, And Stainless Steel
Steel, aluminum, and stainless steel are distinct. Each responds differently to heat and welding techniques. Let’s unveil their unique properties:
- Steel is strong but can rust. Use with caution outdoors.
- Aluminum is lightweight. It’s tricky to weld but excellent for planes and bikes.
- Stainless steel resists rust well. It’s perfect for kitchen gear.
Knowing The Characteristics Of Different Alloys
Alloys differ in content. This affects your final welded product. Comprehend their traits and make smart welding choices.
| Alloy Type | Properties | Common Uses |
|---|---|---|
| Carbon Steel | Hard, prone to corrosion | Buildings, bridges |
| Alloy Steel | Varies, often tougher | Tools, pipelines |
| Aluminum Alloys | Light, conducts heat quickly | Transport, packaging |
Every alloy needs a specific welding approach. Match the method to the metal for strong welds. Gear up with this knowledge as you light your torch!
Exploring Diy Welding Projects
Are you ready to turn sparks into art? DIY welding projects fascinate many hobbyists. They combine creativity with skill. You transform simple metal pieces into useful objects. All you need are the right tools and some basic knowledge. Let’s embark on an adventure to create two beginner-friendly projects. These will refine your welding skills and produce functional pieces for your home or garden.
Creating A Simple Metal Shelf
Shelves are a staple in any home, offering storage and display space. With welding, custom metal shelves add an industrial charm to your decor. Begin with a simple, sturdy design.
- Select the metal frame material. Steel is a solid choice for beginners.
- Cut the pieces to size. A metal saw or grinder does this well.
- Prepare the edges for welding. Clean and bevel them for a stronger joint.
- Set up your welding machine. A MIG welder is user-friendly.
- Tack the pieces together. Check for squareness before full welding.
- Weld the seams completely. Smooth movements create even welds.
- Grind any rough spots. Aim for a smooth finish.
- Paint or seal the shelf. Protect your work and add style.
This project teaches the basics of metal cutting, preparation, and welding. Once complete, you’ll have a functional metal shelf. It’s perfect for books, plants, or decor items.
Building A Custom Garden Trellis
Enhance your garden with a custom trellis. It supports climbing plants. It also adds visual interest to your outdoor space. Crafting one is straightforward.
- Choose the design. Straight lines are simple and classic.
- Measure and cut the metal rods.
- Clean the cut ends. This is important for strong welds.
- Tack weld the rods into your design. Confirm alignment.
- Complete the welds. Aim for consistency in each joint.
- Let the trellis cool. Then, clean the welds once more.
- Finish with a rust-proof coating. Your trellis should last for years.
The trellis project is great for practicing vertical and horizontal welds. It also needs precise measurements and cuts. Once completed, it becomes the backbone for beautiful blooms.

Credit: www.amazon.com
Establishing A Welding Workspace
Entering the world of welding can be thrilling and challenging. A well-set space makes all the difference. Let’s dive into creating a safe and efficient welding workspace.
Setting Up A Safe And Functional Workspace
The right environment ensures safety and productiveness. Start with good ventilation. Keep fire extinguishers close. Ensure your space has proper lighting.
| Essentials | Details |
|---|---|
| Ventilation | Install fans or exhaust systems. |
| Fire Safety | Place fire extinguishers and blankets within reach. |
| Lighting | Use bright, overhead lights to illuminate the space. |
Organizing Your Welding Tools And Materials
Keep your tools and materials organized for easy access. Use labeled shelves and hooks. Separate your materials by type.
- Shelves for equipment: helmets, gloves, and jackets.
- Hooks for cables: avoid tangles and tripping.
- Dividers for metals: sort by size and metals.
- Label everything clearly.
- Maintain a clear workbench.
- Regularly check for wear and tear.
Maintaining Your Welding Equipment
Keeping your welding equipment in top shape is a must for any beginner. Well-maintained tools lead to better results and ensure your safety. This guide outlines essential maintenance tips.
Cleaning And Inspecting Welding Tools Regularly
Dirt and debris can affect your welding quality. Start with regular cleaning to avoid such issues. Here’s how:
- Unplug tools before cleaning.
- Use a wire brush for removing slag.
- Wipe external surfaces with a clean cloth.
- Inspect for damages or wear.
Don’t forget to check cables and connections. Any damage could cause poor performance or hazards.
Replacing Worn-out Parts
Over time, parts will wear out. Replacing them is key to continued performance.
| Part | Signs of Wear | Action Required |
|---|---|---|
| Nozzle | Build-up of spatter | Clean or replace |
| Contact Tips | Increased stick-out | Replace regularly |
| Gas Diffuser | Blocked holes | Inspect and clean |
Maintain a stock of spare parts to ensure quick replacements. This means less down-time.
Advanced Welding Techniques
Advanced Welding Techniques push the boundaries of joining metals to create stronger bonds and superior finishes. Beginners ready to level up can explore the precision of TIG and the versatility of MIG welding. Read on to discover how to enhance your skills through these sophisticated methods.
Exploring Tig Welding
TIG (Tungsten Inert Gas) welding, known for its cleanliness and control, requires patience and a steady hand. This method excels in thin metal applications and gives you a strong, clean weld. Here’s why TIG stands out:
- Fine control of the welding arc and heat input.
- No spatter or slag ensures a smooth finish.
- Welds a variety of metals, from aluminum to stainless steel.
Start by practicing holding the torch with a comfortable grip, and remember to maintain a consistent angle and distance from your workpiece.
Mastering Mig Welding
MIG (Metal Inert Gas) welding is preferred for its speed and ease of use. MIG makes welding thick materials effective and efficient. Key benefits include:
| Advantage | Explanation |
|---|---|
| Fast learning curve | Simple to learn, delivering quick progress. |
| Versatile | Suitable for many metals and thicknesses. |
| Continuous welds | Long welds without starting and stopping. |
Initiate with proper machine setup—select the right wire and gas, and adjust tension and feed rate. Perfect your technique by creating even, consistent beads on scrap metal.
Discovering Welding Resources
As a beginner in welding, knowing where to look for resources can transform your skills. Discovering Welding Resources guides you to the best online and community tools to sharpen your welding expertise.
Finding Quality Online Tutorials
Online tutorials are gold mines for learning welding. To start, focus on these tips:
- Search for reputable websites that specialize in welding techniques.
- Watch videos to see the welding process in action.
- Read articles from experienced welders for in-depth knowledge.
- Look for step-by-step guides that are easy to follow.
- Use platforms like YouTube for a variety of instructional content.
Joining A Welding Community
Getting involved in a community is vital. Here’s what to do:
- Join online forums to connect with other welders.
- Find local clubs or classes for hands-on experience.
- Share your work and get feedback from peers.
- Stay updated with new techniques and equipment.
- Participate in discussions to learn from diverse experiences.
Perfecting Welding Bead Appearance
When you are just starting with welding, the look of your weld bead matters a lot. A smooth, consistent bead not only shows off your skill but also means stronger welds. In this section, we’ll dive into two aspects that influence your welding bead appearance: the equipment settings and your welding technique. Let’s tackle these to get that perfect bead.
Adjusting Voltage And Wire Speed For Consistency
Making sure your equipment is set correctly is half the battle. Adjusting voltage and wire speed are crucial for a consistent bead. Here’s a simple guide:
- Higher voltage gives a wider, flatter bead.
- Lower voltage results in a narrower, taller bead.
- Wire speed must complement voltage for a smooth arc.
Experiment on scrap metal first. Adjust voltage and speed until you see a steady arc with minimal spatter. Use these settings as your starting point.
Focusing On Travel Speed And Arc Length
Your movement during welding influences the bead appearance significantly. Travel speed and arc length are vital:
- Moving too fast can lead to a narrow, rope-like bead.
- Slow movement might cause a bead that’s too wide and flat.
- A short arc length keeps the bead smooth and even.
- A long arc creates lots of spatter and a weak bead.
Remember, steady, even pace and short arc length make the best beads. Keep practicing to find the perfect balance.
By focusing on these adjustments and techniques, you’ll be on your way to creating beautiful, strong welds in no time. Remember, patience and practice are your allies!
Embracing Continuous Learning
Embracing Continuous Learning is the backbone of mastering welding. Whether you’ve just ignited your first torch or laid down a few beads, thriving in the welding world demands constant growth. This journey is about more than just joining metals; it unfolds with each spark, each bead, and every challenge conquered. Grasp every opportunity to absorb new skills, refine techniques, and learn from mistakes to become a welding wizard.
Seeking Feedback And Guidance From Experienced Welders
Building a strong foundation in welding starts with learning from those who’ve tread the path before. Seek out mentors who can provide constructive feedback on your work. Engaging with seasoned welders can lead to insightful tips that textbooks don’t cover. They can demonstrate the right techniques, point out errors, and suggest improvements. Join welding forums, attend workshops, and never hesitate to ask questions. Respect their guidance, and apply their advice with dedication.
Experimenting With Different Welding Techniques
No single welding method suits all tasks. Dive into the diverse world of welding techniques — each with its own merits. Start with simple projects to get a feel for various processes like MIG, TIG, or Stick welding. Always wear safety gear and work in a well-ventilated area to keep hazards at bay. Push your limits by experimenting with metals of different thicknesses and compositions. Here’s a brief look at what to explore:
- MIG Welding: Great for beginners and versatile across materials.
- TIG Welding: Requires precision, suitable for thin materials.
- Stick Welding: Ideal for outdoor jobs, works with rusty metals.
Testing out these methods will not only build your skills but also keep your work interesting. Each technique demands practice, patience, and persistence. Record your progress in a notebook or take photos to document your journey. Celebrate victories, learn from each bead run, and always strive for mastery.

Credit: www.facebook.com
Frequently Asked Questions On Welding Tips For Beginners
What Safety Gear Is Needed For Welding?
Proper safety gear for welding includes a flame-resistant jacket, gloves, eye protection with a proper shade, and a helmet with a full-face respirator. Always wear this gear to prevent burns, UV exposure, and inhalation of fumes.
How Do I Choose The Right Welding Rod?
Selecting the right welding rod depends on the material type and thickness, as well as the desired welding position. Generally, for beginners, a mild steel electrode, like an E6013, is versatile and user-friendly, suitable for learning basic techniques.
Can Welding Be Self-taught Or Are Classes Necessary?
Welding basics can be self-taught through online resources and practice. However, for comprehensive understanding and safety, formal classes provide structured learning and professional guidance, which is highly recommended for complete beginners.
What Is The Best Welder For Beginners?
The best welder for beginners is typically a MIG welder. It is easy to use, versatile, and has a more straightforward learning curve compared to TIG or stick welders. Consider models with adjustable settings to accommodate different projects as you learn.
Conclusion
Stepping into the world of welding can seem daunting at first. But with these essential tips, beginners can navigate the learning curve with confidence. Remember, practice makes perfect and safety is paramount. Keep experimenting with techniques and always seek knowledge to hone your craft.
Here’s to laying strong, skilled welds as you embark on this rewarding journey.