MIG Basics: The Complete Beginner’s Guide to MIG Welding (Setup, Settings & Technique)
Learn MIG basics from scratch: how GMAW works, machine setup, wire and gas choices, transfer modes, technique, troubleshooting…
READ ARTICLE →MIG welding is not inherently hard — it is widely considered the friendliest arc-welding process for beginners — but like any craft, it takes deliberate practice to turn “I made a weld” into “I make good welds consistently.”
The first time I ever struck an arc, I was seventeen, standing in a dusty garage, gripping a borrowed welder’s torch like it owed me money. My uncle, who had welded his living for thirty years, had handed me a pair of gloves, flipped my helmet down, and said the same five words every welding teacher eventually utters: “Just go for it.”
What happened next was educational in the most humbling way. The wire jammed, the arc spit, the weld looked like a line of frozen bird droppings, and I spent the next hour grinding my “masterpiece” back into blank steel. I walked away convinced that welding was a secret language with a steep tuition — payable in burned fingertips and ruined practice coupons.
Then something important happened. I learned that the pile of gray scar tissue I had produced was not a welding failure at all. It was a process failure: wrong wire speed, wrong voltage, wrong angle, and a total absence of what veterans call “reading the puddle.” None of it was about natural talent. All of it was learnable — and of all the welding processes a new person can start with, MIG (Metal Inert Gas welding, formally GMAW) is the one that forgives those mistakes fastest.
If you are reading this because you have been scrolling welder listings and asking yourself whether you are smart enough, steady-handed enough, or coordinated enough to do this — stop selling yourself short. You are about to learn what the easy and the hard parts of MIG welding actually are, how long the learning curve really takes, what it costs to get started, why some welds fail, and exactly how to practice so that your fifth practice bead looks nothing like your first. Let us settle the “is MIG welding hard?” question once and for all.
Short Note: MIG is generally rated the easiest arc-welding process to learn. A complete beginner can lay an acceptable bead on flat plate within their first session or two. Reaching “good enough to trust on a load-bearing project” typically takes a few weeks of regular practice; reaching genuinely professional-level consistency takes months to years.
The reason for the friendly reputation is simple: MIG automates the hard part. The machine feeds filler metal to you at a steady, selected rate. Your job is to move the torch smoothly, keep the arc length and travel speed consistent, and watch the puddle. Compare that to stick welding, where you must simultaneously hold a consumable electrode at the right height, feed it forward as it burns, and chip slag between runs — or TIG welding, where your non-dominant hand meters filler rod into a bath that you control with a foot pedal. MIG hands you a continuous wire and one job: steer it.
That does not mean MIG is effortless. The machine gives you the wire; it will not give you the feel. Bead shape, penetration depth, heat control, and the ability to weld in vertical and overhead positions all live in the hand and the eye. But the distance between “never welded before” and “produced a sound flat weld” is shorter in MIG than in any other arc process — which is why it is the standard entry point for both hobbyists and vocational students.
To judge how hard a skill is, you first need to know what the skill actually involves. Strip away the jargon, and MIG welding is a three-step dance.
It sounds simple because the process is simple in essence. The complexity is all in the details — amperage, arc voltage, wire speed, gas flow, travel speed, torch angle, and metal thickness all influence whether that third step produces a museum-grade bead or a weld that would embarrass a rusty gate.
Here is the essential kit, with what each piece actually does:
| Item | Role |
|---|---|
| MIG welder | Delivers controlled DC current and drives the wire feed |
| Welding gun + liner + contact tips | Guides wire and gas to the joint; the contact tip transfers current to the wire |
| Wire electrode (e.g., ER70S-6) | Consumable filler metal fed continuously from a spool |
| Shielding gas cylinder + regulator | Protects the molten puddle from contamination; flow set around 20–25 CFH |
| Ground clamp | Completes the electrical circuit through the workpiece |
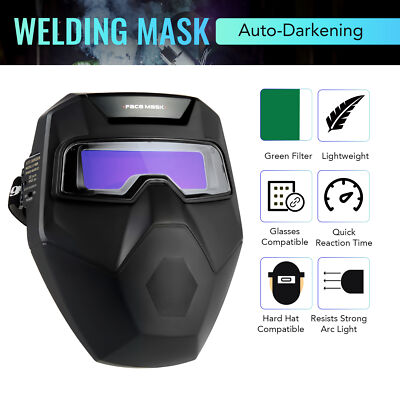
| Auto-darkening helmet | Protects eyes and face from arc light, UV, and spatter |
| Welding gloves, jacket, and boots | FR-rated protection from heat, sparks, and molten metal |
Quick Note: Do not buy the cheapest machine on the internet and expect a poor experience to teach you nothing — it will teach you a lot, mostly about frustration. Budget for a unit that supports the thickness of metal you plan to weld, has a reasonable duty cycle, and comes from a brand with documentation and parts availability. The gauge-of-wire / breaker basics and the breaker-sizing guide will keep you from tripping a main breaker on your first day, which is a surprisingly common rite of passage.
Every process has a personality, and MIG’s is “cooperative.” Here is what the friendly reputation is actually built on.
Stick welders must constantly maintain a precise arc gap as their electrode shortens. TIG welders must dip filler into the puddle with rhythm. MIG simply… feeds. As long as your trigger stays down, wire arrives at a constant rate. The machine is doing the most mechanically demanding part of welding for you. This single feature is why beginners produce recognizable welds within hours rather than weeks.
MIG transfers metal fast — welding short-circuit transfer at 5–10 inches per minute in the home shop, and 20+ IPM in spray transfer in production. Because the process is quick, minor hesitations and wobbles are averaged out over the bead’s length. You get time to react, and small mistakes don’t accumulate into a ruined joint the way they can in slower processes.
One MIG machine, with a gas change and a wire swap, can handle:
This versatility is why the situations where MIG shines are so numerous — and why learning MIG is such a high-return investment of practice time.
Good teaching psychology applies to welding: immediate feedback accelerates learning. In MIG, you hear and see results in real time. The sound tells you if the voltage-to-wire-speed balance is right (a steady “frying bacon” sizzle is the target). The bead shape tells you if your angle and speed are right. There is no waiting to chip slag to discover your mistake, as in stick welding — you see the evidence while the arc is still lit and can correct mid-weld.
Expert Insight: Vocational welding instructors consistently report that students starting on MIG build confidence faster and are more willing to experiment with angles, speeds, and settings — precisely because failure is cheap and visible. That confidence is the soil in which real skill grows. The American Welding Society (aws.org) publishes entry-level curricula built around this same assumption: warm the student up on a process that rewards attempt.
Now let us be honest about the hard parts. MIG welding does not demand razor-sharp dexterity, but it does demand three things that trip up beginners far more than coordination ever does: judgment, patience, and preparation.
1. Dialing in machine settings. Voltage and wire feed speed are the two controls that decide everything, and they must be set together for your material’s thickness. Too much wire speed and low voltage produces the “popcorn” stutter and spatter; too little feed and high voltage produces a thin, overheated arc that burns through thin metal. Learning to balance them — and to use your ears as a meter — is the first real breakthrough for every student.
2. Steady torch movement. Your travel speed and torch angle must hold steady across the entire joint. Nervous hands produce a washboard bead: wide, then thin, then wide. The good news is that this improves with repetition faster than most people expect — the hand learns the pace long before the brain does.
3. Reading the weld pool. Experienced welders do not watch the wire; they watch the puddle — the molten bath trailing behind the arc. Its shape, its shine, and its direction tell you instantly whether you are too hot, too slow, too fast, or aimed wrong. This is the single skill that separates “surviving” welds from “professional” welds, and it comes only from time under the hood.
What does “good” even mean for a weld? Four checkpoints, none optional:
Quick Note: If you think “visible inspection” is overkill for a hobby, remember that a weld failing silently is worse than no weld at all. A miscalculated joint can hold for weeks, then let go under load. Develop the habit of doubting your own welds — factually, with cutting discs — before you trust them.
Here is the encouraging truth, stated plainly: no. MIG was designed to be approachable, and the entire industry leans on that fact — new welders are routinely turned loose on MIG machines within their first week of vocational training because the process is safe to learn and quick to reward.
Let me save you weeks of trial and error by naming the three things that actually trip beginners up — and how to slide past them:
Technique is where “not hard” becomes “mastered.” Here is the ladder, rung by rung.
Pull (drag) vs. push. For most flat-position work on steel, a drag angle — the torch tilted back toward you, gun tip leading, angle about 10–15° — gives deeper penetration and is the beginner-friendly default. A push angle — torch tilted forward, away from you — gives a flatter bead and better visibility of the puddle, and becomes important on aluminum and in some production work. Learn the drag technique first, then train the push.
Work angle. On a butt joint, hold the torch perpendicular to the joint line (90°), tilted only in the travel direction. On fillet (corner) welds, split the angle evenly between the two plates at about 45°. Getting this angle wrong produces the classic beginner defect: a bead that climbs one plate and only wets the other.
Travel speed. Move at a pace that keeps the puddle roughly a fixed width. Too fast thins the weld; too slow bulges it. A useful mental model: the bead’s width should be about 1.5× the wire diameter for a typical fillet, and the ripple pattern should look uniformly spaced.
Stick-out. The exposed wire between the contact tip and the puddle should stay short — around 3/8 to 1/2 inch for solid wire in most positions. Long stick-out makes the arc unstable and adds spatter.
Pro Tip: Before welding your actual project, run three quick practice beads on the same material, same settings, and same position. Read them, adjust, run again. Ninety seconds of practice saves twenty minutes of grinding.
Once the basic bead is automatic, these four skills take you to the next level:
Short Note: None of these advanced techniques are gated by talent. They are all practiced motor patterns. The most accurate statement about MIG welding difficulty ever written is also the simplest: it is easy to start, hard to finish, and unlimited in the middle.
No honest discussion of “is welding hard” can ignore safety, because unsafe welding is not harder or easier — it is simply a different problem, and it is the one that leaves scars. The skill of safe welding is actually easy to learn; the discipline to apply it every time is the hard part.
Your body’s shopping list, with the reason for every item:
Quick Note: You can read every safety rule ever written, but habits are built in the first fifty hours, when your brain is still doing everything slowly and deliberately. That window is exactly when you should be obsessive about the checklist — before the routine makes you careless. The welding safety tips guide expands each of these into checklists you can print.
Half the battle of “is MIG welding hard” is simply knowing where beginners go wrong so you can avoid writing those particular lessons in your own skin. Here are the classics, with their fixes.
What it looks like: Excessive spatter, a stuttering “popcorn” sound, or a wide flat bead that barely penetrates. Cause: wire feeding faster than the voltage can burn it off (or vice versa). Fix: reduce wire feed speed a little, or raise voltage — change one at a time, listen for the even sizzle, and confirm on a test scrap. The settings charts give you a defensible starting point for any thickness.
What it looks like: Porosity (pinholes) in the bead, a dull gray finish, arc that sputters. Cause: rust, oil, paint, mill scale, or galvanizing contaminating the puddle. Fix: grind or wire-brush both surfaces to bare shiny metal for at least an inch beyond each side of the joint, and degrease with acetone or a similar solvent. Prep is not optional; it is where most “mysterious” weld defects actually live.
What it looks like: The bead climbs one side of the joint or runs unevenly. Cause: work angle not split evenly on a fillet weld, or a travel angle outside the 5–15° zone. Fix: re-check your geometry against the joint type before you pull the trigger, and consciously hold the angle through the whole pass.
What it looks like: Thin, incomplete welds (too fast) or tall, bulging welds with excessive heat input (too slow). Fix: set a count rhythm and practice on scrap until the bead width looks uniform; this is the simplest fix in welding and the most neglected.
What it looks like: Porosity appears mid-bead and you cannot explain it. Cause: gas flow wrong for the conditions (too low starves the arc of shielding; a draft can blow it away and cause porosity even at correct flow). Fix: set 20–25 CFH, keep the nozzle close to the work, and remove fans from the path — the argon pressure guide has the details.
Short Note: Notice the pattern: every common beginner mistake is a process mistake, not a talent mistake. None of them require a steadier hand than average. All of them require a more patient head.
If you want the honest shortcut, there is one: consistency and feedback beat raw hours. Ten focused hours beat forty unfocused ones.
Self-teaching welding works, but it is slower and it builds bad habits that are expensive to un-learn. Compress the curve:
Here is the most useful answer to “is MIG welding hard”: progress through projects of rising difficulty, and you will never hit a wall — only a staircase.
Completing even the Level 1 list is enough to prove — to yourself — that the “hard” reputation is mostly reputation. The Level 2 list is proof to employers.
“Hard” is a matter of skill; cost is a matter of budget — and knowing the full cost curve prevents the most disappointing version of the story: buying a welder you cannot feed.
A realistic first-year budget for a hobbyist setup looks like this:
| Item | Typical Range (entry–mid) |
|---|---|
| MIG welder (120V/230V hobby–prosumer) | $250 – $1,200 |
| Auto-darkening helmet | $60 – $250 |
| FR jacket, gloves, and misc PPE | $50 – $150 |
| Welding cart (optional) | $60 – $200 |
| Gas cylinder (purchase or deposit) | $100 – $250 deposit + gas |
| Approximate first-year total | $600 – $2,000+ |
That range is intentionally wide because consumer MIG machines span everything from suitcase-sized 120V units, adequate for 16-gauge sheet work, to 230V units that weld 1/4-inch plate in a single pass. Choose based on the thickest material you actually plan to weld most often, not the thickest you can imagine welding someday. The generator-sizing guide helps if you plan to take your machine off the grid, and rod-sizing logic applies to any stick-mode machine you buy.
The “cheap” part of welding is the machine; the recurring part is consumables:
Quick Note: The cheapest thing you can stock is knowledge. Purchasing a settings chart, a filler-metal chart, and a polarity cheat-sheet — three laminated cards — prevents more burned consumables than any tool in the box. The MIG electrode guide is a solid start.
Difficulty is relative, and the fastest way to appreciate MIG is to look at its siblings.
TIG (GTAW) is the precision prima donna of the welding world — and it is genuinely harder, in ways you now understand deeply: you hold a non-consumable tungsten torch in one hand, dip filler rod with the other, manage a foot pedal that varies amperage continuously, and control heat so precisely that a joint that is structurally perfect and cosmetically flawless is the minimum standard.
| Comparison | MIG (GMAW) | TIG (GTAW) |
|---|---|---|
| Filler delivery | Automatic via wire feed | Manual, fed by hand |
| Typical material range | Thick to thin, steel/stainless/aluminum | Thin sheet, exotic alloys, artistic work |
| Learning curve | Gentle — days to basics | Steep — weeks to basics, months to control |
| Bead control | Good, machine-assisted | Exceptional, entirely operator-driven |
| Speed | Fast | Slow |
If you are climbing from beginner to capable, MIG first and TIG second is the classic — and best — sequence. For the deeper “which one is stronger” question, the answer is nuanced and covered in is TIG stronger than MIG.
Stick welding runs on consumable coated electrodes, needs no gas bottle, loves outdoors and wind, and tolerates dirty metal like a champ. But it trades those assets for difficulty: you must maintain arc length by hand as the rod burns down, feed the rod forward, deal with slag cleanup, and stop to change rods mid-line.
The full trade-off analysis is in stick vs. MIG — but the short version for the difficulty question is: start with MIG indoors, keep a stick machine for field and rusty work.
Short Note: “Which process is easiest?” is the wrong question. The right question is “which process matches the conditions I’ll actually weld in?” Difficulty is contextual — the easiest welder is the one that fits the job.
Learning MIG is not only achievable — it is a genuinely marketable skill. The U.S. Bureau of Labor Statistics lists steady demand for welders across manufacturing and construction, with specialties and certifications commanding higher pay. Every entry-level welding job in the modern shop assumes basic MIG ability on day one.
If you are weighing it as a career, the realistic path is: learn MIG basics and stick, get a certification from an accredited program (AWS SENSE or a recognized vocational curriculum, both described at aws.org), then specialize — because specialized welders price above generalists. The most in-demand welding types article and the welding career guide go deeper into earnings and trajectory.
Every year, MIG welding gets more beginner-accessible, which is the best possible answer to “is MIG welding hard?” — the difficulty is shrinking.
Expert Insight: Industry research published through the American Welding Society and technical journals notes that the human skills that resist automation — joint access, judgment on dirty or variable material, and inspection-informed adjustment — are exactly the skills newcomers should practice hardest. The machine will get easier; the welder still has to matter.
A complete answer to “is MIG welding hard” includes an uncomfortable truth: it has an environmental footprint, and managing it is part of a responsible welder’s job.
MIG uses electricity for both the arc and the wire-feed drive motor — but modern inverter machines are significantly more efficient than the transformer dinosaurs of the past, converting 85–90% of input power into arc energy. Practical energy habits:
Quick Note: Welding’s greenest era is also its most productive: robots, pulse waveforms, and inverter efficiency mean more useful metal joined per kilowatt-hour than at any point in the trade’s history.
Yes — it is the friendliest arc-welding process to start with. The wire feed automates filler delivery, the arc is stable and forgiving, and a total beginner can usually lay an acceptable flat bead within the first couple of practice sessions. Full control over heat, position, and bead shape develops over weeks and months, but the barrier to entry is genuinely low.
A MIG welder (with gun, liner, and ground clamp), wire (e.g., ER70S-6), shielding gas and regulator (C25 for steel), an auto-darkening helmet, FR gloves/jacket, and a clean workspace with good ventilation. That is the complete beginner list — nothing exotic, nothing optional.
Basic competence — a clean, consistent flat weld on mild steel — typically arrives after a few practice sessions spanning a number of hours. Reliable positional welding (vertical, overhead) generally takes weeks to months of regular practice. Professional-level consistency, certification readiness, and all-position competence usually span 6–12 months of committed practice, with continuous learning forever after.
Heat management (warping thin metal, burn-through), gas coverage (porosity from drafts or wrong flow), and consistency (torch angle, travel speed, and the settings balance). The good news: every one of these is a measurable, fixable, learnable variable — none is a matter of inborn talent.
Process does not fix strength — procedure, material, and sound fusion do. A correctly made MIG weld is as strong as the base metal. The is MIG welding strong article deconstructs the tensile reality. What differentiates processes is where they fit: for speed and ease, MIG; for outdoor/dirty work, stick; for precision and thin exotic material, TIG.
No. MIG welding requires fine, controlled movement, not brute force. Anyone with average hand stability can learn it. The limiting factors are patience and willingness to practice — both of which are choices, not gifts. For more mindset perspective, what welding demands from people is an honest look at who thrives in the trade.
Seventeen-year-old me, staring at a ruined practice coupon, would not have believed that MIG welding would one day feel like a pleasant conversation between hand and machine. But that is exactly what it becomes — for everyone, without exception, who refuses to confuse “my first attempt was ugly” with “this is beyond me.”
Here is the final, honest summary. MIG welding is not hard to start. The machine feeds the wire, the arc is stable, and your first acceptable bead is likely within the first hour if your settings and prep are right. MIG welding is very hard to fully master. Puddle reading, positional welding, heat control on thin material, and the judgment to weld confidently on load-bearing parts take months of deliberate practice.
Both of those statements are true, and both are liberating. The first removes the fear that keeps beginners from ever striking an arc. The second removes the arrogance that lets intermediates stop learning. Between them lies a craft that rewards consistent effort more reliably than almost any skill you can learn in a garage.
So: buy the machine that fits your projects, set up your practice station, and strike an arc on clean scrap tonight. The sparks will be forgivable. The learning curve is shorter than you fear. And the day you cut open one of your own welds and see beautiful, full penetration — that is the day you will laugh at the question that brought you here.
One of the least-known but most useful facts in MIG welding is that the process is not actually one process — it is four different ways of transferring molten metal from the wire to the puddle, each selected by machine settings, and each appropriate for different work. Understanding the four modes explains why the same machine can feel utterly different from one job to the next, and why “MIG is hard” moments are usually “wrong transfer mode” moments.
At low voltages and wire speeds, the wire touches the puddle dozens of times per second, shorting the circuit and pinching off a droplet each time. The result is a low-heat, splattery-but-controllable process that works beautifully on thin metal — sheet steel, exhaust pipe, and automotive panels. This is what you will use for your first months of practice, and it is the most forgiving mode to learn on.
Quick Note: The steady crackle you hear in short-circuit MIG is the sound of drops detaching. If it turns into a frantic popcorn rattle, wire speed is too high for the voltage; if it turns into a smooth hiss, you have pushed into globular or spray territory unintentionally.
Raise voltage and wire speed out of the short-circuit window and the drops get large, irregular, and gravity-heavy — this is globular transfer. It spatters, it drips, and it generally produces the ugliest welds in the process family. Production shops avoid it because it wastes wire and time. The lesson for learners: do not camp in this range. If your welds suddenly turn into spatter factories, you are probably sitting in globular transfer — push through it to spray settings or drop back to short-circuit.
At higher voltages on argon-rich gas, the droplets become a fine, steady mist — spray transfer. The puddle becomes fluid, penetration is deep, and deposition is fast. Spray transfer produces the smooth, consistent production beads used in heavy fabrication. The catches: it requires argon in the shielding gas (not pure CO2), it runs hot, and it is almost unusable on thin sheet without burn-through. Spray transfer is where “MIG is actually easy” for the experienced welder — the arc practically welds itself — but only on work that tolerates the heat.
The modern star: the machine takes spray transfer and deliberately interrupts the current, pulsing between a high “peak” that detaches a droplet and a low “background” that lets the puddle cool. Net heat input drops dramatically while the smooth spray character remains. This is how modern machines weld aluminum, thin stainless, and root passes without burn-through — and why pulsed-MIG welding of other materials is covered in the aluminum shielding-gas guide.
| Transfer Mode | Heat Input | Best For | Learner Relevance |
|---|---|---|---|
| Short-circuit | Low | Thin sheet, all positions | Your first mode — practice here |
| Globular | Medium | Very little, really | Recognize and avoid |
| Spray | High | Thick plate, flat/horizontal | Production goal; needs argon |
| Pulsed spray | Low–medium | Thin gauge, aluminum, out-of-position | Modern machines; the future of MIG |
Expert Insight: Welding instructors use this four-mode framework constantly because it converts vague complaints (“my welds are ugly”) into precise diagnoses (“you’re in globular transfer on sheet metal”). Once you can name the mode you are in, the fix stops being guesswork.
If there is a single skill that compresses the MIG learning curve, it is learning to stop watching the wire and start watching the pool. Here is the crash course that usually takes beginners from “staring at the wrong thing” to “self-correcting in real time.”
Short Note: Most beginners hold their helmets too far away because they are afraid of the arc. Get the helmet shade right (#10–#11 covers most hobby MIG), put your face where you can genuinely see the pool, and the pool will answer questions faster than any book.
Your ears are an underused instrument. A healthy MIG arc is a steady, even sizzle. The moment you hear popping (wire speed high / voltage low) or hissing (voltage high / stick-out long), you have a live diagnostic without looking. Welding with your ears turns every practice bead into a self-correcting exercise.
Half the “MIG is hard” horror stories are really “I bought the wrong machine” stories. Here is how to buy the right one the first time.
Duty cycle is the percentage of a 10-minute window a machine can weld at a stated amperage before its thermal overload trips. A 20% at 90 A rating means 2 minutes of continuous welding per 10 — fine for practice, brutal for a project. Look for at least 20–30% at the amperage you expect to use most, and know that a machine’s realistic ceiling is lower than the marketing number.
Quick Note: Brands with documentation and spare parts matter more than sticker weight. A $250 off-brand that eats three drive wheels and two contactor boards in a year costs more than a $600 mainstream unit that runs for a decade. When in doubt, buy the machine you can service.

Abstract advice sticks better as a schedule. Print this, and in a month you will be welding competently on flat plate — the honest definition of “no longer hard.”
| Week | Focus | Daily Drill (20–30 min) |
|---|---|---|
| Week 1 | Setup + straight beads | Set up machine from checklists; run straight drag beads on clean 1/8″ plate; log settings; burn 1–2 hours total |
| Week 2 | Angles + fillet welds | Practice 45° work angle on T-joints; repeat same settings; begin listening for the sizzle; measure bead width |
| Week 3 | Heat control + thin metal | Move to 16-gauge; learn low-amperage settings and stitch welding; cut practice welds and inspect penetration |
| Week 4 | Position + a small project | Welding horizontal and vertical-up coupons; build your picture frame or stool using everything learned |
At the end of Week 4, cut a few of your practice welds open, etch, and stare at the cross-section. You will see the fused root — the visible proof that MIG is not hard. It is simply practiced.
Numbers cut through opinion. Here is what the data actually says about the process, the skill, and the industry — useful ammunition for your own confidence, and for every conversation you will have about “is welding hard.”
Short Note: If you take one number from this entire article, take this one: MIG basics take hours, not weeks, to learn. Every story of someone “just not being able to weld” is a story about the wrong settings, wrong prep, or wrong expectations — not about a missing gene.
Part of learning the craft is learning how to grade yourself honestly. These are the thresholds every beginner should recognize:
| Level | Sample Criteria | Next Step |
|---|---|---|
| Practicing | Bead is straight and consistent on flat steel; no obvious porosity | Move to fillet joints; try horizontal position |
| Functional | Fillet welds on sheet and angle hold without grinding after test | Tack the habit of setting changes + prep every time |
| Inspection-ready | Uniform ripple, full toe wetting, no undercut; passes the nick-break test | Get feedback from a certified welder or instructor |
| Certification-track | Consistent all-position welds that pass a formal bend test | Pursue an AWS certification through an accredited facility |
Pro Tip: “Good enough” is a moving target that should move up, not down. Never relax your requirement for uniform, full-fusion welds just because no one is inspecting. The welder is always his own first inspector — build the habit now, while being easy on yourself feels optional.