My garage door opened one April morning to a neighbor holding two halves of a steel gate he had backed a borrowed truck through. He had read online that a wire feed welder was the easy machine to learn on, so he had one of those small 110-volt boxes. Then he looked at the gas bottle, the regulator, the hose, and the sticker demanding argon mix, and he realized the “easy” path had a shopping list attached. That afternoon I went over with my own small wire feed machine — the gasless kind — and we patched his gate in a driveway with a breeze blowing, using flux core wire and nothing else. He was welding passably by the third rod spool later that month, and the whole setup never involved a gas cylinder. That is the story of welding with a flux core wire feed welder in one paragraph: the machine feeds a specially made tubular wire that carries its own shielding inside the wire itself, so you skip the gas bottle, you weld outdoors where wind would wreck MIG shielding, and you get deep penetration that surprises people who figure “no gas” means “weak.” Set the wire speed and voltage near the chart, drag the gun, keep a short stick-out, and you are running real welds an afternoon after unboxing.
Flux core is the process people usually mean when they say “I want a welder I can use without a bunch of accessories,” and it gets less respect than it deserves in the hobby world because beginners aim it wrong, set the polarity wrong, or expect it to look like clean MIG. It does not look like clean MIG — it throws a fair bit of spatter, it makes slag you chip off, and the bead has its own rugged character — but it is tougher where it counts. It bites into rusty metal that would make a MIG pass look like coral, it penetrates thick plate with fewer passes, and it does all of it without you carrying a cylinder that runs out on a Sunday. If your shop is actually a driveway, a trailer bed, or a muddy fence line, flux core is not the beginner compromise. It is the right tool, and the technique is learnable in a weekend if you do the setup deliberately and practice on scrap instead of your first real job.
This guide walks the whole path in the order it makes sense: exactly how flux core works and why it needs no gas, the advantages that make people pick it, the safety gear and working space you need before powering up, how to choose a machine that fits your power and your projects, a step-by-step setup you can follow with the panel open, dialing in voltage and wire speed for thin and thick steel, polarity and the other one-letter mistakes, the welding positions and how gravity changes your settings, angle and speed technique, how to read and fix the common problems, the maintenance routine that keeps a small machine alive, practice drills that turn into skill, and advanced moves for thin metal, thick plate, and awkward welds. There is a troubleshooting table in here you will want to print, a settings guide you will tape to the machine door, and an FAQ at the end for the questions every beginner actually asks. Read the setup sections with the machine in front of you and you will finish this article able to run a decent bead tonight.
Quick Note: If you are still deciding whether flux core is right for you rather than how to run it, check our what is flux core welding primer first — it frames the process against MIG and stick so the rest of this guide lands on solid footing.
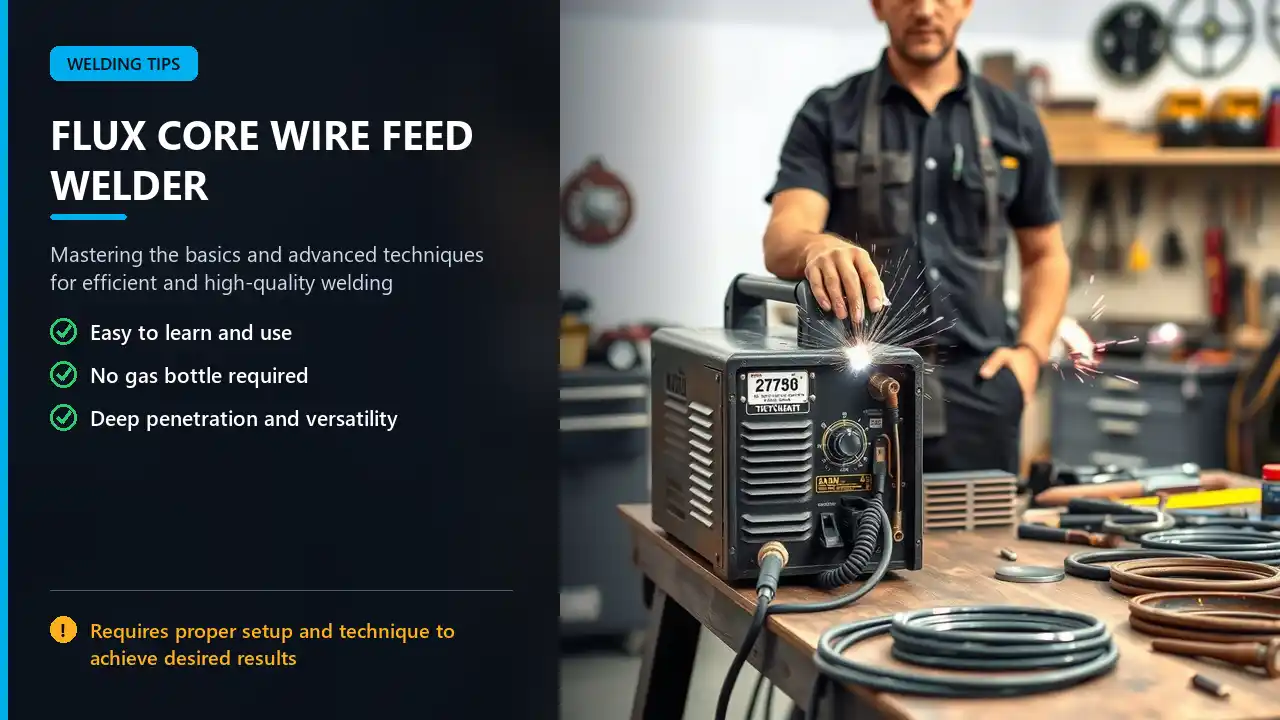
What Flux Core Wire Feed Welding Actually Is
Flux core wire feed welding — FCAW in the standards, self-shielded inside the wire itself — is a wire-fed arc process where the “wire” is a thin metal tube stuffed with flux powder. When the arc runs, the metal tube melts into the weld fill while the flux inside burns, releases shielding gas, and floats a layer of slag over the hot puddle. The gas shields the molten metal from oxygen and nitrogen in the air, and the slag protects it as it cools. Because the shielding is generated at the wire, you do not need an external bottle of gas. That single design decision is what makes flux core remarkably forgiving about wind, dirty metal, and remote locations, and it is what separates it from MIG in practice far more than in principle.
Self-Shielded Versus Gas-Shielded Flux Core
There are actually two flavors of flux core wire, and the difference matters at the checkout counter. Self-shielded flux core — the gasless type most hobby machines run — makes its own shielding entirely from the flux, needs no gas, and is the right choice for outdoor and outdoor-ish work. Gas-shielded flux core runs through the same style of machine but expects an external shielding gas, usually CO2 or an argon mix, and it rewards you with a smoother arc, less spatter, and cleaner beads — at the price of exactly the gas logistics the self-shielded version exists to skip. If the spool’s label does not say “gas shielded” or the package does not instruct you on gas selection, assume self-shielded and keep your wallet closed on cylinders. The confusion between the two is a classic beginner trap, and our comparison of flux cored arc welding versus MIG explains where each fits.
Setup responsibilities, in one breath: install the spool so it unspools the right direction, thread the wire through the drive roll and liner with the pressure adjusted, set polarity to match the wire (electrode positive for almost all self-shielded), pick a wire speed and voltage near the door chart, clamp the ground to clean metal, and keep a short stick-out while you drag the gun. Every variable except these is technique, and every one of these is a thirty-second check that pays off in bead quality.
Short Note: The slag blanket flux core leaves is not a flaw — it is the protection doing its job. When you chip it off after the weld cools, the shiny bead underneath is the proof the shielding worked. Welds with trapped slag, on the other hand, mean technique or cleanup issues, which we will fix later in the troubleshooting section.
Why Welders Choose Flux Core
Flux core earns its place in the shop not because it is the prettiest process but because it shows up for work in conditions that defeat other wire-fed methods. The advantages stack up into a list that reads like a features page for the real world.
| Advantage |
What It Means in Practice |
| No gas bottle |
Nothing to rent, refill, or run out of; the whole rig fits in the car |
| Wind tolerant |
The shield rides inside the arc, so breezes do not blow the protection away |
| Dirty metal tolerance |
Handles rust, mill scale, and painted surfaces better than solid wire |
| Deep penetration |
Reaches full fusion on thick plate in fewer passes |
| High deposition |
Lays down fill quickly, so big joints go faster |
| Beginners in one afternoon |
Simple setup, forgiving arc, self-correcting shielding |
Outdoor suitability deserves the headline. MIG depends on a gas shield that a stiff breeze can tear apart mid-bead; flux core carries its shield with it, so a fence line, a barn repair, or a trailer rebuild in the open parts of your yard simply works. That combination — portability plus wind tolerance — is why construction crews and farm welders treat flux core as a workhorse rather than a compromise. Are flux core welders any good captures the honest verdict from owners of small machines, including the quirks to expect.
Material tolerance is the second headline. Rust, mill scale, and thin coatings that would make a MIG puddle misbehave are far less of an event in flux core, because the flux is chemically chewing through contamination as it melts. Do not take that as license to skip cleaning entirely — clean metal always welds better — but it does mean a field repair on painted equipment is a real option instead of a gamble.
Deep penetration is the third. Flux core runs hot and pushes the puddle deep into the base material, so half-inch plate welds up with real throat, and thicker sections build quickly with multiple passes. On the flip side, that same hot arc is why thin sheet needs a gentle touch — more on that in the thin-metal section.
Important: “Self-shielded” means the arc is shielded; your lungs are not. Flux core produces fume like every process, and the self-shielded formulation generates more coarse fume than clean MIG. Weld outside or with real ventilation, keep your face out of the plume, and read noise into the picture too — a flux core session is loud enough that hearing protection belongs in the kit, not on the shelf.
Safety Gear and Environment Before the First Bead
Wire feed machines make welding look frictionless, and that is exactly when safety habits get skipped. Flux core is a hot, bright, fume-producing process, and it needs the same baseline of protection as any arc method — with spatter a little more enthusiastic than MIG thanks to the flux chemistry. The formal rules map onto a home shop without much translation; OSHA’s welding and cutting resources are the most readable primary source for what a safe welding spell actually demands.
| Gear |
Role in Flux Core Work |
| Auto-darkening helmet |
Shade 10–11 for typical flux core; blocks UV and IR from the arc |
| Safety glasses under the hood |
Eye protection for the moments the helmet is up |
| Leather or FR gloves |
Heat, UV, and the spatter that flies sideways |
| FR jacket or sleeves |
Sparks and UV off the torso and forearms |
| Heavy pants, no cuffs |
Cuffs catch hot BBs of spatter |
| Steel-toe boots, high top |
Dropped stock and hot slag |
| Ear protection |
The crackle of flux core is genuinely loud |
| Respirator or good ventilation |
Fume control indoors |
The Work Space, Made Safe in Five Moves
- Step 1: Clear a radius around the work of anything flammable — cardboard, rags, cans, gas cans — and keep a fire extinguisher within reach rather than within “somewhere.” If you want the definitive hot work fire guidance that professional facilities follow, the National Fire Protection Association publishes the standards that most local codes adopt.
- Step 2: Deal with ventilation before the first bead. Doors open, fan blowing across the work and away from your face, or a fume extractor indoors. Our are welding fumes toxic guide lays out the honest levels of concern.
- Step 3: Check every cable for cracked insulation and check the ground clamp bites bare metal with good pressure. The OSHA hot work standard 1910.252 covers these duties formally; the garage version is the same checklist without the paperwork.
- Step 4: Stand on a dry surface with the machine grounded through the work, and never leave the electrode holder touching anything while the welder is on.
- Step 5: Confirm nobody — kids, pets, visitors — can wander into the arc’s blast radius. UV burns from a distance and the flash is bright enough to startle a driver at your open garage door.
Beyond the arc itself, remember flux core might not be the only hazard in a repair job. Cutting off that rusty plate or grinding that painted beam throws dust, so eyewear and a dust mask belong in the same drawer you reach into for cover lenses. The NIOSH welding hazards resources pull together the whole picture, and they are worth a skim with a cup of coffee before your first real session.
Pro Tip: Keep a second, cheaper auto-darkening helmet with a passive shade as a backup. A dead battery at 6 p.m. on a Sunday repairs the moment you can least afford the trip to town, and a fixed-shade backup means the job waits for no one — see our best flux core helmets picks for models that balance cost and grind.
Choosing the Right Flux Core Machine
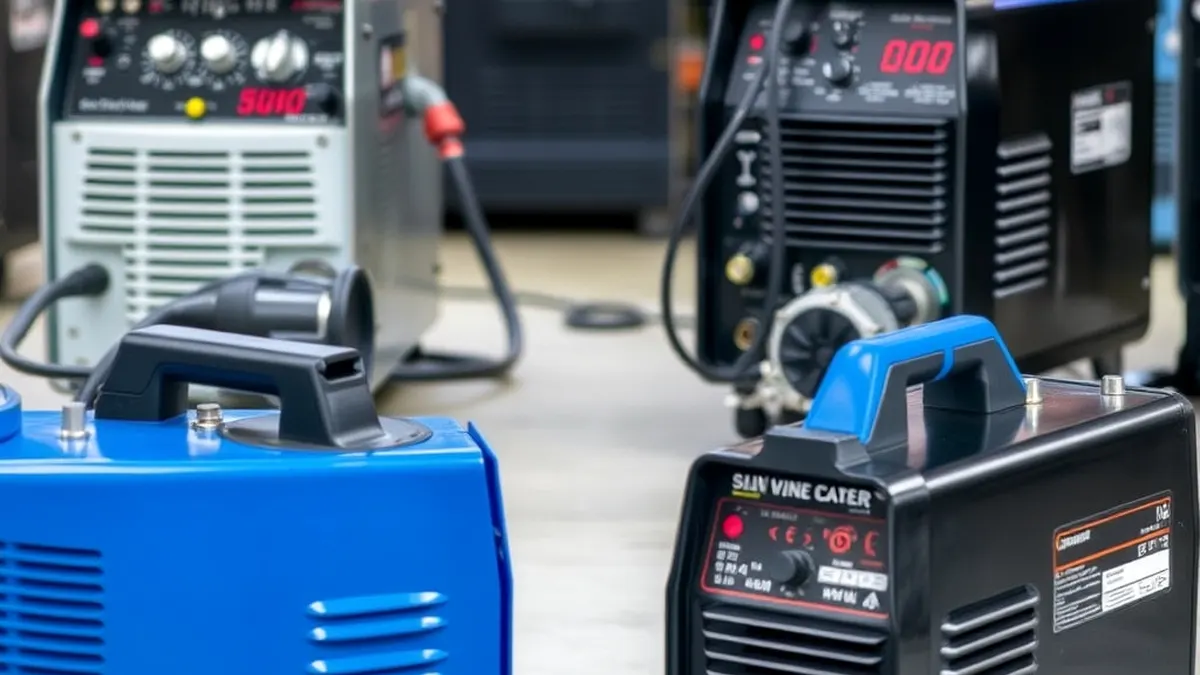
The market is stuffed with small wire feed boxes, and narrowing the field is easier once you translate the sticker numbers into what they mean for your power and your projects. Three specifications decide most of it: input voltage, amperage range, and duty cycle — plus the question of whether the machine also runs solid wire with gas later, if you ever want MIG on the same frame.
110V Versus 230V: Start With Your Outlet
Most home flux core machines are 110/120-volt units that plug into a standard garage outlet and land somewhere in the 90 to 140 amp range. They handle sheet metal, light angle, and fence work beautifully, and they are portable enough to take to the job. If your projects are consistently quarter-inch and up, or you want serious multi-pass muscle on thick plate, a 220/230-volt machine in the 180-amp-plus class gives you the headroom — but it wants a real circuit, and wiring one is a project of its own. Circuit sizing and electrical load basics are well covered by the US Department of Energy’s appliance and circuit guidance, which keeps the electrical planning side honest. Our best 110V flux core welder guide reviews the class most hobbyists should start with, and our welder outlet guide sorts out the receptacle and breaker questions before you spend money.
Amperage, Wire Speed, and Duty Cycle Decoded
Amperage sets your penetration ceiling — more amps push the puddle deeper and let you run bigger wire. Wire speed controls how fast filler is delivered, and it does the practical work of balancing a given voltage: too slow, and the arc burns back up the wire; too fast, and you are shoving cold filler into the puddle. Duty cycle is the percentage of a ten-minute window a machine can arc continuously before thermal protection kicks in. A 20-percent-duty 110V unit will happily run short farm repair beads all afternoon because you never sit on the trigger ten minutes straight; the number only bites if you run long continuous seams, where our duty cycle guide shows how to stretch a small machine.
Beyond the specs, the practical checklist: the drive system should accept both solid and flux core wire without drama (signaled by having a knurled or V-groove drive roll you can flip); the machine should include adjustable voltage and wire speed, not “on/off” single-setting semantics; and the gun should be comfortable in your glove for an hour. Then weigh portability against weight, budget against the features you honestly use, and brand reliability — reading owner experiences before you buy beats discovering a plastic part failure at Home Depot, which our budget welder sanity check handles with a straight face.
Short Note: Buy the machine that runs both gasless flux core now and gas MIG later if the budget allows, even if you never buy a cylinder this year. The multi-capability costs a little up front and means this same box takes you through your second milestone instead of a second purchase.
Setting Up the Machine, Step by Step
Setup is where flux core beginners earn or lose their afternoon. Do it deliberately once, and every future session starts with a two-minute confidence check instead of a puzzle.
- Step 1 — Power off and unplug. You are about to open the panel and thread wire; the machine must be dead. Push the gun trigger to discharge any stored charge before reaching in.
- Step 2 — Install the spool. Match the spool to the hub, and spin it to check the wire direction. Most machines want the wire feeding off the bottom or per the diagram printed inside the panel. Wrong direction means the wire birdnests the moment you press the trigger.
- Step 3 — Route the wire. Using the guide tube, run the wire over the groove of the drive roll, through the liner past the tension roll, and out toward the gun. Snip the leading end square with a good cutter — a bent or burred tip will hang up inside the liner.
- Step 4 — Set drive roll tension. Tighten just enough that the roll turns the wire with a light slip only on a stall. Over-tightening flattens the wire into a ribbon shape that causes eat-and-stop feeding; under-tightening lets the spool’s momentum overrun and the wire kinks in the liner. Our look at drive rolls for flux core wire details the groove profile issue — a knurled roll for gasless wire versus a V-groove for solid.
- Step 5 — Set the contact tip and gun liner. Use the wire size the tip is stamped for, and confirm the liner inside the gun matches the wire size. A .030 liner resists .035 wire and you will chase feeding problems all night.
- Step 6 — Reassemble the panel and set polarity. Flip the machine’s polarity, usually by reversing the gun and work leads at their terminals inside, so the gun runs electrode positive (DCEP) for gasless flux core. This polarity detail is the first thing that breaks beginners, and it gets its own section below.
- Step 7 — Trim the wire and connect everything. Cut the wire sticking 3/8 to 1/2 inch past the nozzle, install the nozzle, connect the ground to clean metal, and you are ready to set dial numbers.
Pro Tip: If the wire binds the first time you feed, do not fight it — pull the spool, inspect the liner entrance, and re-slug. Pushing a jammed wire harder only packs the tangle in deeper, and the ten-minute teardown to recover a bird’s nest is the classic flux core initiation.
Dialing In Voltage and Wire Speed for Different Materials
The numbers on the chart inside your machine’s lid are starting points, and with flux core they are usually close enough to get you to a decent puddle on the first or second try. The skill is knowing how to read the bead and nudge one dial at a time from there.
| Material Situation |
Wire Speed Direction |
Voltage Direction |
Technique Emphasis |
| Thin sheet (18–20 gauge) |
Lower |
Lower |
Short stitches, steady pace, close stick-out |
| Light angle and tubing (1/16–1/8 in) |
Mid range |
Mid range |
Steady drag, normal speed |
| Plate and thick stock (1/4 in+) |
Higher |
Higher |
Slower travel, deeper penetration, multi-pass as needed |
Start with wire speed near the chart mark, then listen. Flux core has an unmistakable sound profile: a steady, crisp crackle — a “frequency” that buzzes in a regular rhythm — means you are in the zone. If the arc sounds sputtery and the wire stubs into the puddle with little pauses, speed it up. If you hear a sharp hissing crackle and the puddle flattens dangerously, slow the feed or lower the voltage. Adjust one dial at a time, run a test coupon, and re-evaluate; changing both at once tells you nothing.
Voltage does the shaping, wire speed does the feeding. Turn voltage up and the bead flattens and widens as the puddle gets hotter and more fluid; turn it down and the bead narrows and peaks. Wire speed supplies the filler that the voltage melts. The pair that makes the puddle wet out smoothly with a soft hissing crackle and minimal spatter, leaving a bead lying about three wire-diameters wide with blended toes, is your home setting for that thickness. Tape the winning numbers to the machine — our full grid of flux core welding settings and the companion amperage chart give you starting cells for every common material and wire size, plus the flux core wire speed and voltage chart for shop-time reference.
Test runs are not optional. Whatever the manual suggests, spend two minutes on scrap of the same thickness before the real joint. Confirm the wire speed and voltage, the ground, and your glove-up, then transfer the setting to the actual work. That habit is the entire difference between “my flux core welds bad” and “my flux core welds great but my technique wobbles once a month.”
Quick Note: Track humidity for your wire too. Gasless flux core wire absorbs moisture from humid air, and wet wire shows up as porosity that no setting tweak fixes. Keep spare spools in a sealed bag or cabinet, not hanging on the machine for six months.
Polarity: The Detail That Breaks Beginners
If your flux core welds come out spattery, shallow, and stubbornly weak no matter what the dials say, the probability is that the polarity is backwards. Solid-wire MIG runs electrode negative (DCEN) on most machines. Self-shielded flux core runs electrode positive (DCEP) — the gun positive, the work negative. Swap them and the process still arcs, because wire feed machines do not refuse to work backwards; they just weld badly. Beginners frequently spend a whole evening “fixing” settings that were never the problem.
Why does polarity flip the result? With the electrode positive, the arc’s heat concentrates at the wire tip, which superheats the consumable and maximizes melt-off, while the flux gets the energetic environment it needs to do its shielding and cleaning job. With it negative, the wire melts slower, the filler arrives cold, and the puddle runs shallow and miserable. The wire’s label almost always states the polarity it wants; the machine’s terminal marks say what is what. Obey both. Our flux core polarity guide digs into the “how do I flip it” mechanics for the common machine brands, and it is worth reading before your first setup so the panel already makes sense.
Important: When you later switch the same machine to solid wire with gas for MIG, you will reverse the polarity back the other way. Use a permanent marker to label the inside of the panel: “gasless = electrode +, gas = electrode –.” Ten seconds of labeling has saved more than one welder from an evening of phantom troubleshooting.
Welding Positions and How Gravity Changes the Job
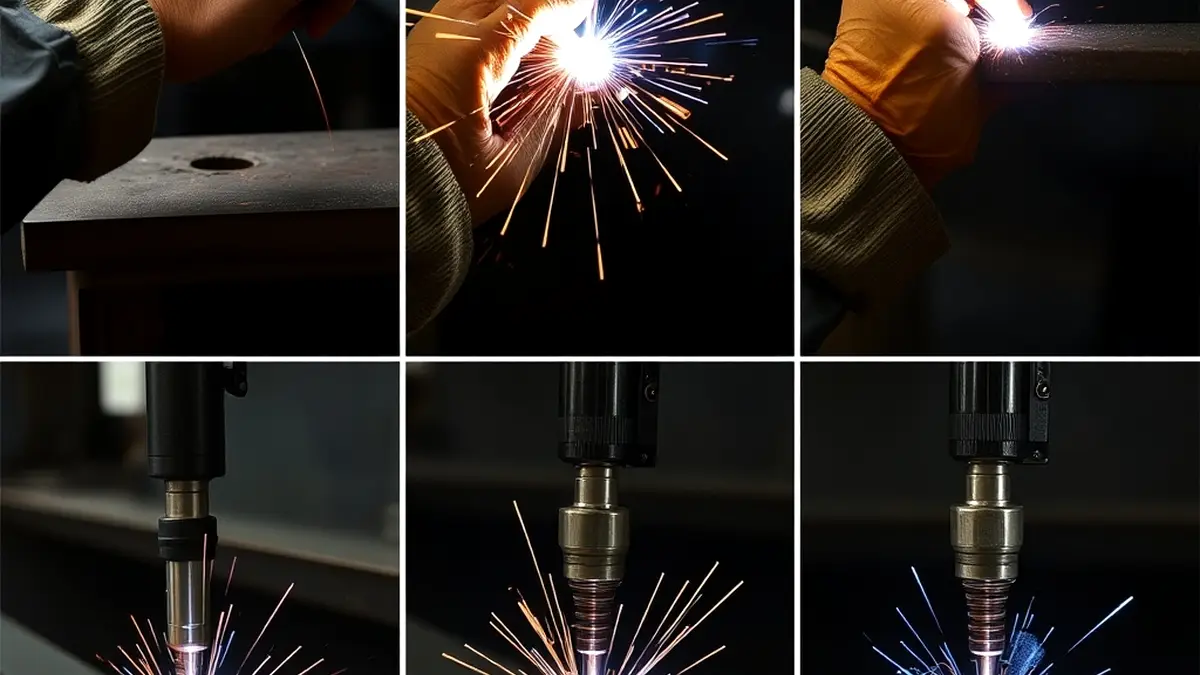
Flux core will weld in every position, but it behaves differently under gravity in each one, and your settings should follow the position rather than the joint alone. The general rule: the further the puddle is forced to fight gravity, the more you back off the heat and the more you lean on short, deliberate technique.
| Position |
Penetration Strategy |
Settings Bias |
Watch For |
| Flat (1F/1G) |
Let gravity seat the puddle |
Chart settings as-is |
Excess spatter from long stick-out |
| Horizontal (2F/2G) |
Tilt slightly up into the joint |
Slightly lower |
Puddle sag and undercut at the top toe |
| Vertical down |
Fast, thin sheet friendly |
Lower heat, faster travel |
Lack of fusion from chasing the puddle |
| Vertical up |
Slow, strong, thick plate |
Reduce heat 10–15%, weave or step |
Sagging and undercut from excess heat |
| Overhead |
Short, quick, low heat |
Lowest heat of the session |
Spatter falling, drips and icicles |
Flat Is Home Base
Learn flat first, with the puddle settling into the joint the easy way. This position is where you tune your machine, build your rhythm, and learn to read puddle shape without fighting gravity. Run pad beads on plate until the crackle is steady and the bead width is predictable, then graduate to joints with the same setting.
Vertical and Overhead: Respect the Goop
Going vertical, the puddle stops being your friend and starts trying to run downhill. Vertical down is fast and works on thin sheet, but it can under-fuse because the arc trails the puddle — save it for the light stuff. Vertical up is the strong technique for thickness: cut the heat, use a slight weave or a step up, and let each puddle freeze as a shelf to build the next one on. Horizontal runs straight along a vertical wall, and the puddle sags toward the lower plate, so aim slightly up into the joint and keep moving. Overhead turns everything into a fight: lowest heat, short stitches, and full PPE because everything lands on you. For flux core-specific numbers, our vertical up settings and horizontal settings charts give starting values.
Short Note: Every position is a technique conversation first and a settings conversation second. If a position welds badly, resist the urge to immediately rewrite the dials — run it again with cleaner technique, and only then make a single small adjustment.
Angles, Speeds, and Tip-to-Work Distance
Once the machine is honest, the weld quality lives in your hands across three numbers: travel angle, work angle, and stick-out distance. Flux core specifically rewards a drag technique — pulling the gun, not pushing — because dragging points the flux at the weld behind the arc and keeps the shielding over the puddle it just created.
Travel angle: tilt the gun 10 to 20 degrees backward from perpendicular along the line of travel, dragging. Too flat an angle shoots the arc ahead of the puddle; too steep causes spatter and poor penetration. Ten to twenty degrees is the perpetual comfort zone.
Work angle: this is the gun’s angle across the joint. A butt joint runs at roughly perpendicular; a fillet and a T-joint split the difference at 45 degrees so both legs fill equally; a lap joint aims slightly into the bottom plate so the top edge melts and ties in.
Stick-out — the forgotten number: the length of bare wire between the contact tip and the work. Flux core likes about 3/4 inch, longer than MIG’s 3/8-to-1/2 inch, because longer stick-out lets the flux get hot and do its shielding job. Too short and the tip buries into the puddle; too long and the wire ball-up starts spattering. Practice holding that distance by feel and the weld quality jumps immediately.
Travel speed follows the puddle, not the metronome. The right speed keeps the puddle about two to three wire diameters wide with clean edges. Too slow, and the puddle grows, the bead goes convex, and slag traps; too fast, and the bead narrows into a rope with poor edge fusion. If you find yourself yanking the gun, drop the heat instead of racing it; if the bead piles up, lift your pace slightly rather than cranking voltage. Our push versus pull technique guide explains why the drag habit is so central to flux core specifically.
Quick Note: The short-circuit “crackle” of flux core is your ear telling you stick-out and heat are matched. A soft, rhythmic buzz is the healthy sound; a harsh spitting crackle and heavy spatter mean long stick-out or too much voltage; a dull stubbing sound means wire too fast or heat too low. Learning the sound profile converts your ears into a free instrument.
Techniques for the Common Joints
Each standard joint asks for a tiny variation on the same drag theme, and most beginners only need the joint-specific paragraph to make their welds go from “smear” to “structural.”
| Joint |
Technique |
Common Beginner Error |
| Butt |
Drag steadily along the seam; keep work angle perpendicular |
Gunning with the seam and blowing through thin edges |
| Lap |
Aim slightly into the lower plate so the top edge melts and ties in |
Parking the arc on the thin top edge and melting it away |
| T-joint and fillet |
45-degree work angle, small weave to fill both legs evenly |
One leg cold and under-filled, arcing only the center |
| Corner |
Steady drag into the corner, moderate speed, watch for burn-through |
Overheating the thin corner edges first |
Butt joints reward patience with speed control. Keep the arc on the seam center, let the puddle wet both edges, and on thicker plate run a filler pass after a root pass instead of trying to fill a V in one horizontal swipe. Lap joints are the field favorite because they are fast and forgivable, but the top piece’s edge is thin — point the arc at the bottom plate and let the puddle climb up and wash over the edge, or you melt a channel out of the top sheet. T-joints and fillets want that 45-degree split so the weld legs are equal; if the joint has a gap, a soft weave settles filler into both sides. Corners meet two edges that burn through eagerly, so run hot enough to fuse but fast enough not to melt the whole corner away.
For every joint, the puddle is the instructor: if it is round, bright, and wets the edges of the joint on both sides, hold what you are doing. If it is V-shaped and digging a groove in the base metal, something — heat, angle, or speed — is out of tune. Stop welding with your eyes on tomorrow; weld the puddle you can see today.
Pro Tip: On a gapped joint, do not try to go faster to “get over it.” Lower the wire speed a touch, shorten the stick-out, and drag slightly slower so the puddle has time to bridge the gap with real metal instead of a thin skin.
Common Problems and How to Fix Them
Flux core failure modes are a short list, and once you know the sound and the look of each, diagnosis is quick. The table below is the print-and-tape version.
| Symptom |
Most Likely Causes |
The Fix |
| Heavy spatter and popping |
Long stick-out, voltage too high, dirty metal |
Shorten stick-out to 3/4 in, drop voltage, clean the joint |
| Wire stubs into the puddle |
Wire speed too high for the voltage |
Raise voltage or lower wire speed; listen for steady crackle |
| Weak, shallow, spattery beads |
Wrong polarity (wire negative) |
Flip the leads so the gun is electrode positive |
| Porosity and pinholes |
Wet wire, long stick-out, wind if gas-shielded |
Dry wire storage, re-trim stick-out, block wind for gas-shielded |
| Slag trapped in the weld |
Cold weld, tight weaves, poor interpass cleaning |
More heat, wider weave angle, chip and brush each pass |
| Wire stops feeding mid-weld |
Flat drive roll for solid wire, tip burrs, kinked liner |
Knurled roll for gasless, new tip, check liner path |
| Burn-through on thin stock |
Heat too high for the material |
Lower voltage, faster travel, short stitches with cooling pauses |
| Arc wanders or hunts |
Bad ground, contaminated tip, loose connections |
Clean and tighten the ground clamp, replace the tip |
Troubleshooting discipline beats guess-and-check. Read the table in order: when spatter explodes, confirm polarity first, then stick-out, then voltage — in that sequence, because polarity is free to check and voltage is the last thing you should drift from your base. If the bead looks cold and stacked like a thread of taffy, increase heat in one notch and re-run. If you are chasing porosity, suspect the wire before you suspect the machine; a humid garage turns even premium flux core spools into a hole factory within a season. Our flux core troubleshooting guide expands each row into a full chase, and the spatter-specific fixes live in our spatter reduction tips article. The professional reference libraries from Lincoln Electric publish the same troubleshooting logic in technical format, which is a useful second opinion when your own diagnosis stops making progress.
Handling cold, inconsistent settings: if beads alternate between beautiful and rotten within the same session, the wire tension or the ground has drifted. Re-tension the drive roll with the trigger pressed, re-clamp the ground to a fresh bright spot, and mark where your favorite settings sit so drift is visible. Five minutes of consistency checks every session eliminate ninety percent of the “flux core is so inconsistent” complaints you hear from people who never check either.
Important: Never chase a volatile weld by holding the trigger longer. If the arc is misbehaving, release, inspect, fix the cause, and start again. Earning two bad inches of weld teaches you more cheaply than grinding out six inches of it.
Maintenance That Keeps a Small Machine Alive
A flux core welder is a simple machine whose death is almost always slow neglect: a flattened drive roll, a caked liner, a worn tip, a tired ground. The maintenance list is short, and it takes longer to read than to do.
After Every Session: Clean
- Step 1: Unplug and let the machine cool completely before touching anything internal.
- Step 2: Clean spatter off the nozzle and pick the spatter out of the contact tip bore.
- Step 3: Wipe the liner entrance and guide area with a cloth; sticky flux dust is the top cause of random feed jams.
- Step 4: Inspect the drive roll for the flattening that comes from running too much tension, and replace the contact tip if the bore is oval or the arc keeps wandering.
- Step 5: Store wire spools sealed in a dry spot and throw the desiccant packet back in the box.
Monthly and Seasonal: Inspect and Replace
| Item |
When to Look |
Action |
| Contact tip |
Every few hours of arc time, or when the arc wanders |
Replace — they are cheap and buy bead quality |
| Drive roll |
When wire feeds erratically or shaves |
Match the groove to the wire and replace a worn roll |
| Liner |
Annually, or after a wire bird’s nest |
Blow it out with compressed air; replace if kinked |
| Gun cable and power cord |
Every session, a glance |
Replace cracked insulation immediately |
| Ground clamp |
When the arc is unstable |
Tighten spring, clean jaws, replace a tired clamp |
| Settings |
After moving the machine |
Re-verify against your taped chart |
Gas-shielded flux core machines add a gas-side item: check the regulator and hoses for leaks each session by watching the cylinder pressure with the gas off overnight, and keep an eye out for the solenoid sticking. Otherwise the maintenance picture is identical — the beauty of a wire feed box is that 90 percent of its failure modes live in three replaceable parts: tip, roll, liner.
Quick Note: Keep a small ziplock of spares in the machine case: two tips, a spare drive roll, a length of liner, and a spare nozzle. When the job is halfway and the tip is gone, the spare in the pouch is worth more than the best Online order with three-day shipping.
Practice Drills That Actually Build Skill
Flux core skill does not come from watching; it comes from running beads with intent. These drills, in order, are a proven ladder for a beginner on a gasless machine, and each one isolates a single skill so you can see improvement in one session.
Stepping On: The First Five Drills
- Drill 1 — Pad of stringers. Run straight parallel beads across flat plate, 2 to 3 inches long, spaced a bead-width apart. Score: consistent width and straight line.
- Drill 2 — Stitch and stop. Run a bead, stop mid-plate, restart with a slight overlap, and compare the tie-in quality. This trains the restart that repairs and long seams constantly demand.
- Drill 3 — Butt joint clean. Two coupons, a 1/8-inch gap, and one pass that fuses both edges without undercut. Score: penetration visible from the back of a thin coupon.
- Drill 4 — Lap joint wash. Overlap two sheets and aim into the bottom plate so the top edge wets in cleanly. Score: no melted-out top edge, even wash.
- Drill 5 — T-joint fillet. Two coupons at right angles, 45-degree work angle, equal legs on both sides. Score: leg lengths match and toes are clean.
Leveling Up: Drills That Separate You From the Pack
Once the pad beads are flat and joints behave in flat position, push yourself: vertical up on plate with a weave, testing the freeze-and-step rhythm; overhead laps in short stitches with full PPE, learning to read a puddle against gravity; and groove filler passes, taking a beveled joint and closing it with multiple passes, chipping and brushing between each one so the final weld is sound, not just pretty. If you run a six-week program of pad, joints, positions, and groove work, you will have what passes for a semester of flux core technique in a garage. Our practice at home plan packages these into weekly sessions with a supply list.
Pro Tip: Photograph every drill sheet at the end of the session, face-down in the same light. Side-by-side, the progress from week one to week six will be dramatic, and the self-evidence is the strongest motivation there is.
Advanced Techniques for Difficult Work
Flux core is versatile, but the hard jobs — thin sheet, thick plate, windy pads, awkward reach — need slightly different tactics from the same drag technique.
Thin Metal Without Holes
Thin steel is the flux core beginner’s nightmare because the process runs hot. The fix is a two-part attack: settings and heat management. Drop both voltage and wire speed to the bottom of your range, tighten stick-out to deliver the heat exactly where it belongs, and weld in short 8-to-12-millimeter stitches rather than one continuous hissing pass. Let the metal cool between stitches — the heat soak alone burns more thin sheet than any dial mistake. If you are patching sheet metal, our sheet metal flux core guide is the deep-dive companion, and the same heat logic appears in our body panel guide.
Thick Plate: Multi-Pass, Not Muscle
On half-inch-and-up plate, do not fight the machine to fill the joint in a single enormous pass. Bevel the edges, run a root pass, chip and brush the slag, drop it into the filler passes, and let the weld build in layers. Interpass cleaning is non-negotiable — slag left between layers becomes inclusions that show up when the weld is tested. Multiple passes, each with clean bright condition and good fusion, are how a 110V machine produces a joint that looks like far bigger equipment made it.
Windy Sites and Awkward Angles
Self-shielded flux core shrugs off wind that MIG cannot survive, but extreme gusts still deserve a wind break — a piece of plywood, a tarp, even the body of a pickup — so the immediate area around the joint stays calm. For awkward angles and cramped corners, slow everything down: shorten your stitch length, lower your expectations per pass, and use a mirror or a phone propped safely to see the puddle where your head cannot reach. Strapping a cheap work light to the work area helps more than almost any other tool at the hard-to-see jobs.
Precision habits that compound: keep the wire spool lightly braked so it does not overrun; clean the nozzle before every new weld on a long job; and verify your weld after every pass rather than at the end — catching one bad seam while the part is still hot and reachable beats discovering it six hours later. Accuracy on flux core is made of those small, unglamorous repetitions, and the flux core tips library collects them into a single reference.
Short Note: If a weld site is so cramped you cannot hold a sane travel angle, that is the signal to reposition the work — turn the part, flip it, or clamp it differently — rather than weld with your wrist bent backwards. Fighting the position is how good welders in bad positions produce bad welds.
Wire Selection: Diameter, Type, and Getting It Right
Flux core wire is not one thing. The spool shelf carries a small constellation of diameters and formulations, and picking the wrong one costs you a whole session of fighting a feed system or a bead that refuses to behave. Diameter and type are the two decisions, and both have real logic behind them.
Diameter first, because it decides everything downstream. The two sizes that matter to hobby machines are .030-inch and .035-inch. The .030 wire is the thinner of the pair and it is the default choice for 110-volt machines: it needs less heat to melt, it feeds cleanly through small guns and liners, and it suits the sheet metal, angle iron, and light tubing that dominate garage work. The .035 wire carries more filler and runs better on 230-volt machines and heavier work — quarter-inch plate moves faster and fills wider gaps — but on a 90-to-140-amp box it is usually more wire than the machine can melt at a civil pace, which translates into stubbing and a cold, ropey bead. A good rule of thumb: if your machine runs 110 volts or your thickest regular job is under 1/4 inch, run .030 and stop second-guessing. Round out the decision with our .030 versus .035 flux core wire breakdown, which compares the two on actual machines.
Type second, and mind the label. The core differences worth knowing: self-shielded wire (gasless, your outdoor and general-purpose performer), gas-shielded wire (the smoother-bead cousin that wants CO2 or argon mix), and specialty wires for stainless and aluminum that swap the chemistry for specific base metals. The self-shielded/gas-shielded split matters at the machine — gas-shielded wire run gasless welds terribly, and self-shielded wire with gas attached is a waste of the cylinder. Our flux core wire types guide sorts the catalog into a usable map, and the best flux core wire picks narrow the shopping list to the spools hobbyists actually praise.
Storage beats shopping. Whatever you buy, flux core wire is a food-moisture sponge. A spool left open on a humid workbench picks up water that vaporizes in the arc and shows up as porosity — the pinhole factory that makes welders blame their machine for a wire that has been inhaling garage air for months. Keep spare spools sealed in their packaging or a cabinet with a desiccant pack, and treat a suspicious spool with a quick test bead before a real joint. A dollar’s worth of test wire is the cheapest insurance in the shop.
About the “can I use MIG wire?” question that haunts every forum: solid MIG wire has no flux core, and on a gasless machine it produces an air-hardened, porous disaster because there is nothing to shield the puddle. It will not work as a substitute, full stop. The reverse is also true — flux core wire fed through a solid-wire V-groove drive roll slips and shaves because the roll is cut for a different profile. Match the wire to the machine and the roll to the wire; our can you use MIG wire in a flux core welder article walks the whole compatibility maze with a straight answer.
Quick Note: Buy wire by the pound thinking “test coupons are part of the budget.” The first spool buys your practice; do not ration it like it is liquid gold, because the fastest path to skill is spending wire on pad beads you do not feel precious about.
Flux Core Versus Its Cousins: Where It Fits
Half the battle of learning flux core is knowing what it is not. Compare it honestly against solid-wire MIG and stick, and you will understand both its strengths and its limitations — and you will stop expecting it to behave like the other processes.
| Situation |
Flux Core |
MIG (solid wire) |
Stick |
| Windy outdoor work |
Excellent — self-shielded |
Poor — gas blows away |
Excellent |
| Smooth bead appearance |
Good, with slag to chip |
Best looking as-welded |
Depends on your rhythm |
| Learning curve |
Gentle with gasless |
Gentle, but gas logistics |
Steeper, discipline-heavy |
| Portability |
High — no cylinder |
Medium — cylinder rides along |
Highest — a box of rods |
| Dirty metal tolerance |
Good |
Poor |
Good |
| Light sheet metal |
OK with low heat |
Smoother with proper settings |
Hard — rods are blunt instruments |
Against MIG, flux core trades cosmetics for logistics. Gas MIG gives you the cleanest, least-finicky bead, and it is the better process for thin sheet and decorative work where appearance matters. Flux core answers back with wind immunity, no bottle, and real forgiveness on rust — which is why field welders keep a gasless machine behind the seat and MIG on the bench. Read the matchup in depth in our flux core versus solid wire and flux cored versus MIG comparisons.
Against stick, flux core is the comfort version of the same virtues. Both processes tolerate wind and dirty metal and both penetrate deeply; stick does it with a rod you hold at exactly the right distance, while flux core does it with a trigger you can learn in an afternoon. New welders overwhelmingly prefer the wire feed comfort, and the bead control you build with flux core transfers directly to the day you pick up a stinger. If the choice is genuinely between the two for your first welder, our stick versus flux core guide settles it by project type rather than marketing.
The honest caveat: flux core has a learning ceiling on pretty work. If your goal is show-piece thin stainless or aluminum, the process will frustrate you sooner than MIG with gas and TIG do, and the industry standards’s flatter statement — the ones the American Welding Society codifies — reflect that flux core is a joining workhorse rather than a finishing process. Choose it for what it is excellent at: strong, real, outdoor-capable welds on steel, fast.
Pro Tip: If you own a flux core machine now but eventually want MIG, buy wire and drive rolls accordingly when you switch, flip the polarity back, and keep your existing machine — most small dual-capable boxes run both with a gas kit. One machine, two personalities, zero new power wires.
Frequently Asked Questions About Flux Core Wire Feed Welding
What is flux core wire feed welding?
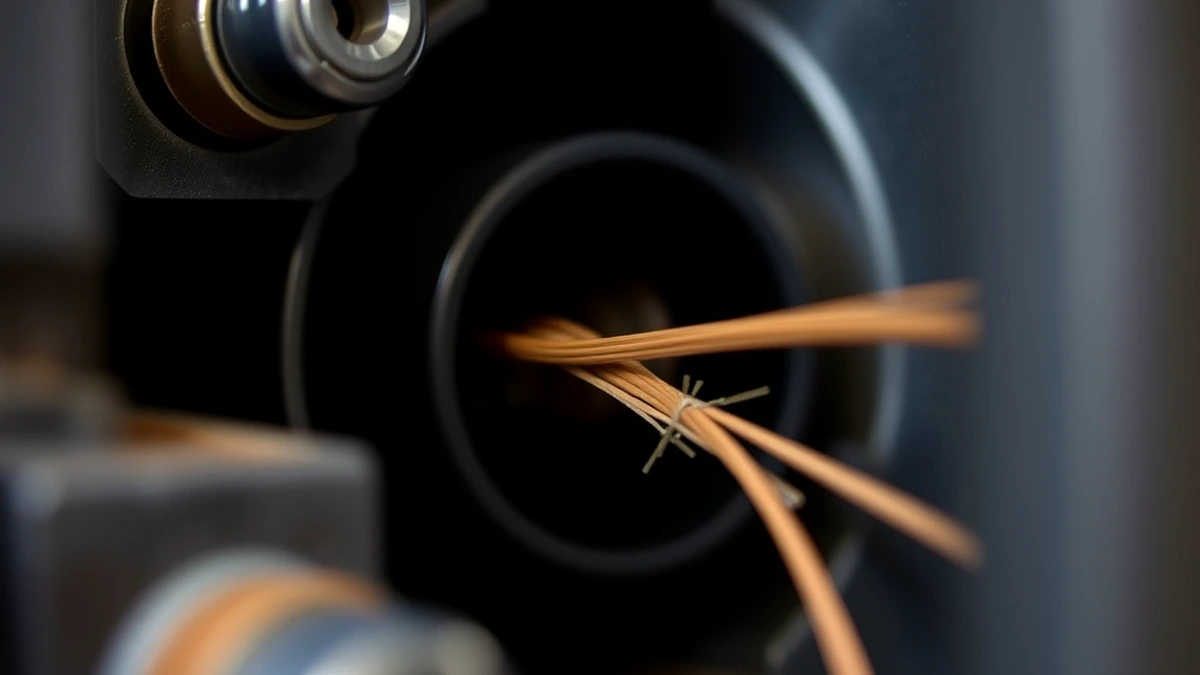
It is a wire-fed arc welding process using a tubular wire packed with flux. When the arc melts the wire, the flux generates shielding gas and floats a protective slag over the puddle, which removes the need for an external shielding gas bottle. The self-shielded version runs outdoors in wind that would ruin MIG.
Can you weld thick metal with flux core?
Yes, and it is one of flux core’s strengths because it penetrates deeply. On half-inch plate, bevel the edges and run multiple passes with slag cleaned between passes rather than trying to fill the joint in one heroic bead.
How do you set up a flux core welder?
Unplug it, install the spool with the wire feeding the right direction, thread the wire through the drive roll and liner with a clean square cut, set drive roll tension, flip polarity so the gun is electrode positive for gasless wire, connect the ground, trim stick-out to about 3/4 inch, and set voltage and wire speed near the door chart using a scrap test to fine-tune.
What safety gear is recommended for flux core welding?
A shade 10–11 welding helmet with safety glasses underneath, leather or FR gloves, an FR jacket or sleeves, heavy long pants with no cuffs, high-top steel-toe boots, ear protection, and a respirator or strong ventilation for fume control. The process is loud, bright, and spattery, so the kit is not optional.
Does flux core need gas?
The self-shielded wire used by gasless machines does not — the flux inside the wire creates the shielding. A separate category of gas-shielded flux core wire does want external gas, so read the spool label. If it does not say gas-shielded, assume self-shielded and skip the cylinder.
Why is my flux core weld full of spatter?
Work through the list in order: verify the torch is electrode positive, shorten stick-out to 3/4 inch, drop voltage a notch, clean the metal, and confirm the drive roll matches the wire so feeding is steady. That sequence resolves the overwhelming majority of spattery sessions.
Conclusion: Your Afternoon-and-Beyond Plan
Welding with a flux core wire feed welder is the fastest way to real, load-bearing, outdoor-capable welds on a small machine, provided you respect the four pillars: setup, settings, technique, and maintenance. Fit the spool and polarity right and the machine behaves; set voltage and wire speed near the chart and the puddle lies down; hold a 10-to-20-degree drag with 3/4-inch stick-out and the bead cleans itself; chip, brush, and inspect and the machine – and the next weld – stay honest.
Tonight’s first move is cheap either way. Open the side panel, feed a fresh spool if the current one has been exposed to humidity, confirm the polarity on the label, and run three pad beads on scrap at the door-chart settings. Write down what you changed and what happened. Twenty minutes of that deliberate repetition will teach you more than another twenty minutes of scrolling, and by the weekend you will have a machine you trust instead of one you negotiate with.
Give yourself the gift of absolutely terrible first welds recorded in a notebook. Every veteran’s best metal came off the end of a spool that once laid a bead like a smear of warm toothpaste. Clean the joint, set the dials, drag the gun, and let the flux do its quiet work. A season from now you will be patching trailers, building gates, and quietly enjoying that you never needed a gas bottle to make it happen, and you will understand why the wind never once got a vote.