Arc Welding for Dummies: The No-Nonsense Beginner’s Guide to Your First Weld
Arc welding for dummies made simple: processes, gear, safety, settings, first-weld steps, common mistakes and fixes. Start welding…
READ ARTICLE →Derek had done everything right, he was sure of it. The new 220V flux core welder was on sale, the dryer outlet in the garage was already there, and the conversion plug he’d bought was exactly three dollars. First session: beautiful beads on 1/4″ plate for twenty minutes — then the lights in half the house blinked, the breaker panel clicked, and silence. His wife’s question from the kitchen (“what did you plug into?”) was fair. His answer (“the welder — it’s rated for 20 amps”) was technically true and completely missing the point, because the number on the welder’s label describes what it asks for at full output while it’s welding, which is not the same as what it pulls the moment it starts, not the same as what it pulls averaged over an hour of intermittent use, and not the same as what any random household circuit happens to be able to give.
That gap — between the number on the label and the reality in the panel — is where most welder power questions live, and it’s a genuinely useful gap to close. Whether you’re sizing a circuit before buying a machine, wondering why the bill moved after a weekend of garage work, figuring out what generator will run your welder at the campsite, or just trying to understand what “140 amps at 60% duty cycle” implies about electricity consumption, the answers all come from a handful of clean physical relationships. Watts, amps, volts, and kilowatt-hours are not arbitrary paperwork numbers — they’re measurements of energy moving through a system, and once you can do the arithmetic in your head, every power question about welding becomes answerable in under a minute.
This guide walks the whole path: what the units actually mean (without the textbook fog), how welding machines convert wall power into arc power and where the losses go, what different machine classes really draw in amps and watts, how duty cycle changes consumption from instant to average, how to calculate what a welding session costs in actual dollars, how to size breakers, outlets, cords, and generators without guesswork, and the handful of safety rules that keep a welding circuit from becoming an electrical story of the wrong kind. By the end, the label on your machine will read like a sentence instead of a slogan.
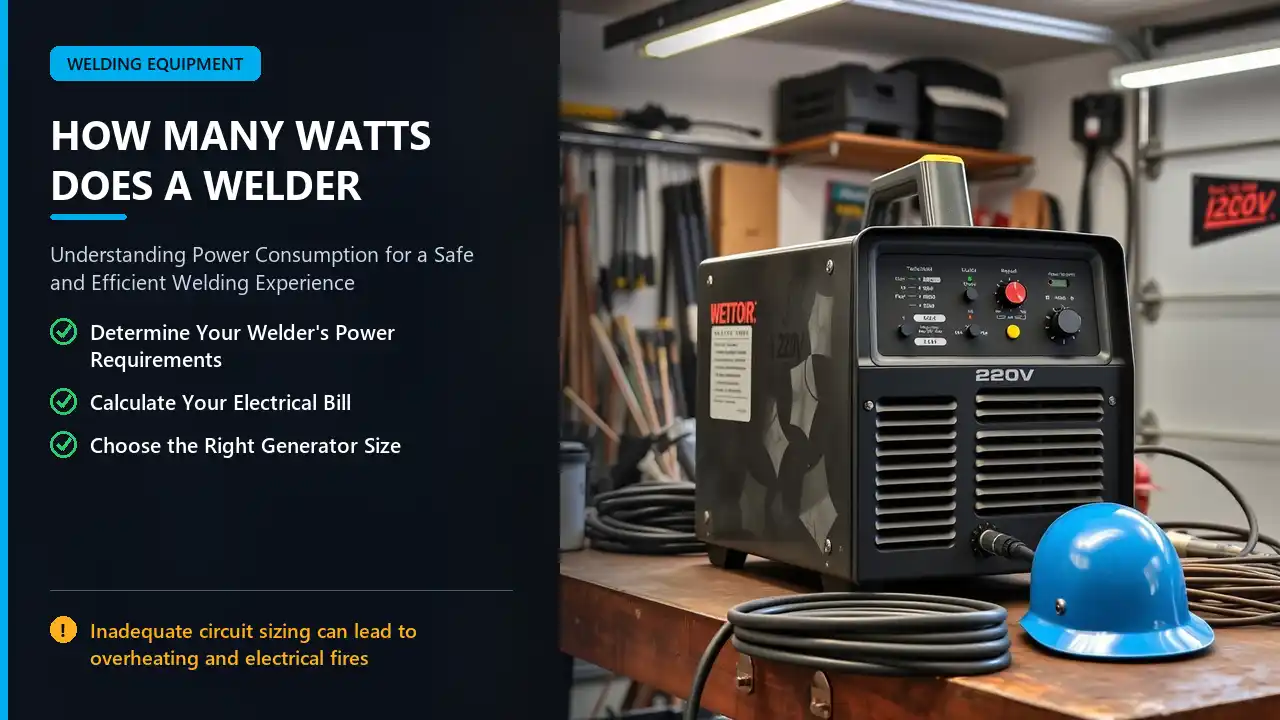
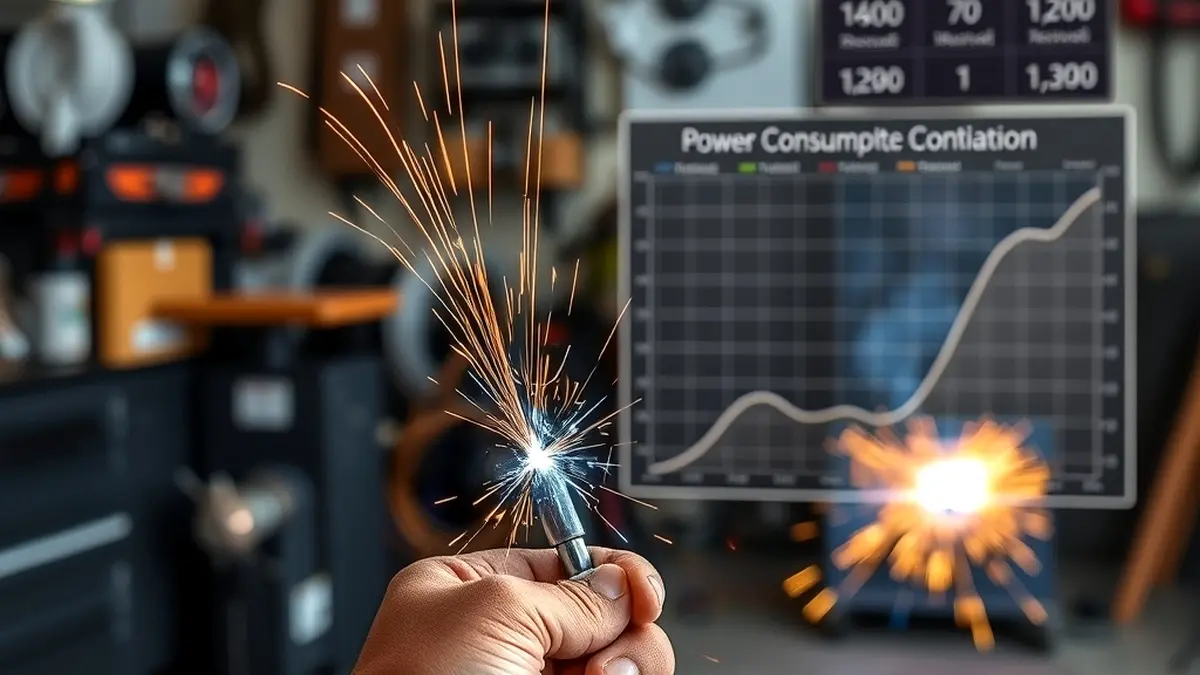
With the summary framed, start at the foundation: what these units actually measure.
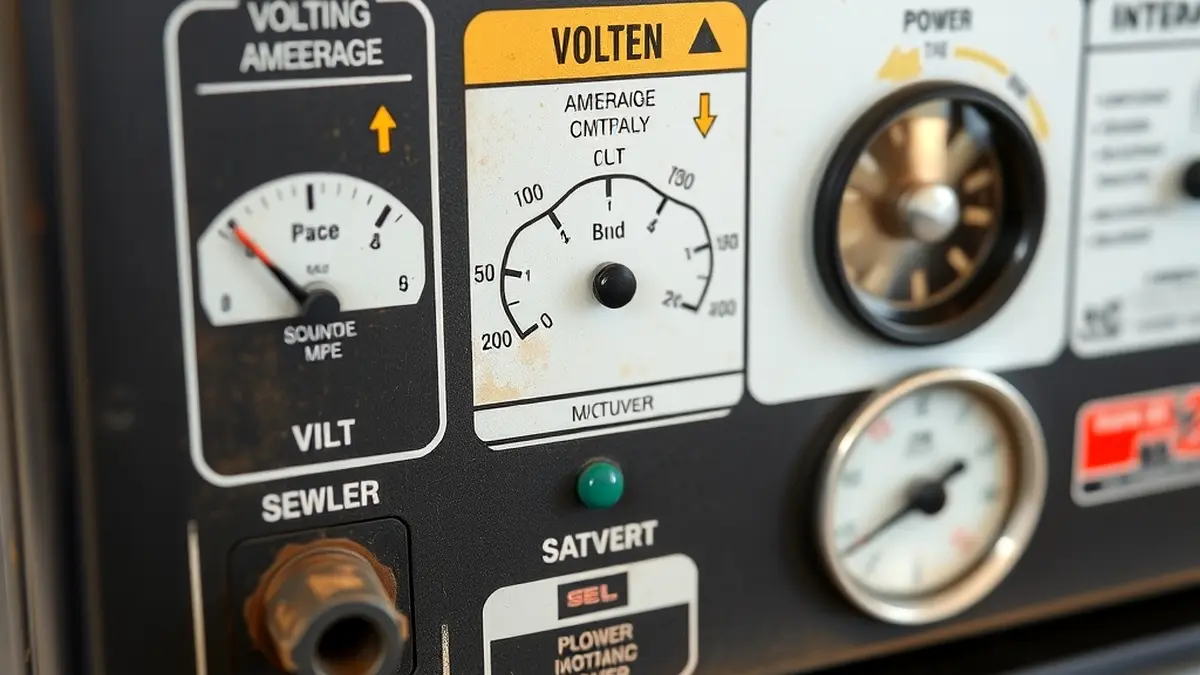
Electricity has three measurements people conflate constantly, and separating them takes one analogy: think of electrical power as water in a pipe. Voltage (V) is the pressure pushing the water — the potential difference between two points. Current (amps, A) is the flow rate — how much charge passes a point per second. Power (watts, W) is the rate energy is being delivered — and it’s simply the product: watts = volts × amps. A 120V circuit flowing 10A delivers 1,200 watts; a 240V circuit flowing 10A delivers 2,400W — same flow, twice the pressure, twice the power. That single relationship is 80% of every welder power calculation you’ll ever do.
Power is a rate; energy is power accumulated over time. The utility meter measures energy — kilowatt-hours (kWh) — meaning one kilowatt (1,000W) sustained for one hour. Run a 1,500W space heater for two hours and you’ve consumed 3 kWh; run a welding machine averaging 1.6 kW for an hour of intermittent welding and you’ve consumed 1.6 kWh. Your bill multiplies kWh by the rate (commonly in the range of $0.10–$0.35 per kWh depending on region and tariff) — which is why the arithmetic that matters for your wallet is average watts × hours used × rate, not the machine’s peak label number.
Two more terms complete the vocabulary. Amperage at the wall (input amps) is what your circuit must supply; amperage at the arc (output amps) is what the weld gets — and they’re related by the machine’s efficiency, covered below. And duty cycle is the percentage of a ten-minute window the machine can weld at rated output without overheating — the factor that converts a scary peak number into an honest average. The Encyclopaedia Britannica overview of welding frames the process generally; everything below zooms into the electrical side that homeowners and shop owners actually get billed for.
Quick mental-math drills to internalize the relationships: a 15A/120V circuit’s maximum is 15 × 120 = 1,800W (which is why a “140-amp” 110V welder that pulls near 15A is pressing right against a standard household circuit’s ceiling); a 30A/240V circuit offers 30 × 240 = 7,200W; a 50A/240V dryer-type circuit offers 12,000W. Machine labels, breaker ratings, and cord gauges all become comparable the moment you convert everything to watts.
A welding machine is a power transformer with ambitions — it takes high-current household power and converts it into the low-voltage, high-current form the arc needs, and along the way it loses some energy as heat. Understanding the conversion explains both the input numbers (what your circuit provides) and the output numbers (what your arc gets).
Output side: an arc welds at something like 15–30 volts and the amperage your settings demand — say 180A at 22V for a solid flux core pass, which is roughly 4,000 watts delivered into the weld. That’s the number that matters for welding performance. Input side: to deliver 4,000W of output, the machine draws more than 4,000W from the wall — divided by efficiency. A modern inverter machine at ~80% efficiency draws about 5,000W input (at 240V: ~21A); an older transformer machine at ~60% might draw ~6,700W (~28A) for the same arc. The losses leave as heat through the machine’s vents — which is also why welders get hot, fans roar, and duty cycle exists at all: the heat is the electricity that didn’t make it into the weld.
Efficiency differences between machine generations are real and worth naming: inverter welders (the lighter, modern units — most 110V flux core machines and current multi-process welders) convert power at higher efficiency, typically in the high 70s to low 80s percent range, draw less input current for a given arc, and waste less energy as heat. Older transformer machines (the heavy copper-brick style) run lower efficiency — often 60–70% — meaning higher bills on the same welding, hotter machines, and lower duty cycles for their class. Neither is unsafe or inadequate — plenty of transformer machines weld beautifully — but for a buyer comparing operating cost or circuit demand, the inverter’s efficiency advantage translates directly into amps saved at the panel: our machine deep dive covers the architecture in detail.
The practical consequence for power math: always know which side of the machine you’re calculating. Sizing a breaker or generator needs input watts/amps (what the wall provides). Estimating heat in the weld or settings needs output. Estimating your electricity bill needs input watts averaged over the session — the machine pulls input whenever the trigger is engaged (and a smaller idle draw whenever it’s on). Confusing input and output produces the classic error of assuming a “200-amp welder” draws 200A from the wall — it doesn’t; 200A is arc output, and input current depends on output level, voltage, and efficiency. The sizing framework that keeps sides straight: our breaker sizing guide.
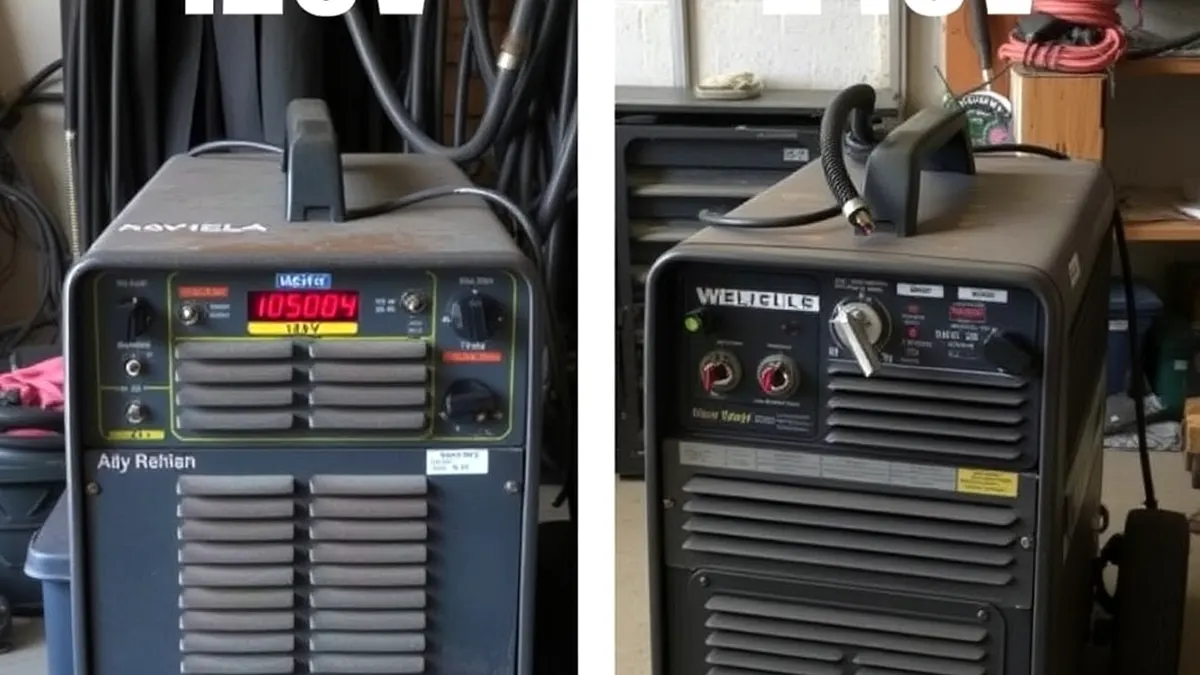
The voltage choice on a welder isn’t about using more energy — it’s about delivering the same energy at different pressures, with consequences that ripple through every component of the circuit.
A 120V machine — typically capped around 140A output — draws its input current through standard household circuits: at full tilt, something like 12–16 amps (roughly 1,400–1,900W). That’s why 110V welders plug into ordinary outlets and why they cap out around 1/8″–3/16″ single-pass work: the circuit’s current ceiling limits how much power the machine can convert, which limits arc output. The famous failure mode: welding near the machine’s maximum on a shared 15A circuit, where a refrigerator compressor cycle, a vacuum, or a dryer on the same leg tips the breaker mid-bead. The workaround hierarchy: dedicate the circuit, shorten the run, verify the breaker rating — or move to 240V for headroom.
A 240V machine draws half the current for the same power (240V × 20A ≈ 120V × 40A) — which is the entire engineering reason 240V exists. The machine can pull 30–40+ amps of input and convert it into 180–250A+ of arc output (plate-capable), while the circuit’s wire and breaker carry manageable current for their rating. A dedicated 30A/240V circuit offers 7,200W of input — enough for a serious home shop’s flux core machine, welder-capable lights, and a grinder with planning. The dryers-and-ranges trick (borrowing an existing 240V outlet with an adapter) works electrically but deserves a clear-eyed note: those circuits are sized for their original appliance’s duty and outlet type, and a plug adapter that doesn’t match the machine’s plug configuration properly (no suicide cords — ever) is a code and safety violation waiting for a bad day. The correct path is a properly rated receptacle and cord for the welder: our wire gauge guide.
The cost comparison surprises people: at identical welding output over an identical hour, 120V and 240V machines consume nearly the same energy (kWh) — efficiency being similar — so your electric bill doesn’t care which you own. What changes is capability, circuit demand, and how much margin you have: 240V buys thickness range and headroom, not cheaper electricity. Machine-by-machine context for both classes: our 110V roundup and beginner welder reviews.
Duty cycle is the translator between the label’s worst case and the meter’s reality — and understanding it changes how every amp-rating number should be read.
The standard: duty cycle is measured over a ten-minute period at rated output. “140A at 20% duty” means the machine can weld at 140A for two minutes, then must cool for eight — the machine’s own thermal protection enforces it if you don’t. Consumer 110V flux core welders commonly carry ratings like 20–35% at maximum output; stronger 240V units run 40–60% at rated output, with industrial machines going higher. The percentage at full output matters less than what it implies about your actual session, because real welding isn’t continuous: setup, repositioning, chipping slag, grinding, and inspection routinely consume 40–60% of a session’s clock. A welder working at 60–70% trigger-on fraction on a 20%-at-max machine isn’t actually exceeding anything — the effective average draw lands well below the label.
The consumption math runs like this: pick a session (say two hours of garage repair, ~50% trigger-on), a machine (a 140A 110V welder averaging ~1,500W input while actually welding), and multiply: 2 hours × 50% × 1,500W ≈ 1.5 kWh. At $0.15/kWh, that’s about 23 cents. Even a bigger 240V machine averaging 4 kW input at the same duty of use over a full weekend day (four hours of trigger-on total) consumes ~16 kWh ≈ $2.40 at the same rate. Welding is simply not an energy-hungry hobby relative to, say, air conditioning — the breaker-sagging reputation comes from instantaneous current, not total energy. Real-world sizing numbers and what happens when duty cycle is exceeded: our duty cycle guide.
The other duty-cycle truth: thermal protection is a feature, not a fault. When the machine clicks off mid-pass, it’s telling you the cooling design’s limit has arrived — usually because you’ve welded continuously at high output on a machine sized for intermittent work. Respect it (let it cool, plan passes with natural breaks) and the machine lasts decades; defeat it (ice packs on the case, obstructed vents — real things people try) and the eventual repair bill dwarfs the time saved. Circuit and settings context for planning around it: our settings guide.
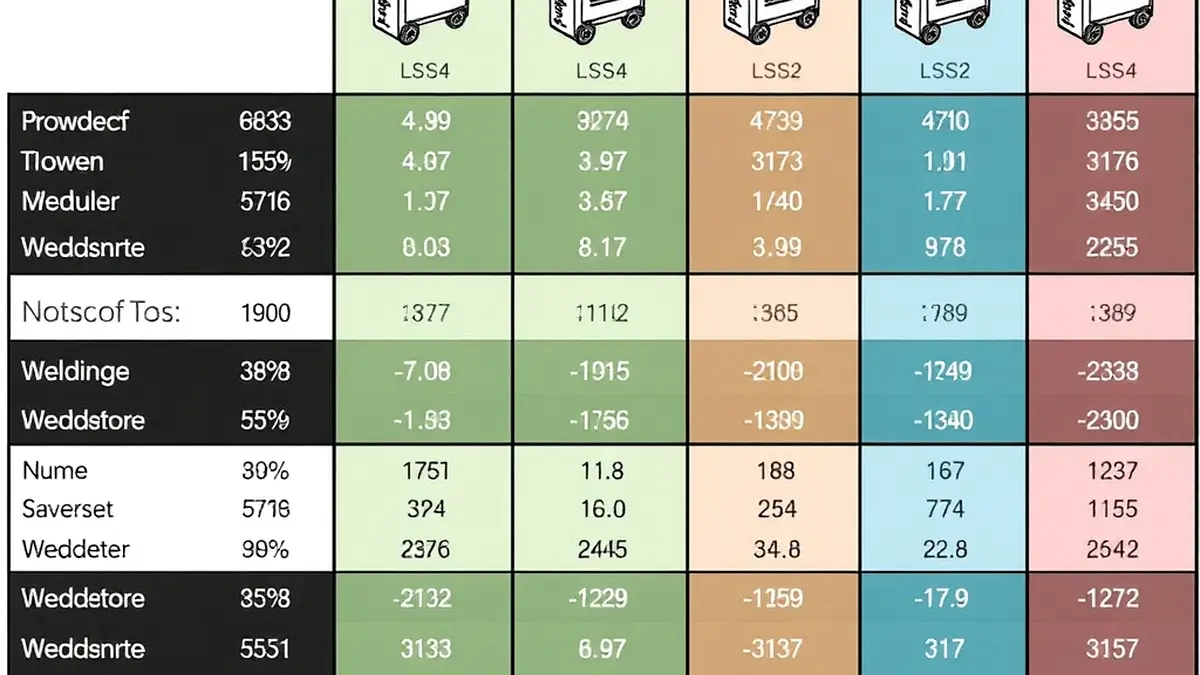
Abstract relationships become useful when anchored to real machine classes. The table below lists typical input draws — the numbers your circuit, cord, and generator care about — for common welder categories. Exact figures vary by manufacturer and output setting; treat them as planning ranges and confirm against your machine’s data plate.
| Machine Class | Typical Arc Output | Input Circuit | Typical Input Draw (welding) | Approx. Input Watts | Typical Breaker |
|---|---|---|---|---|---|
| 110V flux core, light duty (~110–130A max) | 30–130A | 120V | 8–14A | 960–1,680W | 15–20A dedicated |
| 110V flux core/MIG, strong (~140–160A max) | 40–160A | 120V | 12–18A (may need 20A circuit) | 1,440–2,160W | 20A dedicated |
| 220V flux core, home shop (180–200A) | 50–200A | 240V | 15–30A | 3,600–7,200W | 30A dedicated |
| 220V multi-process (200–250A) | 60–250A | 240V | 20–40A | 4,800–9,600W | 40–50A dedicated |
| 220V stick/TIG heavy (250A+) | 80–300A+ | 240V | 30–50A+ | 7,200–12,000W | 50–60A dedicated |
| Industrial engine-driven / shop machines | 300A+ | 240V 3-phase or fuel | 60A+ per phase | 14,000W+ | Per nameplate |
Three readings from the table matter more than the individual cells. First: a typical home flux core welder lives entirely within a dedicated 15–30A circuit — no panel upgrade, no electrician’s visit, just a circuit that isn’t sharing its load with the dishwasher. Second: input draw scales with output demand — set the machine to 80A instead of 180A and the wall draw drops proportionally, because input follows the arc’s appetite. Third: the “breaker” column reflects worst-case continuous full output plus margin — code and safe practice size circuits for the load, not the average; our breaker sizing guide walks the calculations, including the 80% continuous-load derating that governs sustained draws.
Names and model numbers aside, the pattern to internalize: every amp of arc output you want has a wall-current price tag, the tag depends on voltage class and machine efficiency, and the circuit must be able to pay it at the moment of maximum demand — which is the whole story of welder electrical requirements in one sentence.
Electricity bills cause more anxiety than welding’s modest energy appetite justifies, so let’s make the arithmetic concrete with three worked scenarios — each using the same formula: kWh = average input watts × hours ÷ 1,000, then cost = kWh × rate. Pick your regional rate from your bill (this guide uses $0.15/kWh as a middle assumption; substitute yours).
| Scenario | Machine & Session | Avg Input Draw | Energy Used | Cost at $0.15/kWh |
|---|---|---|---|---|
| Evening bracket repair | 110V flux core, 1 hr total, ~45 min trigger-on | ~1,400W | ~1.05 kWh | ~$0.16 |
| Saturday trailer project | 220V flux core, 4 hrs total, ~2 hrs trigger-on | ~3,500W | ~7.0 kWh | ~$1.05 |
| Weekend fabrication binge | 220V multi-process, 8 hrs presence, ~4.5 hrs trigger-on | ~4,200W | ~18.9 kWh | ~$2.84 |
| One year, weekly 2-hr sessions | Typical hobbyist pattern (~1 kWh/session) | — | ~52 kWh/yr | ~$7.80/yr |
The table’s bottom row is the conversation-ender: a weekly welding hobby adds something like single-digit dollars a year to an electricity bill — comparable to a couple of loads of laundry, far less than a space heater’s idle week. The anxiety people carry about welding and power bills comes from conflating current spikes (which trip breakers) with energy consumption (which builds bills) — they’re different quantities measured in different units, and the meter only counts the second one. Circuit behavior and breaker interactions: our breaker sizing guide.
Two honest adjustments keep the model real. First, output level matters: welding at 90A on a 200A machine pulls roughly half the input power of welding at 200A — light sheet work costs less per hour than heavy plate passes, proportionally to what you actually ask of the arc. Second, machines idle: modern welders draw a small standby amount (fans, electronics — tens of watts) whenever powered, negligible over a session but worth including for the precision-minded: unplug storage-season machines if you’re obsessive, though honestly the standby draw is lost in the meter’s noise. The bigger consumption lever isn’t the machine — it’s the shop’s climate control, lighting, and grinder use running alongside it. For the full input/output mental model behind these estimates: our parameters guide.
Welding away from mains power — campsites, fields, remote repairs — puts the generator front and center, and generator sizing for welders has two traps that catch nearly everyone the first time.
Trap one: running watts vs starting watts. Generators advertise two numbers — running (continuous) watts and a higher starting/surge figure for motor loads. Welders are unusual: they don’t have big motors with locked-rotor inrush like compressors, but they do demand their full running wattage instantly and hold it while the trigger is down, with rapid load cycling as the arc strikes and pauses. The sizing rule: generator running watts should cover the welder’s maximum expected input draw (not average — the arc doesn’t care about your duty cycle math), plus headroom for the rest of the load (lights, grinder) — a practical target of ~25–30% margin above the welder’s peak input. A 220V home flux core machine drawing up to ~7,000W wants roughly a 9,000–10,000W generator if it’s sharing with other tools; a 110V machine at ~1,700W peak can live on a modest 3,500–5,000W unit alongside lights.
Trap two: voltage sag under load. A borderline-sized generator browns out as the arc strikes — line voltage dips, the machine’s own protection may trip, and the arc stutters in a way that mimics feed problems or settings faults. The welder’s symptom: fine on mains, erratic on generator. The fix is capacity, not technique — undersized generation simply can’t hold the voltage the welder’s spec assumes. Also honor the fuel-and-heat math: generators run at high load = short runtimes and loud operation, which shapes how you plan a field session (weld in concentrated blocks, rest the generator between them).
Waveform quality matters too: modern inverter welders are reasonably tolerant of generator power, but cheap generators with poor voltage regulation and high total harmonic distortion (THD) can behave oddly with sensitive electronics — look for generators advertising clean/low-THD output if your welder is a modern digital multi-process unit. And always run the generator outdoors with exhaust well away from the workspace — carbon monoxide has no smell and no second chances, a hazard that dwarfs any electrical concern in remote welding setups: our welding safety guide includes the outdoor-power discipline.
Every foot of cord between the panel and the machine is a resistor with opinions — long or thin cords lose voltage as heat, and a welder fed less than its rated input voltage produces less output than the dial promises. The symptoms disguise themselves as settings problems: the arc runs weak and stubby at settings that work fine in the garage bay, the machine’s maximum feels lower than its rating, the breaker doesn’t trip but the machine seems sick. The cause is simple physics: Vdrop = current × resistance, and household extension cords at welding currents develop meaningful resistance over real distances.
The sizing discipline: match cord gauge to the machine’s input current at full draw over the actual run length. For 120V welders pulling up to ~15–20A, that typically means 10-gauge cord for runs beyond ~25 feet and 12-gauge for short runs — where 14-gauge household cords start dropping too much voltage to be harmless. For 240V machines pulling 30A+, 10-gauge or heavier over any real distance, with the wire gauge guide covering the table in detail. Shorter is always better: the cheapest fix for voltage sag is moving the machine closer to the outlet.
The permanent-wiring equivalent applies inside the walls: a 240V circuit’s branch wire must be sized for its breaker and run length (copper 10 AWG on 30A, 8 AWG on 50A as typical home-shop patterns), with connections tight — a loose breaker lug or a corroded outlet develops resistance at welding currents, heats up, and becomes a failure point. If your welding circuit’s outlet faceplate discolors or feels warm after sessions, that’s a defect to fix before the next one: our breaker sizing guide covers the installation-side rules. Cord care also includes common sense mechanics: don’t coil a cord in a tight bundle while welding through it (coiled cable inducts and heats), protect it from spatter and sharp edges, and inspect for cut insulation before each use.
Most “the welder keeps tripping the breaker” stories are actually load-planning stories — the welder isn’t alone on its circuit, or the circuit is smaller than its label suggests.
The cardinal rule: welding circuits should be dedicated — the welder shares with nothing. A 15A circuit nominally “for the garage” may quietly include the garage door opener, the freezer, the air compressor, and the outlet your welder just claimed; each of those loads’ startup surges (compressors and openers especially) combine with the welder’s draw and the breaker resolves the arithmetic for you. The professional practice: a dedicated circuit from panel to welding station, sized to the machine (15–20A for typical 110V welders, 30–50A for 240V units), with nothing else plugged in — the layout decision that eliminates an entire category of mystery trips.
Shared-panel sequencing matters when heavy tools coexist: an air compressor cycling while you’re mid-bead on a marginal circuit produces the blink-and-trip Derek experienced. Plan tool operation (compressor fills between passes, not during), or separate them onto different circuits — the shop-planning version of one-variable discipline. Also verify the breaker’s rating matches the circuit’s wire (a 20A breaker on 14-gauge wire is a code violation and fire hazard — the wire protects by melting before the breaker trips; wrong pairing defeats that dance).
The 80% continuous-load rule refines sizing for sustained work: a circuit should carry no more than 80% of its rating for continuous loads (three hours or more) — a 30A welding circuit accordingly supports ~24A continuous, a number worth remembering when a machine’s full-output draw sits right at a circuit’s edge. The sizing calculations and their reasoning: our breaker sizing guide, with cord-side companion numbers in our wire gauge guide.
One more planning layer for multi-machine shops: total the simultaneous demand. Two welders and a plasma cutter all rated 30A/240V won’t share a 30A circuit no matter how intermittently they run — they need either separate circuits or strict one-at-a-time discipline (the “welding shifts” rule most small shops adopt naturally and formally after the first double-trip afternoon).
Electrical supply problems present as weld-quality problems more often than as visible electrical events — which is why the diagnosis table starts with arc symptoms and works backward to supply causes:
| What You Observe | Likely Power-Side Cause | Confirming Test | Fix |
|---|---|---|---|
| Breaker trips when the arc strikes or mid-pass | Undersized or shared circuit; breaker too small for machine’s true draw | Unplug other loads on circuit; weld at machine on known-good circuit | Dedicated circuit sized to machine’s nameplate input |
| Weak, stubby arc at settings that used to work | Voltage drop in extension cord or long branch run | Weld directly at the outlet; compare arc | Shorter/heavier gauge cord; check branch wiring |
| Machine fine at home, erratic on generator | Generator undersized or poor voltage regulation | Measure generator voltage under load; check rating vs machine peak input | Upsize generator; seek clean/low-THD output |
| Lights dim when the arc strikes | Shared circuit with lighting; normal for high draw on same leg | Check which lights share the circuit | Separate lighting onto its own circuit; rewire as needed |
| Outlet or plug warm after use | Loose connection, corrosion, or undersized outlet | Inspect (power off) for discoloration; check rating vs machine | Tighten/replace outlet; correct rating; fix connection |
| Machine’s thermal protection trips quickly | Low input voltage (sag) increasing internal losses; blocked vents; hot ambient | Check supply voltage at outlet under load; check vents | Fix supply; clear ventilation; cool ambient |
| Household GFCI on welding circuit keeps resetting | GFCI shared with loads leaking minor leakage current; or arc-struck leakage | Test circuit composition; machine leakage check | Dedicated non-GFCI (where code permits) or GFCI per local code; service machine |
The table’s underlying discipline: supply first, machine second, technique third. Before re-dialing settings or blaming the wire, confirm the machine is receiving what its nameplate assumes — measured, not assumed. A $15 outlet tester or a multimeter at the receptacle settles arguments that would otherwise consume an evening, and the habit of checking input before output is the electrical twin of checking polarity before settings: our troubleshooting playbook keeps both orders front and center.
Welding circuits carry enough current to start fires and enough voltage to kill, and the safety rules compress into a short list that deserves memorization rather than summarizing.
Never defeat a breaker or fuse. The breaker is the last line of defense protecting the wiring inside your walls from the current you’re drawing — bypass it (double-fusing, breaker locks, “it holds if I don’t touch anything”) and you’ve removed the device standing between a fault and a house fire. If the breaker trips, the circuit is wrong: find out why instead of resetting and hoping. Sizing logic: breaker sizing guide.
No suicide cords, no ungrounded adapters, no backwards plugs. Improvised adapter cords (male-to-male, ungrounded cheater plugs, dryer-outlet pigtail hacks) violate the fundamental safety architecture of grounded circuits and have caused real electrocutions and fires. Machine plug meets correctly-rated receptacle through a proper cord — or the receptacle gets replaced. Same discipline for extension cords: three-prong, intact ground, rated for the current, undamaged insulation.
Ground everything. The work clamp isn’t optional and isn’t just circuit-completion hygiene — it’s the return path for welding current, and a poor ground (paint, rust, far-from-the-joint placement) causes arcing at the clamp, heat, and potential ignition. Clamp to clean metal near the work, inspect the cable for strain damage, and never route the ground through a workpiece that can shift. Fire watch follows: sparks and slag travel — clear combustibles, cover what can’t move, and keep a charged extinguisher and awareness for the period after the arc stops, when hidden embers keep smoldering: OSHA’s welding standard formalizes what careful welders already practice, and our welding safety guide covers the shop routine.
Moisture and electricity don’t negotiate. Wet hands, damp floors, and outdoor receptacles exposed to weather all raise shock risk in a process that already involves high current in close physical proximity. Stand dry, inspect cords, use GFCI protection where code requires it for the location (garages and outdoors typically demand it), and treat the machine’s casing as suspect if it ever shocks you — a machine that trips GFCIs or tingles is out of service until serviced: our welding fumes guide and safety pages cover the rest of the PPE equation alongside the electrical side.
Capacity honesty closes the list: if your welding ambitions have outgrown the panel’s circuits — regular 240V work on borrowed dryer outlets, extension-cord chains, breakers that held “most of the time” — the correct investment is a properly sized dedicated circuit from a qualified electrician. It’s the least glamorous purchase in welding and the one that converts every subsequent session from a small electrical gamble into a boring, dependable routine. That’s the goal: electricity so boring you never think about it — because the thinking happened once, at installation, in accordance with the numbers in this guide.
The machine’s process mode shapes its power appetite as much as its output setting — and comparing the common shop processes clarifies where the wattage actually goes.
Flux core (FCAW-S) on a home machine sits in the modest band: a 110V welder running typical 120–180A passes draws roughly 1.2–1.9 kW input; a 220V machine at 180–220A pulls roughly 3.5–6 kW. The process’s high deposition at moderate current makes it efficient per inch of weld placed — energy delivered to metalwork rather than spent climbing to extreme outputs. Context: our what is flux core welding explainer and the gas vs flux core comparison.
Stick (SMAW) draws similarly for equivalent current — arc physics doesn’t care which consumable carries the amps — but stick’s typical usage pattern differs: sustained passes at settings matched to electrode size, with rod changes as natural breaks. A 180A stick pass and a 180A flux core pass demand nearly identical input watts; the difference is in how many minutes per hour the trigger-equivalent (arc time) actually runs. Process comparison: our stick vs flux core guide and rod selection guide.
TIG (GTAW) is the interesting outlier — the process can weld at very low currents (15–40A for delicate aluminum and stainless work), which drops input power to trivial levels (well under 1 kW at those settings on a capable machine), yet its high-end aluminum work at 150–200A+ on AC runs the machine’s electronics hard at draws comparable to any other 200A process. TIG’s duty-cycle behavior tends to be the binding constraint rather than wall draw: sustained AC aluminum passes push cooling systems to their rating. Machine-class context: our MIG vs TIG buying guide.
Plasma cutting deserves mention because it surprises people: a 40A plasma cutter at 240V draws roughly 4–6 kW input — comparable to a mid-size welder — but in very short bursts (cuts take seconds, not minutes), so session energy stays low while the breaker demand at arc initiation is real. The same sizing discipline applies: nameplate input governs the circuit, not the brevity of use.
Multi-process machines consolidate the question: one input circuit serves stick, MIG, flux core, and TIG modes, with each mode’s draw bounded by the machine’s maximum output and its mode-specific efficiency. The practical planning number remains the machine’s peak input rating — the circuit must serve its hungriest mode even if you primarily use its thriftiest one: our machine deep dive and multi-process review example. Across all processes, the through-line holds: output amps set the arc, input watts follow the efficiency curve, and the wall’s obligation is the peak — manufacturer reference material like Miller’s technical resources and Lincoln Electric’s documentation publishes the nameplate math for each model.
Every welder carries a data plate — a small metal or sticker rectangle that compresses its entire electrical identity into six or seven fields — and reading it fluently answers most power questions without any external lookup.
The fields, decoded: input voltage (120V, 240V, or dual/automatic — determines which circuits qualify); input amps at maximum output (the number your breaker sizing follows — sometimes shown as a range reflecting minimum-to-maximum output); rated output at a stated duty cycle (e.g., “140A @ 20%” or “200A @ 35%” — the honest capacity statement pairing current with time); open-circuit voltage (OCV) (voltage present before the arc strikes — relevant to safety and some process behavior, typically 50–80V class on consumer machines); and frequency/phase (60 Hz single-phase for North American household machines — three-phase entries indicate commercial power requirements). Some plates add a wire-size range and a recommended breaker — both gifts to the installer: believe them.
The plate’s most misunderstood pairing is output amps with duty cycle — they’re inseparable. “180A at 60%” doesn’t mean the machine welds at 180A all day; it means two minutes on, a bit over one off (3 of 10 minutes cooling), at that specific output, in the ambient conditions the standard assumes (typically around 40°C reference — hot garages derate effectively). Reading output without duty is reading half a sentence: our duty cycle guide unpacks the thermal side.
Practical nameplate drills: before buying a machine, read its required circuit (many plates state “minimum 20A/120V” or “30A/240V” — confirm your panel provides it before purchase, not after); before wiring a station, read the input-amps field and size breaker and wire to it with the 80% continuous derating in mind; before diagnosing a sagging arc, read the input-voltage field and measure your supply under load against it. The plate is the contract between machine and electrical system — everything else in this guide derives from those seven fields. Setting-side context for what happens after the supply side is confirmed: our settings guide, with purchasing logic in our beginner machine reviews and honest capability expectations in are flux core welders any good.
Welding’s electricity cost is already modest — but the habits that keep it that way (and keep the machine and circuits healthy) cost nothing and take seconds.
Plan sessions in blocks. Concentrated welding with natural breaks (fit-up, cleaning, inspection) lets duty cycle work as designed and keeps the machine out of thermal rollback — where an overheating machine wastes more input power as extra heat than a rested one does. It also suits the human rhythm: the pauses that keep beads consistent are the same pauses that keep electrical demand spiky-but-brief rather than sustained. Session structure: our home practice guide.
Match output to the job honestly. Running a 200A machine at maximum to weld 16-gauge sheet isn’t power-hungry so much as technique-wrong — the correct lower settings draw proportionally less input and produce better welds (heat input control: our parameters guide). The efficiency win and the weld-quality win are the same decision.
Keep the machine breathing. Dust-clogged vents force fans to work harder (a continuous small draw) and, more importantly, degrade cooling so duty cycle erodes — a quick monthly blowout of vents and fans maintains both the machine’s electrical behavior and its longevity. Unplug machines during long storage: standby draws are trivial, but eliminating them costs one action and removes phantom load entirely, a habit that also protects against surges during absences.
Sequence the shop’s other loads around welding. Compressors, shop vacuums, and big lighting banks cycling during a sensitive pass create voltage interactions nobody needs — plan them into the breaks (compressor fills while you chip slag). The shop-level discipline extends to fume extraction: fans and extractors add their own small load but earn it — ventilation is the non-negotiable companion to flux core’s fume output: our fumes guide and respirator guide. The occupational baseline for shop air comes from NIOSH’s welding research.
Specialty equipment adds niche loads worth knowing: a welding rod oven (for keeping low-hydrogen electrodes dry — our homemade rod oven guide documents both build and running power) draws a modest continuous wattage whenever maintaining temperature, and fume extractors, grinders, and bench lighting round out the shop’s true electrical profile. Add them up once — most home shops total well under a dedicated 60A panel’s capacity — and the exercise produces exactly the kind of informed confidence that makes every session after it uneventful. Uneventful, again, being the highest compliment an electrical system can earn: welding tips for beginners covers the rest of the first-session checklist.
Welder power discussions accumulate folklore the way arc-work accumulates spatter — confidently repeated, occasionally true, mostly wrong. Four myths deserve direct correction before this guide closes.
Myth one: “Welding runs the meter wild.” Already dismantled by the cost table, but the folklore persists because people remember the breaker trip, not the kWh. The confusion lives in units: breakers respond to instantaneous current, meters to accumulated energy — a welder can trip a 15A breaker in seconds while consuming less energy in an hour than a clothes dryer uses in twenty minutes. Arc physics also explains the flicker that fuels the myth: welders are nonlinear, rapidly-switching loads (the arc strikes and extinguishes dozens of times a second during short-circuit transfer), and that behavior makes lights on the same circuit visibly pulse — a perceptual event so dramatic people assume enormous consumption. It isn’t. It’s a small-to-moderate load wearing a theatrical costume: Britannica’s process overview frames the arc’s electrical character from the physics side.
Myth two: “A bigger breaker gives the welder more power.” Backwards: the breaker doesn’t supply anything — it’s a protection device that allows the circuit to deliver what the wiring and transformer already provide. Swapping a 20A breaker for a 30A one on 14-gauge wire doesn’t unlock machine performance; it removes the safety margin before the wire itself becomes the fuse — the exact failure mode electrical codes exist to prevent. The machine draws what its settings demand; the supply either safely supports that draw or correctly refuses. Capacity comes from proper wire, proper breaker, proper circuit — the sizing framework in our breaker sizing guide, grounded in the same standards logic that governs professional installation practice under the AWS standards framework for welding-system specification.
Myth three: “240V is dangerously more than 120V around the shop.” Hazard is real at both — any circuit capable of driving welding current can injure or kill, and the safety discipline (intact grounds, dry conditions, no improvised cords, GFCI where required) applies identically at either voltage. What 240V changes is engineering convenience: half the current for the same power means lighter wiring and breakers for the same capability. The practical respect owed 240V installations is the respect owed any high-current circuit — correct plugs, correct receptacles, no adapters that “sort of fit” — rather than extra fear of the number itself. The non-negotiable list: the electrical safety section above and our welding safety guide.
Myth four: “Settings from the internet will work on my machine.” The electrical version of the eternal settings question — because dial-to-output mapping varies by machine design (waveform control, feed calibration, transformer turns ratio), and a chart’s numbers silently assume the chart’s machine, supply voltage, stickout, and material. The portable skill is derivation, not transcription: premises verified, window estimated from a thickness table, instrument test beads, one-variable moves — the method that works on any machine because it consults the puddle instead of a stranger’s dial positions: our chart as starting point, our settings guide as method, and the deeper parameter relationships in the research tradition summarized by TWI’s technical publications.
Strip the myths away and what remains is the guide’s honest core: welder electricity is a well-behaved, well-documented subject — peak demand sized for with standard electrical practice, average consumption costing pocket change, and every symptom traceable to a nameplate field or a supply-side cause. The folklore survives because the visible events (trips, flicker, sputtering arcs) look dramatic while the invisible reality (a few kilowatt-hours) is trivial. Know the arithmetic and the drama becomes legible: each event names its own cause, and the fix is always a number — correctly read, correctly applied, quietly boring from then on.
Every thread in this guide converges on one practical deliverable — a repeatable sequence that takes a machine box and an empty wall and produces a station that welds without electrical surprises. Run it as a checklist, in order, and the panel becomes the most boring part of your setup.
Step one — read the nameplate before anything else. Input voltage class (120V or 240V), input amps at maximum output, rated output with duty cycle, recommended breaker and wire size if printed. These fields decide everything downstream; a machine whose requirements exceed your panel’s capacity is a conversation with an electrician, not a hardware-store puzzle. Machine selection context if you’re still shopping: our beginner reviews and budget 220V roundup.
Step two — audit the circuit. Is there a dedicated circuit? Confirm the breaker rating matches the nameplate’s requirement, the branch wire gauge matches the breaker (14 AWG on 15A, 12 AWG on 20A, 10 AWG on 30A as the standard household pattern), and every connection — breaker lug, outlet terminals, ground — is tight. Shared circuits get separated now, not after the first mysterious trip. Verification methods and the 80% continuous derating: our breaker sizing guide.
Step three — plan the cord run. Measure the actual distance from outlet to welding position, choose gauge for that run at the machine’s input current (heavier for longer — tables in our wire gauge guide), and prefer moving the bench closer over thickening the cord. Cord inspection before first use: intact ground prong, no insulation cuts, connectors without burn marks or looseness.
Step four — verify under load. With everything connected, weld a test pass and check: no breaker trip at maximum output, no visible voltage sag (arc behavior identical to any known-good baseline), outlet and cord cool afterward, machine fans cycling normally. If the arc sags while the breaker holds, measure supply voltage at the outlet during the pass — a sagging supply with a holding breaker points at cord gauge or upstream connections rather than capacity. The diagnostic table above sequences the investigation.
Step five — document and post. Write down the station’s facts where future-you will see them: circuit rating, cord gauge and length, machine nameplate input, and the settings notes from your first session’s instrument tests. The posted sheet converts every future electrical question into a lookup — and matches the discipline good shops apply to procedures: documented capacity, verified conditions, deliberate deviations only. Add the safety line beneath it (dedicated circuit only, no adapters, report warm outlets immediately) and the station graduates from experiment to infrastructure. Ongoing monitoring is simple: warm outlets, frequent trips, or arc behavior that changes with machine position are all reports from the supply side — read them promptly, fix the cause, keep the electricity boring. The habit pairs with the technique-side habits from our expert tips collection — one side keeps the power safe, the other keeps the welds sound, and together they define a shop that works.
Input watts while welding vary by machine and output level: a common 110V flux core welder draws roughly 1,000–2,000W (about 8–16A at 120V), a 220V home-shop machine roughly 3,500–7,500W (15–30A at 240V), and heavy 240V stick/TIG machines can exceed 9,000–12,000W at full output. The formula: input watts = input amps × supply volts, at whatever output level you’re actually welding — light work pulls less than the machine’s maximum. Class-by-class numbers are in the machine table above; circuit implications in our breaker sizing guide.
Almost certainly not. Typical hobby use — an hour or two a week at 1–4 kW average draw — lands in the range of a few dollars per year at common rates (see the cost table above). The bill anxiety comes from confusing peak current (which trips breakers) with total energy (which builds bills); welding’s energy appetite is modest next to HVAC, water heating, or even a dryer. The number that can move your bill is hours of trigger-on time at high output, multiplied over months — and even then it’s tens of dollars, not hundreds: the kWh calculator section.
Size it to the machine’s nameplate input current at maximum output, with margin — typically a dedicated 15–20A circuit for 110V welders pulling up to ~15A, and 30A for most 220V home welders (40–50A for machines whose full draw demands it), applying the 80% continuous-load derating when work is sustained. The machine’s manual states its required circuit; the guide’s tables confirm the wire gauge that matches. Full calculation method: our breaker sizing guide.
Yes — if the cord is sized for the machine’s input current and the run length (heavier gauge and shorter beats lighter and longer: 10-gauge for most 110V welder runs beyond ~25 feet, heavier for 240V machines over distance). Undersized cords drop voltage, which starves the machine’s output and mimics machine faults. The give-away symptom: the arc weakens over the cord’s length and recovers plugged directly in. Gauge tables: our wire gauge guide.
Match the generator’s running watts to the welder’s peak expected input draw plus your other loads, with ~25–30% headroom — a 110V welder peaking near 1,700W wants a 3,500–5,000W unit; a 220V flux core machine peaking near 7,000W wants roughly 9,000–10,000W if sharing loads. Prioritize stable voltage regulation (clean/low-THD for inverter machines) — sagging voltage under arc load makes the welder misbehave in ways that look like machine trouble. The sizing traps: the generator section above.
Not for equivalent welding — energy is energy, and two machines delivering the same arc over the same hour consume similar kWh (efficiency classes being comparable). 240V’s advantages are capability and circuit economics (half the current for the same power), not cheaper electricity. What costs more is running a bigger machine at higher output more of the time — that’s a usage difference, not a voltage penalty. Machine-class comparisons: our 110V roundup and machine deep dive.
Almost always one of three causes: the circuit is shared with other loads (compressor, freezer, lights), the breaker or wiring is undersized for the machine’s true full-output draw, or voltage drop upstream (long runs, poor connections) is making the machine draw more current to compensate. Diagnose in order: unplug everything else on the circuit; confirm breaker rating vs the nameplate; test the machine at the outlet directly. The trip is the system working — the fix is capacity, not a bigger breaker: our breaker sizing guide.
Indirectly, yes — duty cycle governs how much of any given hour you’re actually welding (the rest is cooling pauses where input drops to standby levels), and it’s the multiplier between your machine’s peak draw and your session’s average. A 20%-at-max machine physically can’t sustain full draw for an hour, and human workflow (setup, cleaning, repositioning) usually caps trigger-on time well below the machine’s limit anyway. The average-watts model for bill estimates: the kWh calculator section; thermal behavior: our duty cycle guide.
Some — that’s what efficiency means. Modern inverter machines convert roughly 75–85% of input power into welding output (the rest exits as case heat); older transformers convert perhaps 60–70%. So yes, your welder warms the room slightly with electricity that didn’t reach the arc — and that waste heat is exactly why machines have fans, vent slots, and duty-cycle limits. The practical lever is machine choice (inverter efficiency) rather than welding habits: our parameters guide covers the input/output conversion in depth.
Yes — with sizing anchored to the machine’s peak input rather than its average, because the arc demands full current the instant it strikes regardless of what your storage math prefers. A 110V flux core machine drawing up to ~1,700W wants an inverter/bank continuous rating above that figure with margin for the rest of the load; 240V machines need correspondingly larger systems. Practical strategies: weld in concentrated blocks (let the bank recover between sessions), favor the lowest output settings the job allows (a 90A repair draws roughly half what a 200A pass does), and program load-shedding so nonessential loads drop when the arc strikes. Off-grid power math follows the same watts logic as every other supply in this guide — only the source changes; machine-side efficiency considerations are covered in our machine deep dive.
The answer to the title’s question turns out to be comfortably smaller than most people expect: a home welder uses a few hundred watts to a few thousand while the trigger is down, tens of cents worth of electricity per hour of real welding, and a circuit that — properly dedicated, correctly sized, and honestly matched to the machine’s nameplate — you’ll never think about again. The scary numbers on labels describe worst-case instants, not bills; bills are averages, and welding’s average is modest. What isn’t modest is the current those instants demand — which is why the breaker, the wire gauge, the cord, and the generator must all be sized for the peak while the wallet breathes easy about the average.
Derek’s panel got its dedicated 50A circuit the following weekend — installed by an electrician, matched to the machine’s nameplate, with the dryer outlet returned to its actual dryer. The half-house blinking never recurred, and his first full month of welding added something like a dollar to the power bill, a fact he now deploys at every gathering where someone claims welding “runs the meter wild.” That’s the closing arithmetic of this guide: respect the peaks (size for them), understand the averages (they’re cheap), and let the difference between the two — measured in breakers and kWh respectively — keep your sessions uneventful. Uneventful power is good power. Go spend your attention on the puddle instead.