Custom Welding and Metal Fabrication: The Complete 2026 Guide (Process, Costs, Tips)
A hands-on guide to custom welding & metal fabrication: processes, materials, costs, quality checks, and how to hire…
READ ARTICLE →Picture this: it’s a Saturday morning, your coffee is going cold, and you’re standing in front of a half-finished project that refuses to make sense. You’ve got a beautiful brushed-aluminum bumper you picked up at a swap meet, and a solid steel frame that has held together for forty years. In your mind, the plan is simple — line up the pieces, strike an arc, run a bead, and call it done. Then you do what every welder eventually does: you Google the question that separates the hobbyist from the professional. Can you actually weld aluminum to steel?
The answer you’ll find is usually a frustrating “yes, but…” — and that “but” is doing a tremendous amount of heavy lifting. Because the honest truth is that aluminum and steel don’t just have different melting points. They speak different metallurgical languages. Melt them together carelessly and you don’t get a joint. You get a brittle, crack-prone mess that looks like a weld, passes a visual inspection if you’re generous, and then fails the moment real load hits it.
That failure mode is exactly why this topic matters far beyond weekend garage projects. Car makers, shipyards, aerospace firms, and bridge builders all need to join aluminum to steel every single day — and they spend millions of dollars doing it correctly. The good news? Once you understand why the two metals resist each other, the techniques that work become surprisingly logical. In this guide, we’ll walk through the science, the proven joining methods, the methods that only look like they work, the real-world applications, the preparation steps, the mistakes that ruin joints, and the safety considerations nobody should skip. By the end, you’ll be able to look at any aluminum-to-steel job and know exactly which approach — if any — belongs on it.
Key Takeaways: Direct fusion welding of aluminum to steel is a dead end for structural work because brittle iron-aluminum intermetallic compounds form at the interface. The proven solutions are bimetallic transition inserts, explosion welding, friction welding (including friction stir welding), brazing with the right filler, and hybrid joining such as adhesive-plus-riveting. Success depends less on arc settings and more on controlling heat, preventing direct iron-aluminum contact, and managing galvanic corrosion after the joint is made.
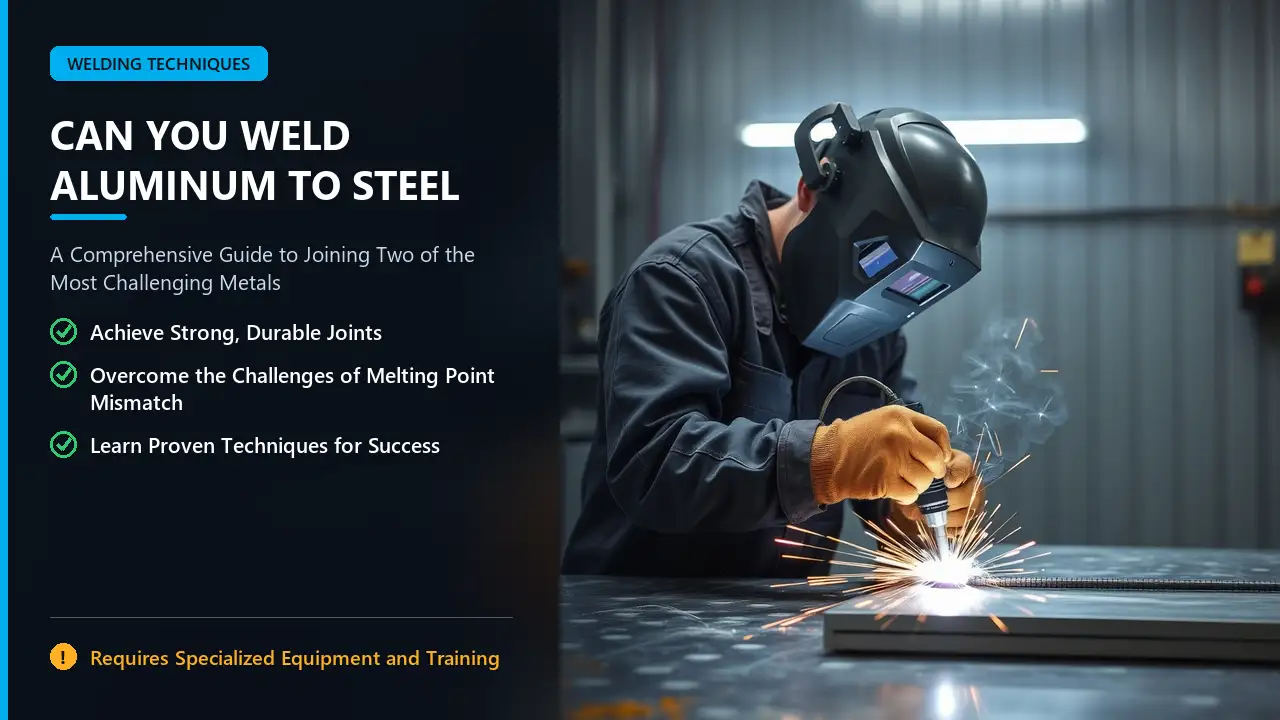
Yes — but not the way most people mean when they say “weld.” If your definition of welding is “melt both pieces together with a torch or arc and fuse them into one piece,” then for all practical purposes, no: you cannot weld aluminum to steel in a shop with a MIG machine, a TIG rig, or a stick welder and produce a joint you should trust. The fusion zone will contain a cocktail of iron-aluminum intermetallic phases — compounds like Feâ‚‚Alâ‚… and FeAl₃ — that are hard, brittle, and about as flexible as glass. Cracks follow those phases the way a fault line follows soft rock.
What you can do is join the two metals using processes that either avoid melting them together, keep them physically separated by a transition layer, or use an intermediary filler that never forms those damaging compounds. Explosion welding, friction welding, friction stir welding, transition-joint brazing, and engineered adhesive-mechanical hybrids all qualify. Industries that build real products — from SAE International-documented automotive programs to naval shipbuilding — use these methods because they work under load, under vibration, and over time.
So the practical answer has two layers. For a hobbyist with a 140-amp MIG welder: don’t try to fuse aluminum directly to steel; you’re building a trap. For a fabricator or engineer: yes, aluminum-to-steel joining is a mature field with proven, repeatable techniques — provided you pick the right one for the load, the environment, and the budget. Everything below is about knowing which technique belongs where.
To understand why this pairing is so difficult, it helps to stop thinking of metals as “strong stuff” and start thinking of them as chemical systems. Steel and aluminum aren’t just different colors and weights. Their atoms behave completely differently at temperature, and when you force those atoms to mix, chemistry takes over — usually against you.
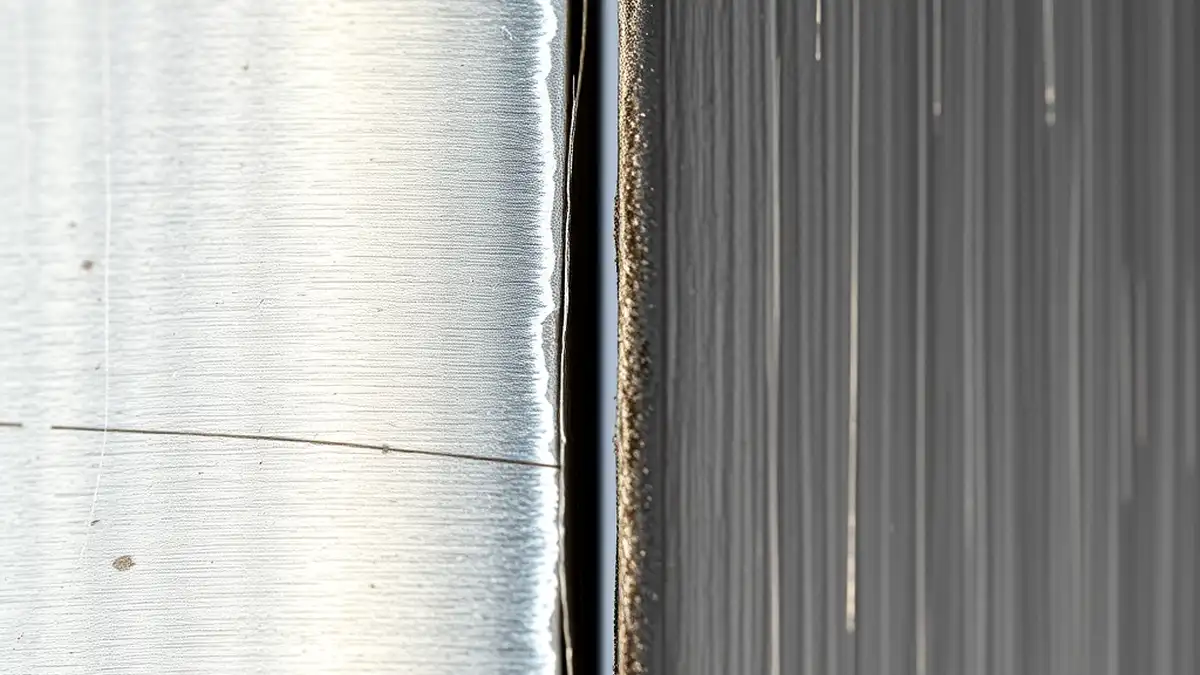
Aluminum melts at about 660°C (1,220°F). Carbon steel doesn’t start melting until roughly 1,370–1,530°C (2,500–2,800°F), depending on alloy and carbon content. That’s a gap of more than 700 degrees — a chasm, thermally speaking. The moment you try to fuse them with an arc, one of two bad things happens. Either you push enough heat to melt the steel and you vaporize or wildly overheat the aluminum side, or you stay gentle enough for the aluminum and the steel simply never joins. There is no comfortable middle setting on your machine’s dial, because the materials don’t share one.
It gets worse. Aluminum conducts heat away from the joint far faster than steel does — roughly three times faster for pure aluminum. So while your arc is concentrated on one spot, heat is racing laterally through the aluminum, warping it and contaminating your shielding gas envelope. Meanwhile the steel sits there stubbornly solid, soaking up heat without softening. Watching an inexperienced welder attempt this is like watching someone try to warm one hand in a freezer and the other hand in an oven at the same time.
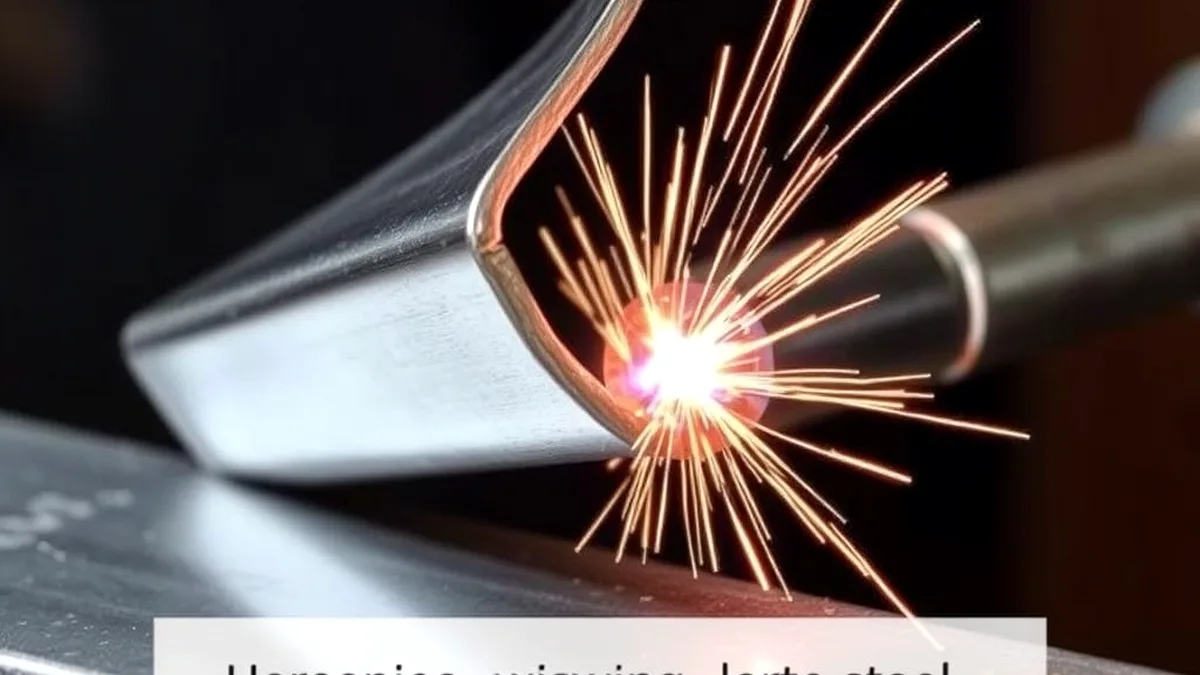
Aluminum expands about twice as much as steel for the same rise in temperature. Steel’s coefficient of thermal expansion sits around 11–13 µm/m·°C; aluminum’s is roughly 22–24 µm/m·°C. In a joint that’s been heated to several hundred degrees and then cooled, that difference translates directly into stress. The aluminum side wants to shrink more than the steel side as it cools, and because the two are (hypothetically) bonded, something has to give. Usually it’s the weakest link: a crack at the interface, a buckle in the thin aluminum, or a distortion you won’t notice until you try to fit the assembly back onto the machine it came from.
This is also why preheating, fixturing, and controlled interpass temperatures show up in every serious procedure for dissimilar-metal work. You’re not just managing the weld puddle. You’re managing two materials that are physically arguing with each other as they cool.
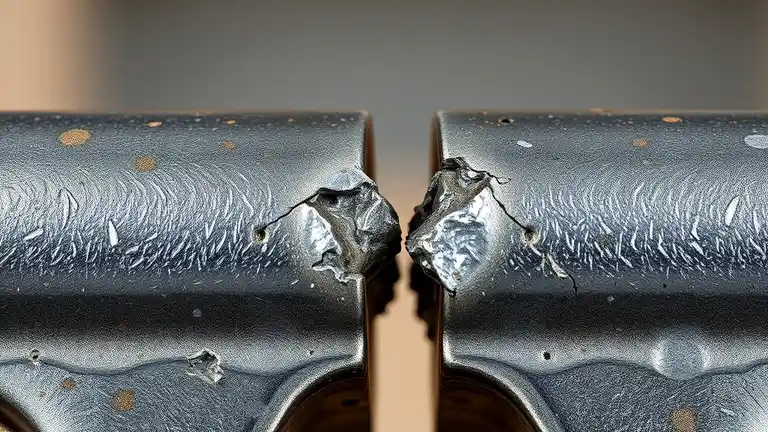
Here is the single most important fact in this entire article: when iron and aluminum meet at high temperature and stay in contact, they don’t blend — they react. Diffusion kicks off at the interface, and a layer of intermetallic compounds grows between the two metals. Metallurgists have identified several phases in the iron-aluminum system, with Feâ‚‚Alâ‚… and FeAl₃ being the usual suspects in welded joints. These compounds are extremely hard and extremely brittle. Where steel gives and deforms before it breaks, an intermetallic layer simply cracks.
Research summarized by ASM International and materials engineers consistently shows that the critical variable is layer thickness. Thin intermetallic layers — a few micrometers — may be tolerable in some controlled processes. Once the layer grows into the tens of micrometers, joint toughness collapses. The problem for conventional welding is that a fusion process supplies exactly the conditions intermetallics love: high temperature, molten metal, and long enough dwell time for diffusion. In other words, arc welding doesn’t merely risk forming these compounds — it practically invites them in, seats them at the table, and lets them grow.
This is also the reason a weld can look perfect and still fail. You can’t see a 20-micrometer intermetallic layer with your eyes. It takes a cross-section under a microscope to reveal it. The joint passes your visual check, gets put into service, and then fails in fatigue — often at a load well below what the base metals could have handled easily.
Even if you solve the joining problem, aluminum and steel sitting in contact create a battery. On the galvanic series, aluminum is significantly more anodic (reactive) than steel. When the two are electrically connected and exposed to an electrolyte — rain, road spray, salt air, condensation — the aluminum corrodes preferentially. In aggressive environments, the potential difference is large enough to eat through aluminum components surprisingly quickly, especially at the joint edge where current density is highest.
This isn’t a theoretical concern. It’s one of the reasons automotive and marine engineers spend as much time on isolation and sealing as they do on the joining process itself. Spacers, sealants, coatings, and designed-in insulation all become part of the “weld.” For a complete walkthrough of prevention strategies, our guide on how to prevent galvanic corrosion covers the practical techniques in depth. The short version: if your aluminum-to-steel assembly lives outdoors or on a vehicle, corrosion protection isn’t optional — it’s part of the joint design.
There’s a quieter problem too. Aluminum carries a tenacious oxide layer (Alâ‚‚O₃) that melts at about 2,070°C — nearly four times hotter than the aluminum underneath it. Unless that oxide is actively removed by cleaning or by the welding action itself, it sits in the puddle as an inclusion and weakens the joint. Steel brings its own contaminants to the party: mill scale, rust, zinc coatings, and drawing oils. When you combine an oxide-covered aluminum surface with a mill-scaled steel surface in one joint, you’re stacking contamination risks on top of metallurgical ones. Cleanliness won’t save a fundamentally flawed fusion attempt — but dirty materials will guarantee that even the correct method fails.
Let’s walk through the anatomy of a failed direct fusion attempt, because understanding the failure makes the successful methods obvious.
Imagine you’ve decided to TIG weld an aluminum plate to a mild steel plate with no filler, just autogenous fusion. As the arc starts on the aluminum side, the aluminum melts quickly and forms a fluid puddle. You drift toward the steel. The steel surface heats, oxidation increases, and if you push hard enough, a thin film of steel melts. Now molten aluminum and molten iron are in direct contact at well over 700°C. Diffusion begins almost immediately. Iron atoms dissolve into the aluminum puddle; aluminum atoms migrate into the steel’s surface region. At the cooling boundary, the intermetallic layer crystallizes.
What you get, in order from the aluminum side: sound aluminum, a transition zone saturated with dissolved iron, a hard intermetallic band, a heat-affected zone in the steel, and sound steel. The intermetallic band is the weak link — typically harder than the surrounding metals, with almost no ductility. Shrinkage stresses from cooling push directly on it. Micro-cracks nucleate. Sometimes they’re visible as a fine craze-cracking pattern along the bead. Sometimes they’re buried, waiting.
Skilled metallurgists at institutions like NIST and university labs have studied this interface extensively using scanning electron microscopy and energy-dispersive X-ray spectroscopy. The consistent finding: without an intermediary layer, a diffusion barrier, or a solid-state process that never melts the metals, the interface chemistry works against you. Every successful technique we’re about to cover is, at its core, a strategy for preventing that intermetallic band from growing thick enough to matter.
If there’s a “default correct answer” for structural aluminum-to-steel joining, this is it: use a bimetallic transition insert. The concept is elegantly simple. Instead of welding aluminum directly to steel, you buy (or make) a strip that is already part aluminum and part steel — metallurgically bonded at the factory — and you weld each side of the insert to its matching metal. The aluminum side of the insert goes to your aluminum part. The steel side goes to your steel part. Nowhere in your shop does molten aluminum ever touch molten iron.
These inserts are typically produced by explosion welding or roll bonding, processes that create a true metallurgical bond without the brittle intermetallic growth of fusion welding. The result is a transition joint with a ductile interface that can handle thermal cycling and mechanical load. You cut the insert to length, bevel it if needed, and join it using conventional processes — MIG or TIG on the aluminum end, MIG or stick on the steel end.
The aerospace industry has used transition joints for decades, because aircraft structures demand both lightweight aluminum and steel’s strength in close proximity — landing gear attachments, engine mounts, hydraulic hardware. Naval construction uses them to attach aluminum superstructures to steel hulls, a classic weight-saving arrangement that also keeps corrosion manageable when the joint is properly detailed. Rail vehicle builders use them for the same reason: aluminum car bodies over steel underframes.
For a shop fabricator, transition inserts turn an impossible joint into two easy ones. Need to attach an aluminum bracket to a steel machine base? Weld an aluminum-side transition strip to the bracket with your normal aluminum TIG setup (and check our guide on what color tungsten for aluminum if you’re setting up AC TIG), then bolt or weld the steel side to the base. The insert handles the metallurgy; you handle the bookkeeping.
Inserts cost real money — they’re specialty items, not something you grab off the rack at a hardware store — and they add a heat-affected zone on each side, so joint design matters. They also need corrosion protection at the interface, especially outdoors. But in exchange, you get a joint whose strength is governed by your weld quality on each side rather than by an uncontrollable intermetallic layer. That trade is almost always worth it in structural applications.
Mention explosion welding to most hobby welders and they picture demolition. The reality is far more controlled and far more fascinating. Explosion welding (EXPW) — also called explosive cladding — uses the precisely timed detonation of an explosive layer to slam two metal plates together with such force that they bond at a molecular level, without either one melting globally. You may have seen the results without knowing it: marine-grade “aluminum-clad steel” plates, bimetallic transition strips, and corrosion-resistant cladding on pressure vessels are all explosion-welded.
A thin layer of explosive is spread across the aluminum flyer plate, which is held a carefully calculated stand-off distance above the steel base plate. The detonation wave travels across the plate, driving the flyer plate progressively into the base plate at velocities measured in kilometers per second. At the collision point, a jet of surface material is scoured away — carrying with it the oxide films and contaminants that would otherwise poison the bond — and the two clean metal surfaces are pressed together under enormous velocity and pressure. The interface takes on a distinctive wavy, layered structure that you can see in cross-section. That mechanical interlocking plus the pressure bond is what makes the joint strong without the brittle fusion story.
The Russian scientist Mikhail Lavrentiev and others developed the concept in the mid-20th century, and it was industrialized in the 1960s. The process is covered thoroughly in general welding histories and standards, and reference works like the Wikipedia article on explosion welding give a solid technical overview of the collision parameters. The physics is sophisticated — stand-off distance, detonation velocity relative to the speed of sound in the flyer, plate thickness, and angle of impact all have to balance — which is why it’s performed by specialist companies, not evening hobbyists.
Explosion welding succeeds where fusion fails for the simple reason that there’s almost no time for diffusion. The bonding happens in microseconds. The metals bond at the surface while the bulk of each plate never rises anywhere near its melting point. The intermetallic layer that would ruin a fusion weld barely gets a chance to start, and what does form is thin enough to be harmless. The result is a joint that approaches the strength of the softer partner (the aluminum) and can be machined, formed, or welded — which is exactly why explosion bonding is how most commercial bimetallic transition inserts are born in the first place.
The downside is that explosion welding is industrial-grade work: it requires licensed explosives handling, open or controlled blast sites, precise engineering, and money. Nobody is explosion-welding parts in a garage. But understanding the process matters for the fabricator because it explains (a) why transition inserts cost what they cost, and (b) why a metallurgically sound aluminum-to-steel bond is achievable at all. When someone tells you “it’s impossible to bond aluminum and steel,” you now know the correct response: it’s impossible with fusion welding equipment, not with metallurgy.
Friction-based processes are among the most exciting tools in the dissimilar-metal toolbox, and they have a remarkable origin story: friction stir welding (FSW) was invented at TWI (The Welding Institute) in Cambridge, UK, in 1991 by Wayne Thomas and his colleagues. The patent changed how industry thinks about joining — including how it thinks about aluminum to steel.
The older sibling, rotary (or inertia) friction welding, is exactly what it sounds like. One part is spun at high speed while the other is pressed against it. Friction heats the interface to forging temperature — hot enough to plasticize the metal, not hot enough to melt it wholesale. The rotation stops, the axial force rises, and the two parts forge together. Because the interface never becomes a fully molten fusion pool and the dwell time at temperature is short, the intermetallic layer stays thin. Rotary friction welding has been used commercially for decades on drivetrain components, shafts, and hydraulic parts. Automotive suppliers friction-weld aluminum to steel for components like transmission shafts and driveshafts, taking advantage of the fact that the bond is strong, repeatable, and inspection-friendly.
FSW goes further. A rotating, non-consumable tool with a pin and shoulder is plunged into the joint line and traversed along it. The tool mechanically stirs the plasticized material from both sides of the joint together. Nothing melts — the process runs below the solidus temperature of the workpieces. For aluminum-to-steel, engineers insert the tool on the aluminum side and let the steel remain essentially solid, with the aluminum flowing around the interface. The absence of a melt means the brittle intermetallic reaction that plagues fusion welding is minimized, and the FSW joint can be remarkably clean.
Researchers worldwide have published extensive studies on FSW of aluminum to steel, examining tool shape, rotation speed, traverse speed, and offset. A common finding is that controlling where the tool sits relative to the interface governs how much iron transfers into the aluminum. Used correctly, FSW produces strong, fatigue-resistant dissimilar joints. This is not a garage technique — it needs a stiff machine with serious spindle torque — but it’s a perfect example of how mastering the physics of the interface beats reaching for more amperage.
If you’re comparing traditional processes to build your mental model, our breakdown of MIG vs TIG welding helps clarify why neither conventional fusion process can claim the same interfacial control as friction processes.
Brazing is where the aluminum-to-steel story gets interesting for people without access to explosive permits or million-dollar friction rigs. Brazing joins materials by heating them above 450°C but below their melting points, and filling the gap with a filler alloy that melts and wets both surfaces. Since neither base metal melts, you sidestep the catastrophic intermetallic layer that forms when iron and aluminum both become liquid. The aluminum stays solid. The steel stays solid. The filler does the bridging.
Not every brazing filler is suitable. You need an alloy that wets both aluminum and steel, melts at a temperature low enough not to damage the aluminum, and doesn’t create a weak or galvanically hostile joint. In practice, technician-designed brazing filler rods sold specifically for joining aluminum to steel or cast iron to aluminum are the go-to, often built around zinc-aluminum or aluminum-silicon systems tailored for dissimilar work. Zinc-containing fillers appear repeatedly in the literature because zinc wets both metals well, flows easily, and helps keep the intermetallic reaction under control.
A note on filler selection generally: if you’re doing gas-welding work on aluminum at all, the right filler matters as much as the right heat. We cover the science of choosing one in our article on filler rod selection for gas welding aluminum, and the same logic — match the alloy system, understand melting behavior, control temperature — applies when you’re bridging to steel.
The braze-welding route is realistic for repair tasks and lighter-duty fabrications: aluminum display hardware to steel brackets, aluminum trim on steel structures, small fixtures, or boat and RV accessories. Success depends on meticulous cleaning (the oxide layer must go), a controlled flame or heating method that you can keep off the surrounding aluminum, and willingness to accept that a brazed joint is generally softer and carries less load than a forged or friction-welded joint. For heavily loaded structural work, braze your joint, then support it with mechanical fastening.
Directly? No. With a transition insert? Yes — and that’s the whole point. Let’s be precise, because a lot of conflicting information floats around forums. If someone tells you they “MIG welded aluminum to steel” and it worked, one of these things is true: they actually welded the aluminum to a transition piece already welded to the steel; they brazed with a dissimilar-metal filler; the joint is held together by luck and will fail later; or they’re describing a job that will make a great story and a bad product.
Here’s why running aluminum wire into a steel joint with a plain MIG gun is a losing play, step by step. Aluminum wire feeds terribly against steel if you’re trying to deposit on steel, because the puddle wants to wet the aluminum wire and ball up. If you’re running steel wire (ER70S-6) onto aluminum, the chemical marriage is a non-starter — the iron wire and molten aluminum will happily form exactly the intermetallic phases we spent a section explaining. And a standard MIG gun with a long cable is also fighting gentle beasts you don’t need: aluminum wire buckles and birdnests with the wrong liner and drive rolls, a topic our guide to welding aluminum with a MIG welder digs into in practical detail.
What MIG can do in the aluminum-to-steel world is contribute its side of the joint in a transition-insert assembly. You’ll need proper pure-argon shielding on the aluminum side — the gas math is explained in our article on which gas to use for aluminum — and a setup that can push aluminum wire without birdnesting. On the steel side, your normal steel MIG process works. Two separate, conventional welds, separated by an engineered transition: that’s the recipe.
One genuine option exists under the “MIG” umbrella: MIG brazing with a copper-silicon or similar brazing wire onto steel, then joining the aluminum mechanically or with adhesive. Some coachbuilders and marine fabricators use stainless or silicon-bronze MIG brazing to attach thin aluminum to steel trim, relying on the fact that the joint is brazed, not fused. It’s a legitimate technique in the right application, but it’s not “MIG welding aluminum to steel” in the way a beginner would hope.
The TIG route has exactly the same fundamental limitation as MIG, with higher stakes, because TIG gives you more precise control — and the intermetallic problem doesn’t care about your control if iron and aluminum both cross the liquid line. TIG welding aluminum to steel directly will produce a brittle intermetallic layer unless a transition piece, a specialized filler, or a brazing approach is used.
Where TIG earns its keep in this discussion is twofold. First, TIG is the tool of choice for welding the aluminum side of a transition insert cleanly — you get the AC balance and amperage control needed to break up the aluminum oxide layer, and pairing it with the right tungsten prep is covered in our article on choosing tungsten for aluminum. Second, TIG brazing with a dissimilar-metal filler rod is a genuinely workable, controllable method for lighter mixed-metal joints because the tight arc lets you keep the aluminum surface temperature below its melting point while the filler flows. The discipline required — patient amperage control, meticulous cleaning, and the humility to stop the moment the base aluminum wants to melt — is the same discipline that makes TIG welders fearless but careful, as our comparison of whether TIG is stronger than MIG makes clear.
If a TIG operator tells you they’ll “handle it with technique,” respect the skill — then ask which filler alloy and what intermetallic thickness they measured in the last cross-section they ran. Technique alone doesn’t beat chemistry.
Stick (SMAW) and flux-core (FCAW) processes bring their own realities to this conversation. For direct aluminum-to-steel fusion, they’re even less suited than MIG and TIG, because the filler chemistry in both processes is designed for steel-on-steel work, and the flux systems are built around slag that behaves badly with molten aluminum.
Stick welding has one legitimate historical trick: bronze or nickel-based rods can sometimes form a brazed-quality bond between steel and a non-melting partner, and some fabricators use stainless or nickel electrodes to weld steel to steel or steel to cast-iron — a dissimilar pairing we explore in welding cast iron to steel. But for aluminum specifically, stick rod chemistry is a dead end. And flux-core aluminum wire is a niche that exists but brings its own headache chest — we document both the promise and the pitfalls in our articles on flux-core welding of aluminum and flux-core aluminum welding. None of that changes the core law: no fusion process, stick or wire, joins aluminum and steel directly into a load-bearing structural bond.
When you see flux-core wire being used on mixed-metal repairs, what it’s usually doing is welding steel to steel while the aluminum piece rides along as a non-structural attachment. That distinction — structural vs. cosmetic — is worth repeating in every shop meeting.
Knowing the theory is one thing; seeing it in service is another. Here’s where aluminum-to-steel joining earns its keep every day — and where each method dominates.
Why does a carmaker go through the pain of joining aluminum to steel at all? Because physics says weight is the enemy of efficiency. The U.S. Department of Energy’s lightweighting research has long documented that a 10% reduction in vehicle weight can yield a 6–8% improvement in fuel economy. At the scale of millions of vehicles, that single statistic drives billions of dollars in engineering. Automakers want aluminum’s low density everywhere the structure can afford it — hoods, doors, decks, subframes — while keeping high-strength steel where crash energy and cost favor it. That means body structures where an aluminum panel meets a steel rail, and the joint between them has to survive 1,000,000+ stress cycles and a crash.
The solutions used in production are pragmatic hybrids: mechanical fasteners (self-piercing rivets), structural adhesives, tailored transition joints, and friction welding for rotating components. Where “welding” appears, it tends to be a controlled process like friction welding or specialized resistance and arc-brazing techniques deployed by people who certify every batch. Standards work by bodies like SAE International keeps the methodology disciplined across suppliers.
Ships present a textbook example. A steel hull is strong, cost-effective, and forgiving. Above the main deck, weight high in the vessel is a stability liability, so aluminum superstructures are the time-honored solution for many craft — ferries, patrol boats, and naval vessels. Joining a heavy steel ship to a lighter aluminum deckhouse is handled with explosion-bonded transition strips fitted between the two, precisely to avoid the corrosion and cracking that direct contact would cause. The transition strip is welded to steel below and aluminum above, and the joint line is detailed to shed moisture, because that buried galvanic couple is watching.
Rail vehicles use the same logic inverted: aluminum car bodies over steel underframes, or steel couplers attached to aluminum structures. Friction welding and transition joints both appear, chosen for fatigue resistance and because every kilogram saved on a rolling assembly reduces energy use over decades of service. If you’ve ever ridden a modern light-rail car built of aluminum and noticed the steel hardware bolted into it, you were looking at evidence of a solved engineering problem.
Aerospace pushes the material question to its extreme because every kilogram affects payload and fuel burn over tens of thousands of cycles. Aluminum alloys, and increasingly hybrids, meet steel where landing gear structure, engine mounts, and fasteners demand steel’s stiffness and wear. These are exactly the environments where TWI’s research on friction joining and carefully qualified transition joints came of age. The cost of failure — literal — concentrates the mind on process control.
In bridges, walkways, and building frames, engineers occasionally want aluminum’s corrosion resistance and light weight on top of steel’s raw load-bearing capacity. Aluminum decking over steel girders, aluminum railings on steel platforms, and aluminum frames on galvanized steel supports are all real scenarios. Each one is an exercise in managing galvanic corrosion as much as joining — the junction needs isolation, sealing, and a drainage plan. Our galvanic corrosion prevention guide is effectively required reading for anyone hanging aluminum on steel outdoors.
The difference between a joint that lasts and one that fails is frequently decided in the 30 minutes before the torch is lit. Here’s a disciplined preparation sequence that applies across every method in this guide.
Before touching tools, decide the joint’s job. Is it structural, semi-structural, or cosmetic? What loads, fatigue cycles, temperatures, and corrosive environments will it see? This single decision forks the whole project: a brazed or mechanically supported joint may be fine for a decorative railing bracket but wrong for a suspension component. Engineers call this “design intent,” and skipping it is how projects end in disappointment.
Aluminum contaminates: degrease with a solvent, then mechanically remove the oxide layer with a clean stainless wire brush dedicated to aluminum (never the brush you used on steel, or you’re grinding steel particles into your aluminum surface — a classic self-inflicted poisoning). Steel side: knock off mill scale, rust, zinc, paint, or oil. For brazing especially, cleanliness is the difference between filler that flows and filler that beads up and refuses to wet. If the aluminum has been in a damp environment or had any residual flux from earlier attempts, both rules and common sense say: more cleaning, better joint.
Because aluminum and steel expand at wildly different rates, your fixture is doing thermal engineering work. Clamp both pieces so the interface can’t pull apart as heat spreads. If you’re running a transition insert, leave room for heat to flow into both base metals, and if the practice calls for it, preheat the steel side gently to reduce the differential — many commercial procedures specify preheat ranges precisely for this reason. The asymmetry of heating you’re managing is a feature to respect, not a bug to ignore.
On a transition joint, that means keeping the aluminum weld zone strictly on the aluminum side of the insert and the steel weld on the steel side. On a brazed joint, it means controlling temperature so you never cross the base-metal melt line. On a mechanically assisted joint, it means installing isolation (an insulating gasket or coating) and sealant as part of the build, not as an afterthought. The corrosion story starts the moment dissimilar metals touch, so treat the corrosion barrier as a structural detail.
| Method | Melts the Metals? | Intermetallic Risk | Relative Strength | Skill Level | Equipment Cost | Best For |
|---|---|---|---|---|---|---|
| Direct MIG/TIG fusion | Yes | High — avoid | Low (unpredictable) | Any (dangerous) | Low | Nothing structural |
| Bimetallic transition insert | Only each side separately | Very low | High | Intermediate | Medium (insert cost) | Structural, field work |
| Explosion welding | No | Low | Very high | Industrial specialists | Very high | Cladding, transition strips |
| Rotary friction welding | No (solid state) | Low | High | Machine-dependent | High | Circular/shaft parts |
| Friction stir welding | No (solid state) | Low | High | Machine-dependent | High | Large panels, line work |
| Brazing / MIG & TIG brazing | No (filler only) | Manageable | Moderate | Intermediate | Low–medium | Repairs, light fabrications |
| Adhesive + mechanical | No | None (but corrosion still) | Moderate–high in shear | Low | Low | Panels, non-weldable access |
Read the table as a decision tree. If the joint must bear real load for years, you’re choosing among transition inserts, friction processes, or explosion-bonded products. If it’s repair or light-duty, brazing and mechanical-adhesive hybrids become legitimate. If your only option is direct fusion… reconsider the design first.
One question people always ask is whether these joints are “as strong” as a normal steel-to-steel weld. The honest answer is that a well-made aluminum-to-steel transition joint is strong enough for its application — which is exactly how engineers design them — but the weld is rarely the weakest link anymore; the aluminum base metal or the corrosion interface usually is. For context on how welds are rated in general — design stress, weld strength, and the difference between “never break” and “designed for” — our article on how strong a weld actually is is worth a bookmark. The same principles apply; the dissimilar-metal joint simply adds one more constraint to the calculation.
If you’re about to attempt any of the legitimate methods, here are the failure patterns professionals see most often — and how to dodge each one.
Sometimes the sharpest decision is not to weld at all. Here are the non-welding routes that solve real mixed-metal problems, each with a legitimate role.
None of these are “cheating.” They’re the right tools. If your application is government, code-regulated, or safety-critical, consult the relevant structural welding standard — AWS standards (such as the structural steel D1.1 code and the structural aluminum D1.2 code) establish the engineering guardrails for structural welding, while bolting and adhesives follow their own, equally serious standards. And always run the final design past someone qualified to sign it.
It’s easy to get lost in metallurgy and forget that every process in this article is a comprehensive safety interview. Each method brings specific hazards.
The governing document every welder should know is OSHA’s regulatory coverage of welding, cutting, and brazing — it’s the baseline for commercial and vocational work in the US, and its ventilation and PPE requirements are good habits even for hobbyists. Galvanized or coated members add zinc fume hazards; if you’re ever welding zinc-coated steel near aluminum (a surprisingly common mixed-metal setup), read our guide to welding safety and give your lungs a serious upgrade.
Money talk, since it decides most choices.
For context on how cheaply aluminum work can be done in general — and whether it’s the right thing to spend your money on — see our analysis of welding aluminum with a MIG welder. The takeaway there generalizes here: the cheapest route per weld attempt is rarely the cheapest route per working joint.
What’s next? Three trends are worth watching, and they’re changing the answer to “can you weld aluminum to steel” faster than you’d think.
1. Solid-state processes go mainstream. Friction stir welding, linear friction welding, and friction-stir spot processes are moving out of labs and into production lines as machines get cheaper and robotics mature. The more that joining relies on plastic flow instead of melting, the less the intermetallic problem matters.
2. Smarter interfaces and coatings. Researchers are testing interlayers — thin zinc, nickel, or aluminum-silicon coatings applied to the steel before joining — that intentionally tame diffusion. A controlled coating turns a hostile interface into a designed one. Some of this work is being documented through NIST and university programs, and it’s a steady stream of “we can now join things we couldn’t last decade.”
3. Hybrid joining becomes codified, not exotic. Adhesive-plus-mechanical and adhesive-plus-spot approaches are being written into standards and production procedures (the work of bodies like SAE and AWS). The more codified these become, the more engineers routinely spec them — which keeps pushing the “can we?” question toward “yes, here’s the qualified procedure.”
The lesson for anyone working in metal: keep an eye on solid-state joining for mixed materials. The 1991 TWI patent turned into today’s mainstream aircraft, rail, and automotive practice; the next ten years are likely to do the same for more mixed-material combinations.
With fusion welding processes, no — melting them together produces brittle iron-aluminum intermetallic compounds and the joint fails. The correct routes are transition inserts, friction-based joining, brazing with suitable filler, or adhesive-mechanical methods. The physics is the same whether the instructor is a shop floor veteran or a university lab.
It depends on method. For brazing, technicians typically choose a zinc-aluminum or aluminum-silicon dissimilar-metal filler that wets both metals; for friction stir welding, some procedures use a zinc interlayer. There is no universal rod. Whatever you choose, it must melt below the aluminum base metal’s melting point and keep the interface chemistry controlled. The filler logic for gas aluminum work in general is covered in this guide.
Two compounding reasons: brittle intermetallic phases form at the interface, and the two metals expand/contract at different rates. The combination of a low-ductility interface and differential thermal stress is a recipe for cracking — which is why the winning methods prevent thick intermetallic growth and manage thermal loads with fixturing and preheat.
Not typically in absolute terms. A brazed joint is stronger than a structurally naive fusion weld (which cracks), but for maximum load capacity you’d move up to a transition insert or a friction-process joint. “Strong enough for the application” is the engineer’s yardstick, not “as strong as steel.”
They can — that’s the galvanic effect. The higher the environmental electrolyte (salt water, road salt, humidity), the faster galvanic corrosion can act on the aluminum side. Isolation, sealing, and drainage are part of the joint design. Our galvanic corrosion guide walks through the full prevention playbook.
Only for the aluminum-side of a transition assembly or for aluminum-to-aluminum work. A spool gun changes how wire feeds, not what the puddle chemistry does against steel. If you’re new to aluminum welding equipment, our coverage of spool guns for cast and cast-adjacent aluminum and general welding tips for beginners will save you days of frustration.
Used carefully, yes — preheating the steel side reduces the thermal differential that drives warping and cracking. It does not, however, fix the intermetallic problem. Preheat controls stress; a transition or brazing approach controls chemistry. You need both disciplines for a durable joint.
Brazing light-duty parts and using mechanical-adhesive joints — yes, with proper PPE and ventilation. Anything structural, high-load, fatigue-prone, or held together by direct fusion — no. There is no shame in walking a critical mixed-metal join to a qualified professional or using an engineered transition product. The reason professionals respect this joint is precisely because it doesn’t forgive shortcuts.
Yes — with the right process, preparation, and expectations. No — with a MIG gun pointed at molten steel and molten aluminum and a hope in your heart. The distinction isn’t a fine print gotcha; it’s the core of the subject.
Here’s the whole conversation in five lines you can take to the shop:
Whether you’re attaching an aluminum attachment to a steel machine, building a mixed-metal repair on a trailer, or just trying to settle a debate at the fabrication bench, you now have the map. The metals can be joined — if you respect the chemistry, control the heat, and build for the corrosion that’s always coming. That’s not a limitation. That’s what separates a joint that looks like it works before lunch from a joint that’s still working ten years and ten thousand cycles later.
For further reading on how to raise your whole welding game, start with our practical welding tips for beginners and the deep dive on weld strength — and when you’re ready to bring quality work home, our full welding safety checklist belongs on your bench wall.