Pipeline Welding: The Complete Guide to Girth Welds, Codes, Careers, and Best Practices
Pipeline welding explained: girth weld techniques, API 1104 codes, NDT inspection, welder pay, safety rules, common defects, and…
READ ARTICLE →The wheel was beautiful before it cracked. It was a one-piece cast aluminum wheel off a small trailer — the kind you find cheap at a salvage yard because the previous owner curb-rashed it and then, somewhere along the way, picked up a hairline crack along one of the spokes. The seller shrugged. “Aluminum,” he said. “Weld it.” So home it came, and out came the welder, and that’s when the real education started.
Here’s what nobody tells you before your first casting repair: cast aluminum is not the shiny extruded sheet you practiced on in the garage. It behaves like a sponge that’s been soaked in oil, frozen with internal stress, and then painted with an oxide layer that laughs at your grinder. You strike an arc, the puddle boils and pops, gas pockets bloom like tiny volcanoes, and the crack you were fixing seems to grow a cousin two inches away. The weld looks gray, spongy, and vaguely angry. You start wondering if the whole idea of fixing this part was a fool’s errand.
It wasn’t. It’s just that castings keep their secrets inside, and they make you earn every inch of bead. And the question that lands in front of every welder at this exact moment — the one that sent you to this article — is deceptively simple: can you weld cast aluminum with a spool gun? The short answer is yes, you can, and for a lot of repairs the spool gun is genuinely the right tool — but only if you understand what you’re actually welding into, because the spool gun solves the feeding problem while doing absolutely nothing about the casting problem. Those are two very different fights, and confusing them is how good welders end up with bad welds.
In this guide we’re going to walk the full road: what cast aluminum really is (including the common alloys like A356 and 319 you’re most likely holding), why castings crack and bubble the way they do, how a spool gun actually feeds wire, how to prep a greasy second-life part so the arc has a chance, when to preheat and when preheating hurts you, which filler wire belongs on which casting (4043 or 5356 — and why the wrong choice here ruins welds), what settings to dial in, and when you should quietly put the spool gun down and switch to TIG or even a brazing rod instead. Real scenarios, real numbers, no fabricated expert quotes. By the end you’ll be able to look at any cast aluminum part, judge it honestly, and choose a plan of attack with confidence.
Key Takeaways: A spool gun can weld cast aluminum because it fixes aluminum wire feeding — short feed path, no bird-nesting, steady arc — but castings bring their own problems that the gun can’t solve: gas and shrinkage porosity, absorbed oil and die/sand-casting release agents, a hard oxide skin, and unknown alloys. Success depends on aggressive cleaning (acetone, dedicated stainless brush, grinding out the oil-impregnated layer), drilling crack tips, preheating to roughly 250–400°F when the casting allows it, choosing 4043 filler for most silicon-bearing cast alloys, using 100% argon with DCEP polarity, and running fast, stacked stitch beads with cooling pauses. For thin, cosmetic, or high-value repairs, TIG and low-temperature aluminum brazing often beat MIG outright — process selection matters more than gun type.
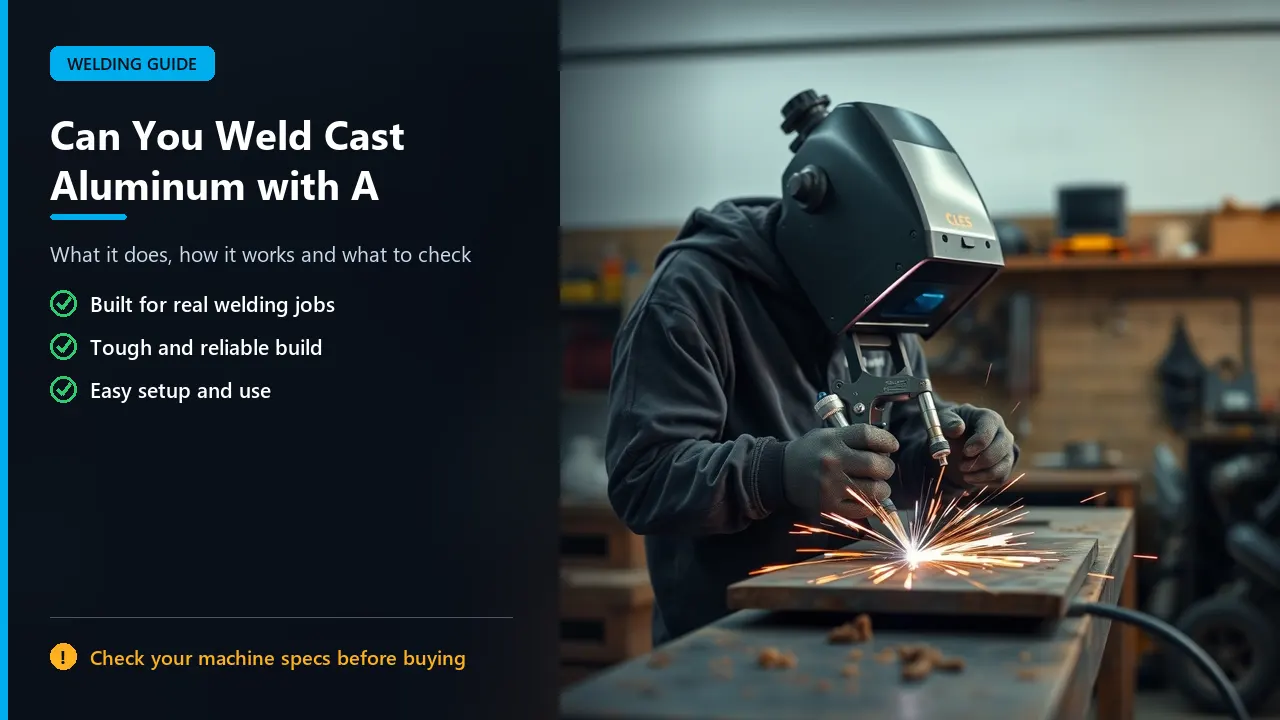
You can weld cast aluminum with a spool gun, and people do it every day — on engine covers, transmission housings, pump bodies, trailer wheels, lawnmower decks, and industrial fixtures. The spool gun exists precisely because feeding soft aluminum wire through ten feet of liner from a machine-mounted spool is miserable: the wire buckles, tangles, and creates the dreaded bird’s nest that turns a five-minute weld into a twenty-minute untangle. Put the spool on the gun and the wire only travels a few inches from spool to contact tip, and suddenly a modest 140-amp MIG welder can push aluminum wire almost as reliably as it pushes steel. That single mechanical advantage is why spool guns became the entry ticket to aluminum MIG welding for home shops and small fabrication businesses.
So the gun is fine. The casting is where the caveats live. A cast part is a fundamentally different animal than wrought aluminum: it was poured or injected as a liquid, it solidified with trapped gas and shrinkage voids, it may have spent twenty years absorbing oil through its pores, and its alloy is often stamped on no paperwork anywhere. When you put an arc into that material, you are re-melting a region that may contain decades of contamination and microscopic voids. The result is only as good as your preparation and your process choice — and a spool gun, for all its feeding virtues, changes neither.
There’s also a framing issue worth clearing up right away. “Can you” is the wrong question if what you really mean is “should you, on this part, for this job.” For a non-structural bracket repair on a thick A356 casting, properly prepped and preheated, a spool gun with 4043 wire is a completely sensible tool. For a hairline crack in a pressurized component, a thin die-cast housing, or a part where appearance and porosity control both matter, TIG — or admitting the part is beyond economic repair — is the honest answer. The rest of this article is about telling those situations apart.
Cast aluminum is aluminum that was melted and poured into a mold — sand, permanent metal, or a high-pressure die — to solidify into a complex shape. Wrought alloys like 6061 and 5052 are made to be rolled, extruded, and bent; cast alloys are made to fill a cavity. That difference sounds academic until you notice that cast alloys carry much higher silicon content (which helps the molten metal flow and reduces shrinkage), often contain copper or magnesium for strength, and are engineered for the foundry rather than for the weld bench. The Aluminum Association’s alloy numbering makes this visible: wrought alloys run 1xxx–8xxx with letter prefixes for processing, while cast alloys are written like A356.0, 319.0, or 380.0 — a system designed around the mold, not the mill.
In practice, you will meet a small cluster of cast alloys far more often than the rest:
Here’s the practical catch: the casting in your hands is almost never marked. Wrought sheet comes with a mill stamp; a casting comes with a shape. Without a foundry ticket you’re identifying the alloy by application and by how the metal behaves — does the puddle run fluid and silvery (high silicon) or does it stay narrow and syrupy (high magnesium)? Is the part hard-machined or soft? Most home welders make an educated guess, and honestly, that’s often the best available option. For a deeper look at the wider family of aluminum grades and their welding quirks, our guide to welding aluminum with a MIG welder covers alloy-by-alloy behavior in detail.
The reason identification matters is filler compatibility. Welding a high-silicon casting with a high-magnesium filler is a classic recipe for solidification cracking, and the reverse pairing has its own problems. Match the filler to the casting family, not to whatever spool was cheapest on the shelf — we’ll build the actual selection chart a little later.
If wrought aluminum is a well-behaved student, cast aluminum is a student with three undisclosed conditions. Understanding those three conditions explains about ninety percent of every bad result you’ll ever get on a casting.
Castings are porous before you ever strike an arc. Two mechanisms create that porosity. First, gas: hydrogen is far more soluble in molten aluminum than in solid aluminum, so as the casting freezes, dissolved hydrogen gets squeezed out of solution and nucleates into bubbles that never escape. Second, shrinkage: aluminum shrinks as it solidifies, and if the feed path from the riser froze early, tiny voids open up in the last regions to freeze — often right in the middle of a thick section or at the root of a rib.
Now run an arc through that material. The heat re-melts a zone full of microscopic gas pockets and shrinkage voids, the metal around them gets fluid, and the trapped gas expands. What surfaces in your puddle is classic weld porosity: pinholes, worm tracks, and crater blowouts. Even with perfect shielding gas and spotless wire, the casting itself is supplying the gas. This is why porosity shows up on nearly every list of casting-welding problems, and why it’s worth reading our dedicated guide on porosity in welding before you start — the causes and fixes in that guide apply directly here, with the extra caveat that with castings, some of the gas is coming from inside the base metal, which no amount of shielding can prevent.
The practical countermeasures are aggressive cleaning, removing the visible pore networks by grinding, preheating (which drives moisture and some absorbed gas out ahead of the puddle), short stitch beads that let gas escape between passes, and choosing a filler with good fluidity — silicon-bearing 4043 wets and flows better than 5356 and helps pores rise out of the puddle instead of freezing in place.
Here’s the dirty secret of repair welding: a used casting has been absorbing fluids for years. Sand-cast parts come out of the mold with binders and release agents baked into the surface. Die castings are sprayed with lubricant every cycle. Then the part goes into service and soaks up gear oil, coolant, road grime, and degreaser residue through its pore network. You clean the outside with brake cleaner, see bright metal, and assume you’re clean. You’re not — the contamination runs deeper than your solvent reaches, and heat wicks it up into the puddle exactly when you least want it.
That’s why preparation for castings isn’t “wipe it down,” it’s “remove the compromised material.” Grind or belt-sand until you’re into fresh metal, hit it with acetone, use a brush dedicated exclusively to aluminum (a brush that touched steel once will embed iron particles that rust inside your weld), and if the part is oily enough to suspect deep saturation, bake it gently before welding to drive out what you can. Skipping this step is the single most common reason cast welds come out porous and spongy — and it’s a mistake we’ll catalog in the mistakes section further down.
Two more conditions round out the diagnosis. The first is the unknown alloy problem already described — you’re often welding a metal you can’t positively identify, which means your filler choice is an educated bet. The second is residual stress: castings cool unevenly in the mold, get heat-treated unevenly, and in service pick up mechanical stress from bolt loads and thermal cycling. Put a hot arc into a stressed casting and it can relieve that stress by cracking — sometimes along the weld, sometimes as a new crack a few inches away, and sometimes hours after you’ve put the welder away. This delayed cracking behavior is one of the great frustrations of casting repair, and it’s why preheating and slow cooling matter so much: you’re trying to take the thermal shock out of a material that already has plenty of internal stress of its own.
It’s also why people who work with dissimilar joints and corroded parts develop respect for the metal: aluminum isn’t “easy,” it’s just different. Our piece on welding cast iron to steel shows the same principle from the other side of the shop — cast ferrous metals punish shortcuts just as hard as cast aluminum does.
To judge whether a spool gun is the right tool, you need to know exactly what problem it solves. A spool gun is a MIG gun with a small 4–10 pound wire spool and a compact drive motor mounted directly on the gun. The wire travels from that spool through a short liner — often less than a foot — to the contact tip. Compare that with a conventional MIG setup, where aluminum wire must push from the machine’s main feeder through ten or twenty feet of liner before it ever reaches the gun.
Steel wire is stiff enough to survive that push. Aluminum wire is not. It’s soft, it work-hardens as it’s dragged through liner bends, and under compression it buckles — the wire kinks inside the liner and coils into a bird’s nest back at the drive rolls. Feed problems show up at the puddle as stuttering, sputtering, and inconsistent arc length, which on aluminum means cold laps, lack of fusion, and a bead that looks like it was laid by a nervous machine. Spool guns eliminate almost all of that: short feed path, local drive rolls, and a wire that never has to be pushed far.
What the spool gun does not change is anything metallurgical. It doesn’t clean your casting, remove absorbed oil, reduce base-metal porosity, change your filler chemistry, or give you more amperage than your machine can produce. That last point catches people out: a spool gun is limited by the power source behind it. Most consumer 140–180 amp MIG machines that offer a spool-gun option are perfectly happy on 1/8-inch cast material but get thin when you’re trying to lay heat into a half-inch engine flange. Know your machine’s duty cycle and output before you commit to a job — our guide on MIG wire sizing digs into matching wire diameter to current capacity.
For context, here’s how spool guns stack up against the other aluminum-wire feed options:
| Feed System | How It Works | Best For | Watch Out For |
|---|---|---|---|
| Standard MIG gun (linear feeder) | Wire pushed from machine spool through long liner | Steel, stainless — not realistic for aluminum | Bird-nesting, kinking, erratic feeding with soft wire |
| Spool gun | Small spool and motor on the gun; short feed path | Occasional-to-regular aluminum work, repairs, field jobs, castings | Extra weight on the gun, 4–10 lb spool limits run length, machine must support spool-gun hookups |
| Push-pull system | Machine pushes, gun motor pulls in sync | Production aluminum welding, long spools, thin wire | Cost, complexity, more parts to maintain |
| Wire-feed torch / folder (retrofit feeders) | Aftermarket feeding accessories | Budget conversions | Feed reliability varies widely |
For a hobbyist or repair shop dealing with random cast parts — the exact situation this article addresses — the spool gun hits the sweet spot of cost, portability, and reliability. It’s also the most forgiving of the three for field work, because you can carry the whole aluminum-capable setup to the part when the part refuses to come to the shop (bolted engine assemblies, installed railings, mounted wheels). If you’re still building your kit from scratch, our welding tips for beginners resource walks through sensible tool-buying order so you don’t overspend before you know what you actually enjoy welding.
One more piece of the puzzle: polarity. Aluminum MIG runs on DCEP (reverse polarity), which most modern inverter machines handle automatically or via a switch — but it’s worth verifying, because running a spool gun on the wrong polarity gives you poor cleaning action and weak penetration. Our explainer on MIG polarity covers why DCEP behaves the way it does, and our MIG gas settings guide covers the flow-rate side of the equation.
Before we go one step further into technique, there’s a fork in the road that most articles skip: the spool gun might not be the right tool at all. Welding isn’t a single skill — it’s a family of processes with genuinely different strengths, and cast aluminum rewards some of them far more than others. Choosing the process first and the settings second is how professionals work; grabbing the gun that’s already on the cart and forcing the job to fit is how amateurs end up grinding out cracks at midnight.
Here’s how the three realistic options compare for cast aluminum repair:
| Factor | MIG with Spool Gun | TIG (GTAW-AC) | Torch Brazing / Braze Welding |
|---|---|---|---|
| Heat control | Good — trigger modulation, but puddle moves fast | Excellent — pedal gives pinpoint, instant control | Excellent — base metal never fully melts; lowest stress on the part |
| Speed on long seams | Fast — best of the three for long cracks and build-up | Slow — hand-fed rod, one puddle at a time | Moderate — good for short joints and build-up |
| Porosity control on dirty castings | Fair — faster travel lets gas escape, but high heat can release more | Best — low current, slow deliberate puddle, rod added deliberately | Best for contaminated parts — base metal stays below melting, so oils far less likely to boil into the puddle |
| Cosmetic quality | Functional; spatter and ripple possible | Best — stacked-dime appearance, minimal spatter | Rougher appearance; often filed or blended after |
| Equipment cost / skill floor | Lowest if you already own a MIG | Highest — AC TIG machine, tungsten skill, pedal work | Lowest — torch, rod, flux, ventilation |
| Structural suitability | Good on thick, prepped, preheated parts | Best for critical, thin, or inspected work | Light-duty and non-structural only |
| Typical best job | Cracked housings, wheel lips, thick brackets, build-up | Thin walls, visible repairs, precision fittings | Cosmetic chips, non-pressure parts, when you lack an aluminum machine |
The pattern in that table matters more than any single row. MIG with a spool gun wins on speed, deposit rate, and tolerance for less-than-perfect fit-up. If you have a two-inch crack in a thick A356 pump housing, the ability to stitch-weld quickly with a consistent filler deposit is worth a lot. TIG wins on control — the ability to watch the puddle, pause, add a tiny amount of rod, and adjust amperage mid-stroke is priceless on thin or high-value castings. And brazing — using an aluminum-silicon rod with a torch, essentially the low-heat cousin of welding — quietly wins on contaminated and delicate parts, because the base metal never reaches its melting point, so the oil trapped in the pores has far less opportunity to erupt into your joint.
For a fuller picture of the MIG-versus-TIG decision as it applies to aluminum generally, our side-by-side on the difference between MIG and TIG welding goes deeper, and whether TIG is stronger than MIG addresses the strength question people usually really mean when they ask about “better.” Short version for castings: strength depends far more on prep, filler choice, and penetration than on which process label is on the machine.
There’s a fourth option that deserves a mention only so you can avoid it: flux-core aluminum wire. It doesn’t exist in any commercially useful form for shop practice — aluminum flux-core wire was never standardized the way steel FCAW is, and the products that surface online are not something you should trust on a real repair. If you’re tempted by the idea of welding aluminum without shielding gas, read our piece on welding aluminum with a flux-core welder first — it explains why the process remains largely a non-starter for real repair work. Gas-shielded wire, or a filler rod, are the honest paths.
Decision shortcut: thick casting, non-cosmetic, long crack → spool gun MIG. Thin wall, expensive or visible part, precision fit → TIG. Oily, dubious, or lightly damaged casting with no structural demand → brazing rod. Structural or pressure-bearing part where you can’t verify the repair → don’t weld it; replace the component. That last line is a legitimate professional answer, not a cop-out.
On cast aluminum, preparation isn’t 90% of the work — it’s the part that determines whether the other 10% means anything. Every experienced aluminum welder has a story about a “quick tack” that turned into gas-soaked slag because the part was dirtier than it looked. Below is the sequence that gives a spool gun its best chance on a used casting. Work it in order; each step protects the one after it.
| Step | What You Do | Why It Matters on Castings |
|---|---|---|
| 1. Identify and disassemble | Confirm the part isn’t pressurized or load-critical; remove gaskets, seals, bearings, and sensors | Hidden seals and trapped fluids boil into the arc; pressurized parts should never be welded |
| 2. Degrease chemically | Wash with a strong degreaser or solvent, then wipe with acetone immediately before welding | Cast pores hold oil that a surface wipe alone won’t remove |
| 3. Remove the compromised layer | Grind or belt-sand 1–2 mm into bright metal around the joint zone; on oily parts, more | The outer skin is where die lube, sand binders, and years of service fluids concentrate |
| 4. Chase the crack | Drill both crack tips to stop propagation; V-grout or U-groove the full length to sound metal | Cracks run ahead of the visible line; grinding only what you see re-cracks after welding |
| 5. Brush with dedicated tool | Stainless steel wire brush used only on aluminum, never on steel | A brush that touched steel embeds iron; iron in aluminum welds rusts and weakens the joint |
| 6. Final solvent wipe | Acetone on a lint-free rag, immediately before striking the arc | Kills fingerprints and residue reintroduced during handling |
| 7. Dry / bake if saturated | Gentle oven bake (~200–250°F) for oil-soaked or water-jet-cleaned parts | Drives absorbed moisture and volatiles out before the arc does it violently for you |
| 8. Preheat if appropriate | Even warm-up to the temperature your alloy tolerates (see next section) | Reduces thermal shock, improves fluidity, lets gas escape before the puddle freezes |
| 9. Clean the filler and gas path | Fresh wire spool, clean liner, dedicated aluminum contact tips, gas line purged | Contaminated feed hardware undoes all of the cleaning you just did |
Two of those rows deserve emphasis because they’re where casting repairs most often go off the rails. The first is crack chasing. A crack in a casting is a stress raiser with a sharp tip that you cannot see with your eyes; it extends microscopically beyond the stained line on the surface. Drill a small hole at each visible end before you grind — this pins the crack — then grind a groove along the entire length until the metal at the bottom is bright and pore-free. If you skip this, you’ve welded a lid over a crack that keeps growing underneath, and the repair fails exactly where you “fixed” it.
The second is the oil question. If the part came out of an engine bay and smells like gear oil even after solvent cleaning, the saturation is in the pore network. Surface cleaning will not reach it. Grinding until you’re past the stained zone, plus a low-temperature bake, is the only reliable countermeasure — and even then, be ready for some porosity to surface on the first pass. That first pass is diagnostic: if it boils and pops violently, stop, grind deeper, and clean again rather than trying to bury the problem under more passes.
For the general principles behind cleaning aluminum before any arc process — including why the oxide layer (melting near 2,070°C while the aluminum beneath it melts at 660°C) has to be actively removed rather than just heated — the pre-weld sections of our MIG aluminum guide and the aluminum-specific cleaning notes in our welding safety tips resource both go into the “why” behind each step. And if you’re unsure whether a part is safe to weld at all — sealed chambers, fuel-carrying housings, anything with unknown history — treat the safety guidance as a hard gate, not a suggestion.
Preheating cast aluminum is one of the most valuable — and most misused — steps in the whole process. The theory is straightforward: aluminum conducts heat away from the arc violently fast, and a cold, thick casting acts like a heat sink that sucks energy out of the puddle before it can wet out properly. The result without preheat is lack of fusion at the toes, a tall narrow bead sitting on the surface, and high thermal gradient stress that invites cracking. Warm the whole part first and the puddle flows, the gradient softens, absorbed moisture and volatiles cook off ahead of the arc, and the weld has a dramatically better chance of bonding to sound metal.
The typical window for cast aluminum preheat is roughly 250°F to 400°F (120°C to 200°C), with most repair work landing around 300–350°F. Use an infrared thermometer or a temperature stick, not your palm — “too hot to touch” is somewhere around 140°F and gives you no usable data. Heat evenly with a torch or an oven rather than concentrating on one spot, and keep the heat off the crack itself until you’re ready to fill it so the crack doesn’t open further from uneven expansion.
Where people get into trouble is going further than the alloy likes. Here’s a practical guide to the trade-offs:
| Preheat Range | Effect on the Weld | When to Use It |
|---|---|---|
| Ambient (no preheat) | Fastest cycle; highest risk of cold lap, cracking, and gas porosity from moisture | Thin, small, already-hot-shop parts only if the casting is sound and clean |
| 150–250°F (65–120°C) | Drives off surface moisture; modest stress relief; low property loss | Good default for cautious work on unknown alloys |
| 250–400°F (120–200°C) | Best all-round window for most sand and permanent-mold castings; better fluidity, fewer cracks | Thick sections, repaired cracks, A356 and 319-class parts |
| Above ~400–450°F (200–230°C) | Accelerated oxidation, loss of heat-treat temper, heavier scale, possible grain growth | Avoid; over-preheating trades one defect for another |
| Die castings (380/ADC12) | Gas-rich by nature; preheat helps flow but can release trapped gas violently | Use modest preheat, expect porosity, consider brazing instead |
Post-weld treatment matters just as much as preheat. Let the part cool slowly — bury it in a dry sand bed, wrap it in a thermal blanket, or at minimum move it away from drafts so it doesn’t quench. Rapid cooling re-introduces the exact thermal stress preheating was meant to prevent, and on a heat-treated casting like T6 A356, an uncontrolled thermal cycle can also knock the temper down locally. And understand the limits: preheat reduces stress and improves fluidity, but it doesn’t fix a contaminated part or a fundamentally unsound casting. It’s an enabler for good prep, not a substitute for it.
One last caution for workshop planning: preheating raises fume concerns. As the part warms, oils, binders, and residues baked into the casting release vapor before you ever strike an arc. Do your heating in a ventilated area, wear respiratory protection rated for welding fumes, and keep your welding respirator on rather than around your neck. Standards from OSHA on welding, cutting, and brazing spell out the ventilation and exposure requirements that apply to this work; the short version is that a heated dirty casting is a fume source all by itself.
If you take one technical decision from this article, make it this one: match your filler wire to the casting, not to your habit. The two wires you’ll meet on a spool-gun shelf are ER4043 and ER5356, and they are not interchangeable in any meaningful sense. Getting this wrong is one of the most common ways cast welds crack — and the failure often shows up later, not in the moment, which makes it extra frustrating to diagnose.
ER4043 is an aluminum-silicon wire (about 5% silicon). Silicon lowers the melting point, improves fluidity, and — critically — widens the temperature range over which the solidifying weld can accommodate shrinkage strain without tearing. That makes 4043 the crack-resistant choice, and since most common cast alloys (A356, 319, 380) are themselves silicon-rich, 4043 chemically matches the family you’re welding into. Its trade-offs: lower as-welded strength than 5356, a duller silvery-gray bead, and it doesn’t anodize to a clean color match.
ER5356 is an aluminum-magnesium wire (about 5% magnesium). It’s stronger, it color-matches wrought 5xxx/6xxx material better after finishing, and it’s the right pick when the casting itself is magnesium-rich (like 535) or when the joint is structural and strength is the priority. Its trade-off on castings is the dangerous one: on high-silicon cast alloys, 5356 is more prone to solidification (hot) cracking, because the wide freezing range of the Mg-bearing weld metal meets a base metal that wants to tear as it shrinks. Many welders who “always run 5356 because it’s stronger” discover this lesson through a crack running down the middle of a bead they were proud of ten minutes earlier.
Here’s the selection chart that settles most jobs:
| Base Casting (typical alloy) | Recommended Filler | Why | Watch Out For |
|---|---|---|---|
| A356 / A356.0 (wheels, heads, structural) | ER4043 | Matches high-silicon chemistry; excellent fluidity and crack resistance | Lower strength than 5356; duller appearance |
| 319.0 (engine blocks, machinery) | ER4043 | Cu-bearing cast alloy is crack-sensitive; 4043’s freezing range helps | Requires careful heat control; preheat recommended |
| 380 / 360 / ADC12 (die cast housings) | ER4043 (or ER4047 for fluidity) | Very high silicon; 4043/4047 flow well and tolerate the base chemistry | Gas porosity inherent to die castings; consider brazing instead |
| 535 / 535.0 (Al-Mg castings) | ER5356 | Magnesium base matches magnesium filler; good strength and color | Keep heat input controlled; avoid 4043 here for strength-critical joints |
| 6061 wrought joined to cast | ER4043 (general) or ER5356 (color/finish match) | 4043 for crack-free general work; 5356 when appearance matters | Decide by priority: reliability vs. finish |
| Unknown alloy, general repair | ER4043 (default) | Forgiving, fluid, crack-resistant across the widest range of cast chemistries | Still verify no structural requirement demands 5356 |
| Non-structural cosmetic chips | ER4047 rod (torch brazing) | Very low melting point, flows like solder, minimal heat into the part | Not a structural weld; brazed joints have limited load capacity |
The “unknown alloy → default to 4043” row is the one that saves the most repairs. When you can’t identify the casting, 4043’s crack resistance and fluidity cover you across the majority of what you’ll find in a scrap pile, and its lower strength is irrelevant on the non-structural repairs that dominate unknown-alloy work. Our deeper guide to filler rod selection for aluminum expands the logic across gas welding and TIG as well, and filler classifications themselves are standardized under AWS A5.10 — the AWS standards library is where the official designations (ER4043, ER5356, and the rest) are defined if you want the source rather than a forum post.
Whatever wire you pick, buy it clean and store it clean. Aluminum wire that’s been sitting in a dusty shop picks up oxide and moisture that go straight into your arc, and a contaminated spool will generate porosity no matter how perfectly you prepped the casting. Fresh wire, clean liner, dedicated contact tips sized to your wire diameter — details our wire-feed welding guide treats as first-class variables rather than afterthoughts.
For almost all cast aluminum MIG work with a spool gun, 100% argon is the gas — full stop. Argon gives a stable, easily started arc at the low-to-moderate currents typical of repair work, and it’s forgiving of the slight variations in stickout and travel that come with welding awkwardly shaped castings. Flow rate generally lands between 20 and 25 CFH (about 10–12 L/min) for most jobs; too low and the puddle goes milky and porous from air entrainment, too high and the turbulence actually pulls atmosphere into the shielding envelope. Start around 20 CFH, watch the puddle, adjust from what you see.
Helium mixes (argon/helium blends, commonly 75/25 or 50/50) are the standard escalation when you need more heat — thick sections, deep grooves, or a machine that’s light for the job. Helium raises arc voltage and heat input noticeably, giving deeper penetration and a hotter, more fluid puddle. The trade-off: the hotter arc is harder to control on thin sections and burns through faster if you’re not disciplined. If you’re curious about how shielding gases behave at a physics level, the overview of shielding gas is a useful plain-language reference, and our own guide to what gas to use for welding aluminum covers the argon-versus-helium decision in a shop context.
And to close a door that should stay closed: CO₂-containing mixes — your standard 75/25 argon-CO₂ steel gas — do not belong on aluminum. CO₂ oxidizes aluminum, produces a filthy unstable arc, and guarantees a bad weld. If someone has told you it “kind of works,” they’re describing a weld that will fail. Our experiment write-up on welding aluminum with 75/argon-25/CO₂ documents exactly why that combination fails.
On settings, there’s no universal chart that fits every machine and every casting, but the working ranges for a spool gun on cast aluminum look roughly like this:
| Cast Thickness | Wire Diameter | Typical Current Range | Notes |
|---|---|---|---|
| 1/16″ (1.6 mm) | 0.030″ (0.8 mm) | 60–80 A | Lowest practical settings; short stitches; watch burn-through |
| 1/8″ (3.2 mm) | 0.030″–0.035″ | 90–130 A | The comfortable sweet spot for most 140–180 A machines |
| 3/16″–1/4″ (4.8–6.4 mm) | 0.035″ (0.9 mm) | 130–170 A | Preheat strongly; consider beveling and multiple passes |
| Over 1/4″ | 0.035″–0.045″ | Machine-dependent | Spool gun may be underpowered; preheat, multi-pass, or switch process |
Treat those numbers as a starting bracket, not gospel. Dial in on a scrap piece of similar thickness — ideally a scrap casting of the same alloy, not plate, because castings suck heat differently than rolled plate does. Voltage (arc length) should be set for a soft, consistent crackle rather than a violent spit; a puddle that’s boiling and popping hard usually means contamination in the base metal, insufficient gas, or both. As a general technique rule on castings: push, don’t pull — pushing the gun keeps your shielding gas over the puddle you’ve just laid and gives better visibility of the leading edge. Keep stickout short (about 1/4–3/8 inch) and travel speed brisk enough that the puddle stays narrow and doesn’t get gray and frothy.
For broader settings literacy — interpreting the dials, understanding what inductance and arc voltage actually do to bead profile, and building the habit of dialing in on scrap before you touch the workpiece — the MIG gas and settings guide translates dial numbers into puddle behavior. If part of your reasoning for choosing MIG in the first place was penetration comparisons, the TIG settings chart is also worth a skim — it shows how AC balance and amperage control the same aluminum puddle from the other process’s perspective.
Settings get you an arc; technique gets you a joint. On cast aluminum specifically, the technique has to compensate for a base metal that contains gas, resists wetting, and cracks under restraint. The habits below are the ones that separate a repair that lasts from one that bubbles apart in the first week.
Long continuous beads are the enemy of casting repair. Run a 4-inch bead in one pass and you’ve pumped a concentrated line of heat into a material that’s already full of voids and internal stress. The metal ahead of your puddle expands, the metal behind it shrinks, and the casting fights back — with cracks. Instead, weld in short stitches of roughly 1 to 1.5 inches, skip around to distribute heat (backstep or stagger patterns), and let the part cool to below ~200°F between sequences. The slower overall cycle feels inefficient; it’s actually faster than grinding out a cracked first attempt.
The arc is bright and distracting; the puddle is where the truth is. On a casting, a healthy puddle is shiny, fluid, and advancing evenly into both walls of your groove. A puddle that’s gray, frothy, or sitting proud of the surface without wetting the toes means one of three things: contamination boiling out of the base metal, insufficient heat, or gas starvation. Stop and diagnose rather than continuing — every additional pass on top of a bad root pass makes the repair worse, because you’re now welding into your own contaminated deposit.
Even on a well-prepped casting, expect some porosity to break the surface of your first pass. Don’t just cover it. Let it cool, grind the porous area back to clean metal, wipe with acetone, and re-weld. Porosity sealed under a cap pass becomes a permanent internal defect — and if you’re curious how much that actually costs in mechanical terms, our analysis of weld strength breaks down how voids and undercut translate into lost load capacity. A visible pinhole you can pick out with a fingernail is a warning; a sealed pocket of them is a failure waiting for a load.
Aluminum welds crack at craters more than almost anywhere else. As you end a stitch, hold position for a beat while the puddle solidifies, or back the trigger slightly to ramp current down if your machine has downslope. A crater crack at the end of a stitch will propagate into the base metal — on a casting with existing stress, that propagation can be fast. If you see a crater split, grind it out immediately and re-fill; never leave one “for later.”
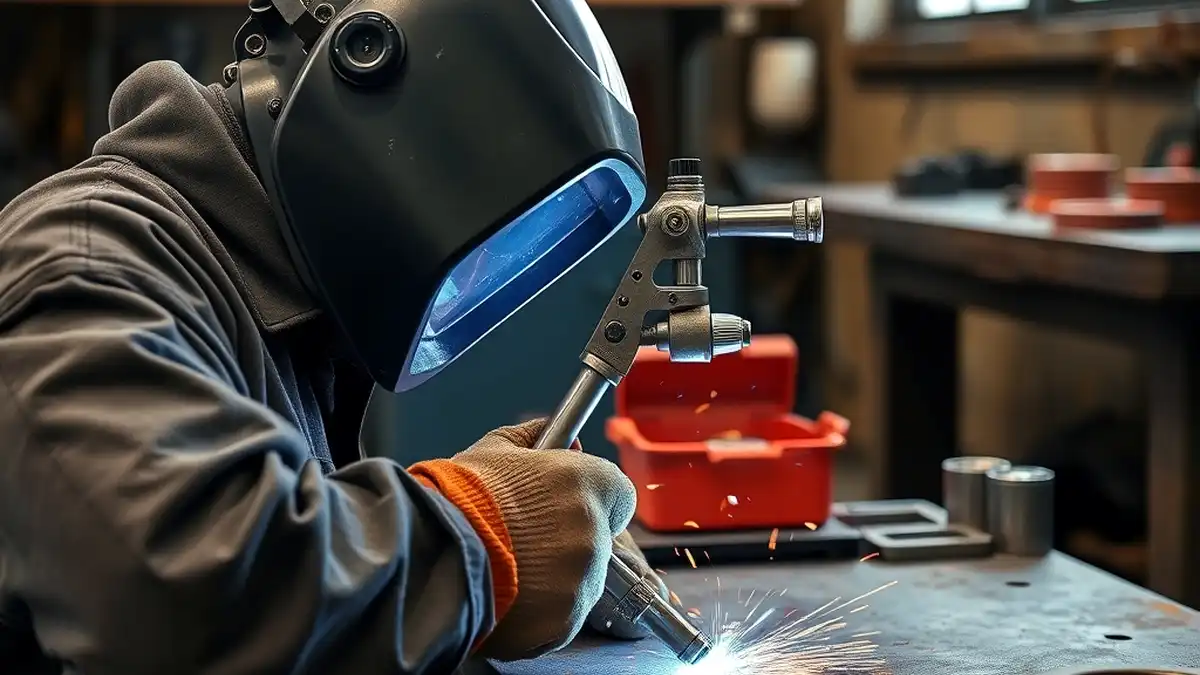
Aluminum’s high thermal conductivity means heat spreads away from the puddle faster than steel welders expect — but a spool gun sitting in one spot still concentrates enough energy to blow through a thin casting section. Keep a steady travel speed, keep the arc aimed at the leading edge of the puddle, and if you need to pause to reposition, release the trigger rather than hovering. On thick sections where you want deeper penetration, weave sparingly: a tight side-to-side motion that washes the sidewalls, not a wide figure-eight that dilutes the puddle and overheats everything.
These technique habits transfer directly from sound MIG fundamentals — the same body position, trigger timing, and puddle discipline described in our beginner welding tips — with the casting-specific additions of shorter stitches, more patience, and a much lower tolerance for ignoring what the puddle is telling you.
Let’s put all of this together in a single realistic job — the kind that shows up on a Saturday with no blueprint and no alloy stamp. The part: a cracked cast aluminum pump housing from a pressure washer, roughly 3/8 inch thick at the crack, oil-stained from years of service, with a two-inch fracture running from a bolt hole to the edge of a mounting flange. Non-structural in the sense that it doesn’t carry the machine’s frame loads, but it does need to hold a gasket seal along part of its length. The tool: a 180-amp MIG machine with a spool gun, a spool of ER4043, and a bottle of argon.
Here’s the sequence that turns that pile of doubts into a sound repair:
1. Triage and teardown. First question isn’t “can I weld it?” — it’s “should I?” The housing isn’t pressurized (the pressure lives inside a different component), it isn’t safety-critical, and replacement cost is high enough to justify the effort. Gasket material, seals, and the pressure switch come off. Every rubber and fiber component leaves the bench, because they vaporize beautifully under an arc and contribute nothing but fumes.
2. Clean like the part owes you money. Degreaser wash, then a solvent wipe. The crack region gets ground with a 4-inch flap disc until bright metal shows across a full inch on either side of the fracture — the stained, oil-darkened skin comes off, not just gets scuffed. Then the deeper drill: because the housing sat in an oil-filled assembly, the ground area gets a sniff test and a second, more aggressive pass where the metal still looks dull. Acetone wipe last.
3. Chase the crack. A small hole is drilled at each end of the visible fracture to pin it. Then a V-groove is ground along the entire length, cutting until the bottom of the groove is clean, bright, and free of the dark line that marks the crack. The bolt hole at the origin gets inspected — if it’s visibly deformed or the crack runs right through its wall, that hole gets slightly overdrilled and the weld builds around it.
4. Brush, wipe, and set the machine. Dedicated stainless brush over the groove, acetone wipe, spool gun connected and confirmed on DCEP, gas flow set to 20 CFH, wire speed and voltage dialed in on a scrap casting of similar thickness. On 3/8-inch material the machine lands around 140–160 amps with 0.035-inch 4043 wire — the machine is comfortable here, no struggle for heat.
5. Preheat. Even warm-up with the torch to about 300°F, checked with an infrared thermometer, concentrated on the mass of the housing rather than soaked directly into the groove. The warm-up phase is also diagnostic: as the metal comes up to temperature, a faint oil smell confirms the saturation was real, and the ventilation fan goes on.
6. Root pass. Short stitches, about an inch each, worked from the middle of the crack outward in alternating directions so heat doesn’t pile up at one end. Travel speed brisk, arc aimed at the leading edge, stickout short. The first pass comes out slightly porous — expected, given the casting’s history — so it’s allowed to cool, the porous sections are ground back to sound metal, wiped, and re-run. Second pass on those spots comes out clean.
7. Cap and finish. A final cap pass slightly wider than the root, again in stitches with cooling pauses between sequences. Crater control at every stop. After the last stitch the part is set aside to cool slowly — no fan, no water, no quenching impatience.
8. Inspect honestly. Once cool, the weld is examined under a light: no pinholes you can catch with a fingernail, no crater cracks, no lack-of-fusion line at the toes, and the original crack tips show no signs of reopening. The gasket surface gets a light pass with a file to restore flatness. Total arc time: maybe forty minutes. Total elapsed time with cleaning, preheating, and pauses: most of an afternoon — and that ratio, where preparation dwarfs welding, is completely normal for casting work.
That ratio is the whole lesson. The arc portion is the shortest and least decisive part of the job. If you reversed it — five minutes of cleaning and forty minutes of welding — you’d get the porous, gray, poppy mess that sends people to forums to declare cast aluminum “unweldable.” It’s weldable. It just charges rent in preparation.
Most casting-repair failures aren’t mysteries. They’re the same handful of errors, repeated in different garages. Here are the ones that come up most often, and what to do instead:
Notice how many of those ten are preparation and process choices rather than hand skills. That’s the signature of cast work: the gun is the easy part. If you’re still building your general MIG fundamentals, the fundamentals in our welding tips for beginners guide will make the casting-specific skills land much faster.
The mark of a good welder isn’t using the spool gun everywhere — it’s knowing when it’s the wrong tool. Three situations reliably call for something else.
Thin or cosmetic castings → TIG. When the wall is under about 1/8 inch, when the repair is visible on a finished product, or when the part is valuable enough that a second attempt isn’t available, AC TIG gives control no spool gun can match: pedal-regulated amperage, the ability to pause mid-puddle, precise rod addition, and far less spatter. TIG also handles the “start-stop on a thin edge” problem that makes MIG tricky — you can fuse a crack along a thin lip without the constant fear of blowing through that a wire-fed arc carries. Setup matters: AC balance tuned for cleaning without excessive penetration, a properly ground electrode, and the right tungsten — our guide to what color tungsten for aluminum covers the selection, and our TIG settings chart walks through dialing in amperage and balance by material thickness.
Contaminated or doubtful castings → brazing rod. An aluminum-silicon brazing rod used with a torch melts well below the base metal, which means the oil deep in the pores never gets the chance to boil into a molten puddle — the base metal never becomes molten. For chips, non-pressure housings, decorative damage, and repairs where you lack a shielding-gas setup entirely, brazing is an honest, low-risk answer with an equally honest limitation: it’s not a fusion weld, and its load capacity is lower. Use it where the demand matches the method.
Unknown history, pressurized, or structural parts → stop. A casting with no alloy identification, no service records, and a crack you can’t fully chase is a candidate for replacement, not repair. Same for anything that holds pressure, carries a person, or fails in a way that hurts someone. Walking away from a weld is a legitimate skill — it appears in professional practice as engineering judgment, and it’s the same instinct that keeps our welding safety guidance from being decorative reading.
There’s also a “after the weld” consideration that casual repair work ignores entirely: if the repaired part lives outdoors, on a vehicle, or anywhere two dissimilar metals meet, corrosion protection is part of the job. Aluminum joined near steel creates the classic galvanic couple, and a repaired casting bolted to a steel bracket will happily sacrifice itself at the joint interface over a few seasons. Sealing, isolation, and coating strategies are covered in depth in our guide to preventing galvanic corrosion — worth reading before you declare the job finished. For background on how the industry thinks about these joining problems at scale, TWI’s technical knowledge base is an excellent non-commercial reference, and The Aluminum Association publishes the alloy and fabrication data that underlies most of the numbers quoted throughout this article.
Welding a dirty casting is a fume event before it’s a welding job. The hazards here deserve their own moment because they’re easy to underestimate. Heating and arcing on a used casting releases whatever the pores contain: oil mist, solvent residue, mold binders, degreaser byproducts. On aluminum specifically, the arc also generates aluminum oxide fume — fine particulate that doesn’t belong in your lungs. Add the usual welding hazards (UV radiation, electrical risk, hot metal, and for aluminum, the invisible-but-intense arc glare) and the PPE requirements are not optional.
Minimum kit for this work: a welding helmet with an appropriate lens for the process, leather gloves and jacket, hearing protection if grinding, a respirator rated for welding fume (not a dust mask), and real ventilation — exhaust at the source or, at minimum, fresh-air cross-flow that pushes fume away from your breathing zone. Bake and preheat operations should happen in the ventilated zone too, not at the bench where you’ll be leaning over the part. Reference standards from OSHA’s welding, cutting, and brazing pages set the employer-side requirements, and the same principles apply to a home shop: if you can smell the part heating up, your ventilation isn’t working hard enough. Our welding respirator guide breaks down cartridge types and fit, which matters more than the brand name on the box.
One more cast-specific caution: never weld a sealed casting. A closed cavity — a cylinder, a sealed housing, a capped passage — heats, the air or fluid inside expands, and the resulting pressure can rupture the metal or eject molten material. Drill a vent, open the cavity, or don’t weld it. It’s the same logic that governs safe hot work in industrial settings: pressure has to have somewhere to go.
Yes — a spool gun is a legitimate, commonly used tool for cast aluminum repair, and it solves the hardest mechanical problem of aluminum MIG (wire feeding) cleanly. The caveats are the casting itself: porosity, absorbed oil, oxide, and unknown alloy all have to be addressed through preparation, preheat, and filler selection. The gun gets an honest chance only when the prep is honest too.
Default to ER4043 for most castings — A356, 319, 380/ADC12, and unidentified alloys — because its silicon content gives fluidity and crack resistance that matches silicon-rich cast chemistries. Use ER5356 when the casting is magnesium-rich (such as 535) or when strength specifications demand it, and be aware that 5356 is more crack-sensitive on high-silicon castings. For non-structural cosmetic work, an aluminum-silicon brazing rod is a lower-heat alternative. Our filler rod guide covers the wider selection logic.
Not always, but on thick, oily, stressed, or cracked castings preheat in the 250–400°F range usually makes the difference between a weld that wets out and one that sits on top of the surface cold-lapping. Small, thin, clean parts can often be welded cold with stitch technique. Over-preheating past roughly 400–450°F causes oxidation, temper loss, and grain problems — so aim for the window, not the maximum.
Three usual suspects, in order of likelihood: contamination boiling out of the casting (oil, binders, moisture in the pore network), base-metal porosity re-melting into the puddle, and shielding gas problems (wrong gas, wrong flow, drafty environment). Cure the first with grinding past the affected layer and baking, the second with groove-out and multi-pass technique, and the second with gas checks. We cover the general diagnostics in our porosity in welding guide.
For thin walls, cosmetic repairs, and precision work — yes, TIG’s heat control wins decisively. For long cracks, thick sections, build-up work, and speed, a spool gun MIG is often the better practical choice. Neither process overcomes bad preparation; both reward it. If you’re weighing the two for your own shop, our MIG vs TIG breakdown and the question of whether TIG is stronger than MIG cover the trade-off in full.
100% argon at roughly 20–25 CFH covers the vast majority of repair work. Argon-helium blends are the upgrade path for thick sections or underpowered machines, since helium adds arc heat and penetration. Never use CO₂-containing mixes on aluminum — they oxidize the puddle and produce junk welds, as our 75/25 argon-CO₂ test demonstrates.
You can try, but manage expectations. High-pressure die castings trap gas during injection and are soaked in die-release lubricant, so porosity in the finished weld is common even after excellent prep. For non-structural repairs, moderate preheat, 4043 or 4047 filler, and patient stitch technique can produce usable results. For anything critical, consider brazing or replacement instead — and know that many professionals decline die-cast structural repairs outright.
As strong as your prep, penetration, and filler allow — but rarely as strong as the original casting was in its heat-treated condition, and never stronger than the weakest section you didn’t inspect. Castings with heavy internal porosity cap the achievable joint quality regardless of technique. For a clear picture of how weld quality translates into load capacity, see our breakdown of weld strength. When the part is safety-critical, “probably strong enough” is not an engineering answer.
Only with a proper push-pull feeder or a very short, clean liner run — a stock gun fed from the machine’s main spool will bird-nest and stutter with soft aluminum wire almost every time. That feeding problem is exactly why spool guns exist, and why they became the standard entry point for aluminum MIG work. Wire diameter choice supports the same goal: 0.030-inch wire feeds more reliably than heavier diameters on modest machines, as our wire size chart explains.
The arc itself carries the standard welding hazards — UV, electrical, hot metal — and dirty castings add a fume problem on top: oils, binders, and residues cooked out of the pores. Wear a proper respirator, ventilate aggressively, preheat in a ventilated area, and never weld a sealed cavity. If the part’s history is unknown or it held fuel or pressure, treat replacement as the safer option.
Yes — you can weld cast aluminum with a spool gun, and when the prep is right, it’s a perfectly respectable choice for the majority of real-world casting repairs. The spool gun fixes the feeding problem that makes aluminum MIG miserable, it’s portable enough to bring to the part, and paired with 4043 wire, 100% argon, correct polarity, and stitch technique, it produces sound, serviceable welds on A356 wheels, 319 engine components, pump housings, brackets, and a long list of other cast parts that show up in garages and shops every day.
But the gun was never the hard part. Cast aluminum brings three problems to the bench — porosity that’s already inside the metal, contamination that soaked in over years of service, and alloys you often can’t identify — and no wire feeder on earth solves any of them. Preparation solves them. Grinding past the compromised layer, chasing the crack to sound metal, baking out absorbed oil, preheating to the 250–400°F window, choosing 4043 over 5356 unless the chemistry says otherwise, running short staggered stitches with proper crater control, and having the honesty to switch to TIG or a brazing rod when the part demands it — that’s the actual skill. The trigger pull is the easy thirty seconds at the end.
Here’s the whole article in one breath: the spool gun is a capable tool for cast aluminum work, the casting decides the rules, and preparation is the real technique. Clean it like the weld depends on it — because it does. Preheat it like the metal has a temper and a memory — because it does. Fill it with wire that matches the alloy family rather than your shelf inventory. Move fast, stitch small, watch the puddle, and inspect every stop. Do that, and the cracked casting on your bench becomes a repair you can stand behind — and if the part is critical, sealed, pressurized, or beyond honest repair, you’ll know that too, which might be the most valuable skill in this entire craft.
Want to keep building from here? Start with our complete guide to MIG-welding aluminum for the fundamentals underneath everything above, then level up the quality side with our weld strength and porosity deep dives — and before the next job, give the welding safety checklist a fresh read, because the fumes from a dirty casting are exactly the kind of hazard that’s easy to talk yourself out of taking seriously.