The shop was quiet except for the hum of the compressor and the angry buzzing coming from booth three. Derrick, three weeks into his first job at a structural fabrication shop, yanked his helmet up and stared at the fillet weld in front of him. It looked like two different people had made it. The left half was a smooth, slightly convex stack of dime-ish ripples. The right half was a cratered, spattery mess with a hole near the stop. His instructor, a gray-haired welder named Sal who had thirty-one years of pipe and plate work behind him, walked over, glanced down, and said something Derrick never expected.
“Same wire. Same machine. Same steel.” Sal tapped the weld with a gloved finger. “The only thing that changed was you — and you didn’t even know it. Your angle drifted, your speed doubled when you got nervous about the edge, and your stickout grew because you leaned back. Wire’s fine. Machine’s fine. Technique’s the whole ballgame.”
Derrick’s story is the story of almost everyone who picks up a flux core gun for the first time — and plenty of experienced welders who never move past the basics because nobody ever broke technique down into learnable, repeatable pieces. Flux cored arc welding has a reputation as the “easy” process: it works outdoors, it’s forgiving of dirty metal, it deposits metal fast, and it runs on affordable machines. All true. But there’s a canyon between usable and skilled, and the difference isn’t talent or expensive equipment. It’s technique — gun angle, travel speed, stickout, stickout consistency, arc length, weave discipline, position strategy, and the hundred small decisions your hands make every second you’re pulling the trigger.
This guide is your masterclass in those decisions. We’re going to take the whole skill set apart — from dialing in your first bead to welding vertical-up joints that pass visual inspection — and rebuild it in an order that actually teaches. Whether you’re brand new to flux core or you’ve been burning wire for years and want to close the gaps, what follows is the systematic path from “it sticks” to “it’s right.”
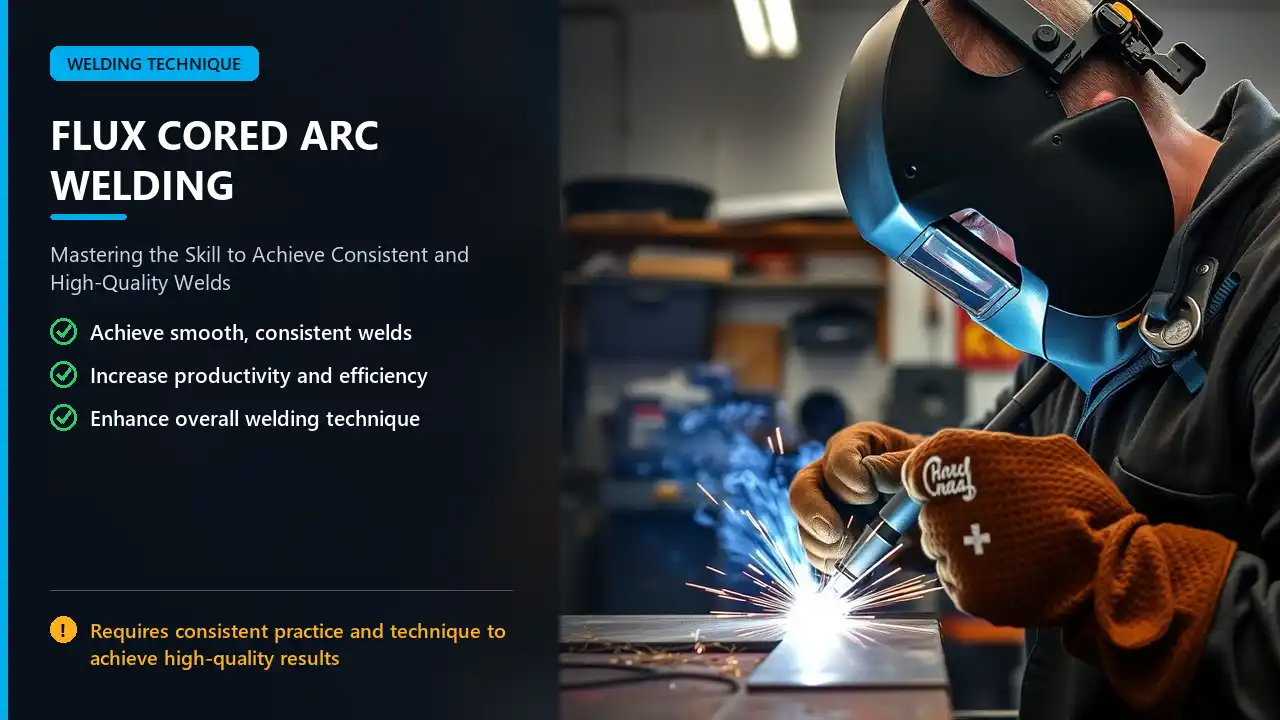
Key Takeaways: The Skill Pillars of Flux Core Welding
Before we get into the deep mechanics, here’s the framework. Every technique in this article ladders up to one of these pillars — keep them in view and the details will make far more sense as they arrive.
- Parameter discipline comes first. Voltage and wire speed are the foundation; technique can’t rescue settings that are wrong. Learn to hear a good arc — a steady, crisp frying sound — before you worry about fancy gun work. Our flux core welding settings guide gives you the dial-in starting points.
- Consistency beats brilliance. A weld with steady angle, steady stickout, and steady speed will outperform a weld with one brilliant section and three sloppy ones. Inspectors don’t grade peaks — they grade uniformity and freedom from defects.
- Position changes everything. The settings and strategy for flat, horizontal, vertical-up, and overhead are genuinely different. Our dedicated guides to vertical-up settings and horizontal settings cover each in depth.
- Push or pull matters. Self-shielded flux core is a drag (pull) process in nearly every scenario — using push technique with gasless wire is one of the most common and most fixable mistakes. We explain the “why” in our push or pull technique guide.
- Diagnose systematically. Porosity, undercut, lack of fusion, worm tracks, and excessive spatter each have specific causes — and the fix is usually a parameter or technique change, not a new machine. Bookmark our troubleshooting playbook.
- Safety is part of technique. Fume exposure, UV radiation, spatter, and ergonomics aren’t side topics — they directly affect your consistency and career longevity. Follow OSHA’s welding standards and NIOSH’s health guidance.
With those pillars set, let’s start where every weld starts: at the machine, turning dials.
Step Zero: Dial In Before You Strike the Arc
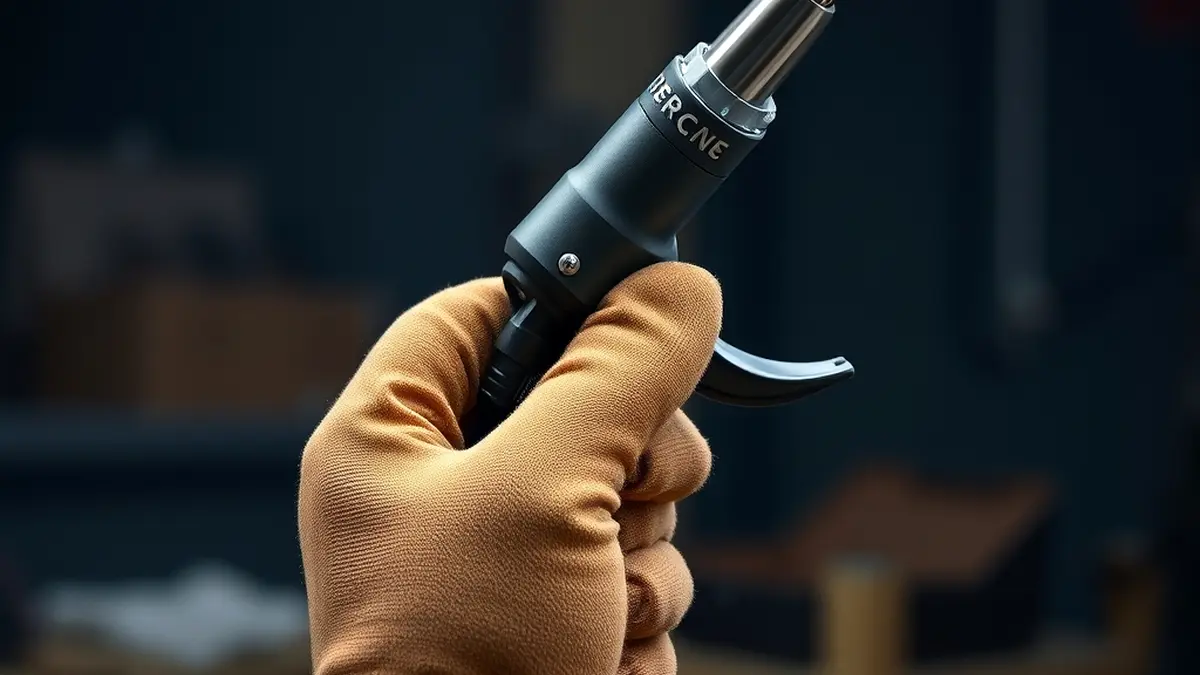
Here’s an uncomfortable truth that separates professionals from hobbyists: the majority of “technique problems” reported by new welders are actually parameter problems wearing a disguise. You cannot out-technique wrong settings. If your voltage is too low, you’ll get cold-lapped, ropey beads no matter how perfect your angle. If your wire speed is too high, the wire will stab into the puddle and stub like a broken record. If polarity is wrong (self-shielded flux core runs on DC electrode positive — DCEP), the arc will feel wild and unstable no matter what you do with your hands. Our guide to flux core polarity walks through getting this foundational setting right.
The two dials that matter most are voltage (arc length and heat) and wire feed speed (amperage and deposition rate). They work as a pair, not as independents. Think of wire speed as your gas pedal and voltage as your steering — pushing harder on the pedal without adjusting the wheel gets you somewhere, just not somewhere good.
A practical dial-in routine looks like this. Start with the manufacturer’s recommended settings for your wire diameter and material thickness — charts like our flux core amperage chart and the more detailed wire speed and voltage chart give you credible starting numbers. Run a test bead on scrap of the same thickness as your project. Then evaluate against three questions:
How does the arc sound? A properly set flux core arc produces a steady, consistent frying or crackling sound — not a slow popping (too cold, usually low voltage), not a violent snapping and spitting (too hot or too long an arc), and not a stuttering, interrupted buzz (wire speed too fast for the voltage, or poor contact). Sound is genuinely one of your best diagnostic tools; experienced welders often diagnose settings with their eyes closed, listening for the rhythm. Learn that sound deliberately — run beads at slightly-low, ideal, and slightly-high settings on scrap and memorize what each one sounds like. Twenty minutes of this exercise will teach you more than an hour of reading.
How does the bead look? A good flux core bead sits slightly convex (a small crown, not a flat pancake), has evenly spaced ripples, wets into the toes of the joint without cold lap (rolled-over edges that never fused), and holds width consistently along its length. If the bead is tall and narrow with an undercut line along the edges, voltage is likely too low or travel too fast. If it’s flat, wide, and washed out with excessive spatter, voltage is likely too high or travel too slow. If it wanders in width, your technique is inconsistent — go back to fundamentals.
How does the slag behave? Slag is a messenger. Thin, glassy, easily lifted slag usually means parameters are in a healthy range. Thick, crusty, stubborn slag can indicate the travel was too slow or the settings too cold. Slag that bubbles or traps pinholes in the bead almost always points to contamination or shielding problems. Learning to read slag is a skill in itself — and it’s one of the quiet advantages of flux core: the process literally leaves you a report card after every pass.
One more foundational element: wire size matters more than people think. The two common diameters — .030″ and .035″ — aren’t interchangeable in spirit. .030″ runs better on low-amperage 110V machines and thin material; .035″ handles thicker plate and higher deposition. Our comparison of .030 vs .035 flux core wire helps you choose, and our review of the best flux core wires covers the consumables themselves — because cheap wire with inconsistent core loading will sabotage your technique no matter how good your hands are.
Gun Angle: The Most Overlooked Variable in the Arc
If you asked ten experienced welders what single technique element causes the most trouble, gun angle would win the vote almost unanimously — and for good reason. It’s invisible when you’re doing it wrong, it drifts constantly as you move along a joint, and it affects shielding, penetration profile, bead shape, and slag behavior simultaneously.
Two angles define your gun’s relationship to the work. The work angle is the gun’s orientation relative to the joint itself — for a fillet weld in the T-joint shown below, the gun typically bisects the two plates (roughly 45°). The travel angle is the gun’s tilt along the direction of travel — whether you’re pointing into the direction you’re moving (push) or trailing behind it (pull/drag).
Here’s the rule that matters for self-shielded flux core: drag it. Nearly all gasless flux core work is done with a trailing gun angle of approximately 10–15° behind vertical, pulling the puddle along behind the arc. The reason is physics: the shielding atmosphere generated by the flux core needs to blanket the molten puddle, and dragging keeps that atmosphere trailing over the weld zone instead of blowing it away ahead of the arc where it’s useless. Push with gasless wire and you’re essentially directing your own shielding gas away from where it needs to be — which is exactly why push technique with self-shielded wire is one of the most common technique errors we see flagged.
The work angle varies with joint type. For a fillet weld (T-joint), start at 45°, bisecting the joint. For butt joints, the gun is near-vertical (90° to the plate) with the travel angle doing the drag work. For lap joints, bias the gun slightly toward the top plate (about 15° toward the vertical member) to ensure both toes wet out. For outside corner joints, aim at the intersection of the two edges.
The deeper skill is angle stability through the entire pass. Watch a beginner’s weld on video sometime — you’ll see the gun angle flatten as the arm extends, then steepen as the welder leans back in, producing a bead that’s wide and flat at the start and narrow and cold at the finish. Your forearm should move as one unit with the wrist locked, positioned so the natural arc of your arm sweep keeps the angle constant. If you can’t maintain the angle comfortably through the whole joint, reposition your body — kneel, sit, brace your elbow — before you strike the arc, not halfway through it.
Practice drill: strike an arc and hold a bead for six inches while a partner watches your gun (or set up your phone to record). Watch the footage. Nearly everyone discovers drift they couldn’t feel. Correct it consciously for a week and the correction becomes automatic.
Contact Tip to Work Distance: The Invisible Power Dial
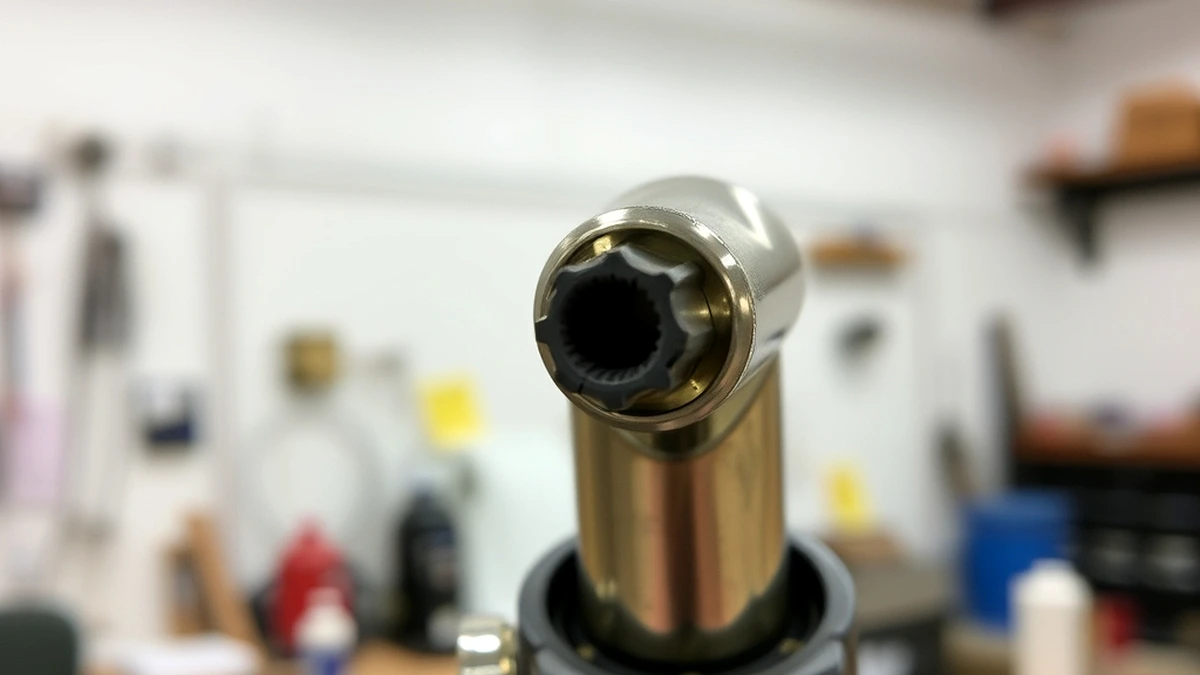
Welders talk about “stickout” the way drivers talk about following distance — everyone agrees it matters, few can state their actual number. Stickout is the distance from the contact tip’s end to the work surface, and in flux core welding, it has an outsized effect on arc characteristics.
Self-shielded flux core wants a longer stickout than MIG — typically around 3/4″ to 1-1/4″ (roughly 19–32 mm) depending on the manufacturer’s recommendation, versus the 1/2″ commonly used for gas-shielded MIG. The reason: as the wire extends beyond the tip, electrical resistance builds along that length, increasing the current (amperage) actually reaching the arc. More resistance equals more heat equals deeper penetration and better flux activation. In other words, stickout is a free amperage adjustment that lives at the end of your gun.
But like all free adjustments, it has a Goldilocks window. Too short, and you starve the arc of resistance — the arc gets soft, penetration suffers, and you risk the contact tip touching the puddle and contaminating it. Too long, and the wire’s electrical resistance makes it heat and ball up before it reaches the joint, shielding becomes erratic as the arc wanders, and the flux doesn’t activate consistently — producing porosity and unstable arcs. Consistency matters even more than the exact number: if your stickout changes by half an inch during a pass (because your arm is extending or you’re leaning back — the same drift we saw with gun angle), your effective amperage changes mid-weld, and the bead width and penetration change with it.
This is why stickout discipline shows up in every professional’s technique: they position their body so the distance stays constant, they reposition rather than stretch, and they’re aware of the tip wearing back as they weld (the contact tip erodes over time, gradually shortening the effective stickout — replace tips before they deform, not after they fail mid-pass).
Combined with gun angle, stickout forms the “static geometry” of your weld — the setup conditions that determine what the arc is capable of before you even start moving. Nail these two, and travel technique has something solid to build on. Neglect them, and no amount of puddle-watching will save the weld.
Travel Speed and Weave: Where the Bead Is Made
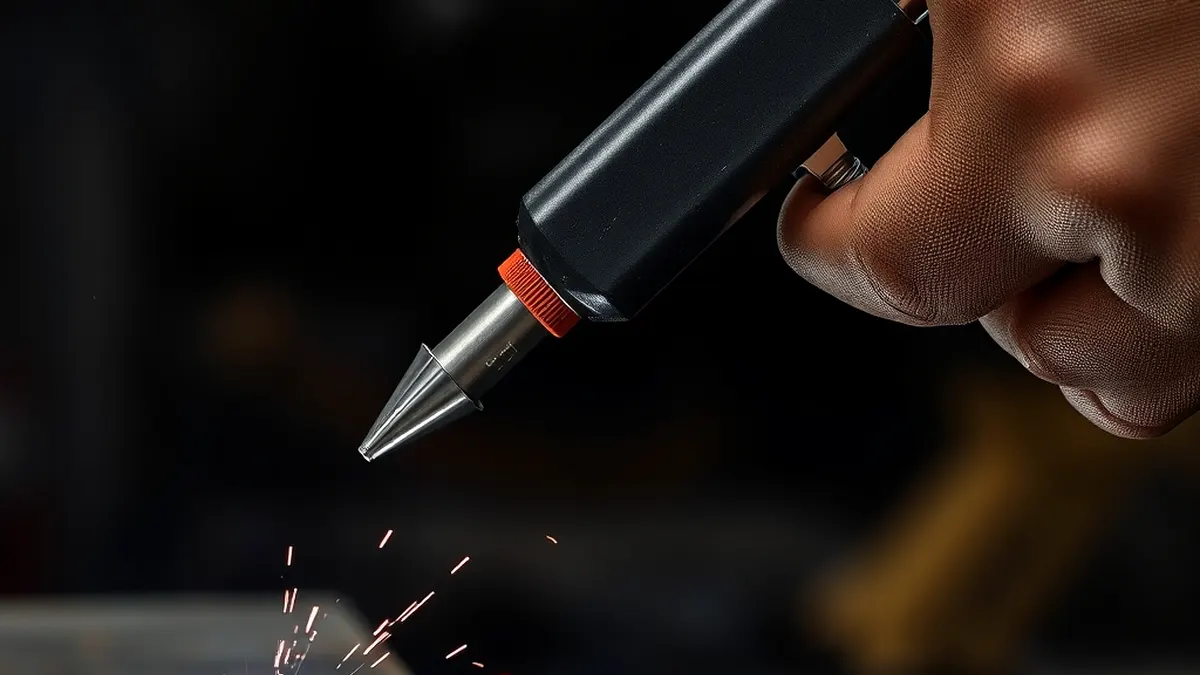
If angle and stickout are the static geometry, travel speed and weave are the dynamic ones — the variables you’re actively managing while the arc is lit and molten metal is flowing. This is where flux core technique becomes genuinely craft-like, and where practice hours translate directly into visible improvement.
Travel speed is the great balancing act. Move too fast and the puddle can’t keep up: the bead narrows, penetration thins, the toes fail to wet out (cold lap), and the flux doesn’t fully react — you may even see unburned flux or incomplete slag coverage behind you. Move too slow and the puddle grows beyond your control: excessive buildup, higher heat input, potential burn-through on thinner material, spatter that gets worse as the arc dwells, and — on steel — a coarser heat-affected zone that can weaken the joint’s properties.
The correct speed is the one that produces a bead of consistent width with good toe wet-out at the settings you’ve dialed in — and it changes when settings change, when joint geometry changes (outside corner vs open root), when position changes (gravity pulls the puddle differently in overhead than flat), and even when you move from the beginning of a joint to the end (the plate heats up as you go, so you often speed up slightly to compensate).
A reliable calibration method: run beads at a comfortable, steady pace, then evaluate. If the bead is too narrow and tall, speed up or add voltage. If it’s too wide and flat with heavy spatter, slow down is not the answer — check voltage first, because slow travel with high voltage produces the worst combination of washed-out beads and spatter storms. For the full parameter matrix, our parameters guide maps settings to outcomes.
Weave patterns are the other half of movement. For most flux core work — and this surprises beginners who’ve watched YouTube montages — stringer beads (straight, no weave) are the default and often the best choice. Stringers put the heat where it belongs, minimize heat input, produce the cleanest fusion, and are easiest to keep consistent. They’re also the pattern inspectors see in the highest-quality work because they minimize the risk of trapped slag and inconsistent penetration that fancy weaves can introduce.
Weaving earns its place in three specific situations: filling wide joints where multiple stringers would be inefficient; tying into both sides of a joint (a gentle zig-zag or crescent motion that wets each toe); and vertical-up work, where a controlled weave — typically a triangle, crescent, or Z-pattern with a pause at each side — is how you build the shelf that supports the puddle against gravity. The universal rule for all weaves: pause at the toes, not in the middle. The edges are where lack of fusion and cold lap live; dwelling briefly at each side lets the puddle wet in, while the middle of the weave moves quickly to avoid dumping excess heat into the joint’s center. Move fast in the middle, pause at the edges — reverse that and you’ll get a beautiful center with cold, unfused toes, which is exactly what an inspector is trained to reject.
Wide weaves in general carry a hidden risk: they concentrate heat and can cause excessive grain growth and distortion in the heat-affected zone. Many welding procedures — especially code work — explicitly limit weave width (a common specification is no more than 2.5 to 3 times the wire diameter, though the exact limit depends on the procedure). Even outside code work, keeping weaves narrow trains better habits.
Out of Position: Vertical, Horizontal, and Overhead
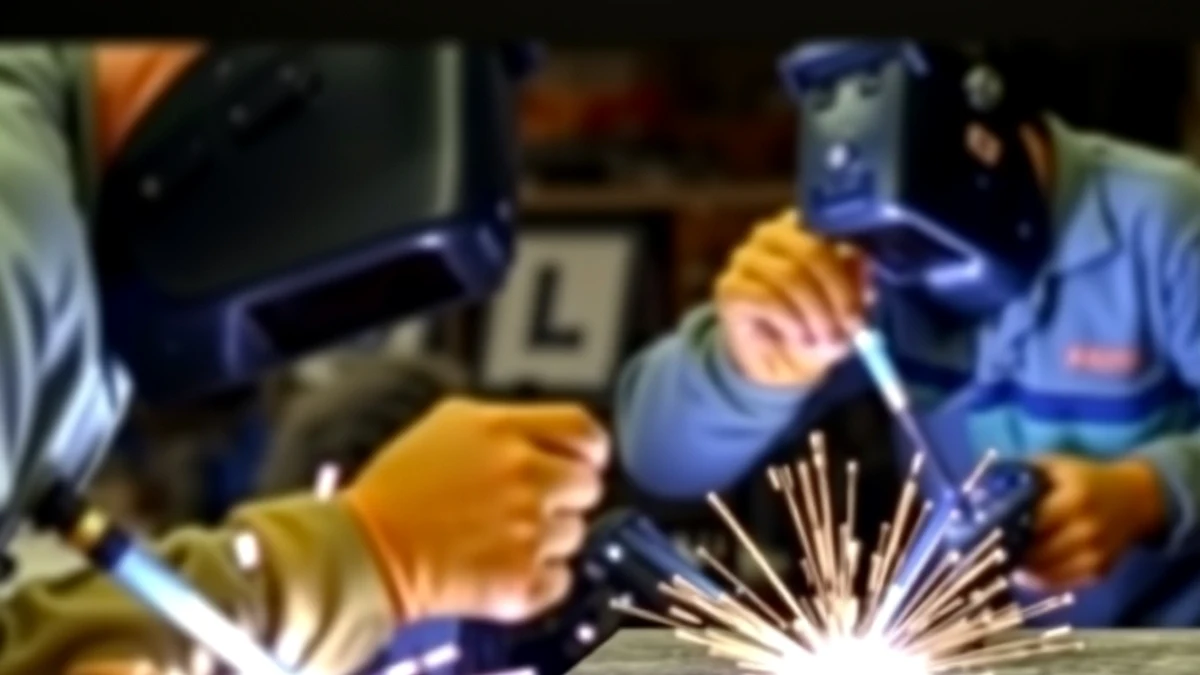
Flat-position welding is where everyone starts and where flux core feels almost magical — the puddle sits where gravity wants it, the bead forms easily, and success comes fast. The real test of technique begins the moment the joint leaves the flat plane. Out-of-position welding is where parameter discipline, gun control, and puddle management converge, and it’s where skilled flux core welders genuinely earn their rate.
Horizontal (fillet welds in the flat-horizon orientation) is the gentlest transition from flat. Gravity pulls the puddle down across the face of the joint, so your strategy is to keep the upper toe wetted in while preventing the lower side from sagging. Slightly reduce heat versus flat settings, keep your work angle biased slightly upward, and let the puddle support itself. Full details live in our horizontal flux core settings guide.
Vertical-up is the signature out-of-position flux core technique — and it’s counterintuitive for people coming from stick welding’s vertical-down habits. In flux core, you generally weld vertical-up (climbing), not down, for the same reason a mason lays bricks from the bottom: each new pass or weave segment sits on the shelf of solidified metal below it. The technique: run a root pass (or a stringer for open-root joints), then build with controlled weaves — triangle, crescent, or Z-pattern — pausing at each side, moving fast through the middle, and always letting the leading edge of the puddle tie into the previously solidified shelf. Settings differ from flat: wire speed drops modestly, voltage is dialed to keep the arc force sufficient to hold the puddle up without letting it sag. Our complete vertical-up settings guide provides the numbers and step-by-step sequencing.
The physics challenge of vertical-up is that gravity is your constant adversary — it wants to pull the molten metal down the plate. Your arc force, surface tension, and the solidifying metal below fight back. Too much heat and the puddle collapses downward in a saggy, ropy bead. Too little and you get lack of fusion at the toes and a cold, stuck-on appearance. The skill lives in the balance: consistent weave rhythm, disciplined pauses, and settings matched to position rather than borrowed from flat.
Overhead is where flux core’s advantages over stick welding become viscerally apparent — the deposition rate is high enough to build bead quickly before gravity wins, and the puddle’s surface tension (aided by the flux blanket) helps hold metal in place. Overhead demands the lowest heat of any position (to minimize puddle size), tight stickout control, and — above all — confidence. Hesitation overhead creates sagging; hesitation happens when you’re unsure of yourself. The fix is deliberate practice: overhead beads on plate, then overhead fillets, then overhead joints in mock-up positions, until the motion is muscle memory. Never attempt overhead without a shielded jacket and a good helmet angle — gravity sends spatter straight down your collar, and overhead spatter is the fastest way to learn why welding safety gear isn’t optional.
There’s also positional sequencing to understand: real joints often require welding in multiple positions across one assembly (start flat, transition to vertical as the joint climbs). Planning your weld sequence — which segments you do first, how you tie into each other, where you stop and restart — is itself a technique, and experienced welders plan sequence the way chess players plan moves. Our guide to mastering flux core rod technique covers sequencing strategy in more depth.
Joint Prep and Fit-Up: The Work Before the Work
Every technique conversation eventually arrives at the same destination: preparation. It’s less glamorous than puddle control, which is probably why it’s the step beginners skip — and why inspectors can identify skipped prep from across the shop.
Cleanliness for steel flux core is more forgiving than aluminum welding, but “more forgiving” isn’t “irrelevant.” Mill scale, rust, paint, oil, and cutting fluids all introduce contaminants into the arc zone. Heavy rust and mill scale can destabilize the arc, contribute to porosity, and alter penetration. The practical standard: wire-brush or grind the joint area to bright metal, wipe away oil and grease, and remove paint entirely (paint in the heat-affected zone produces fumes that are both a weld quality problem and a health problem — thermal decomposition of paint coatings can release compounds you absolutely don’t want in your lungs). Galvanized steel deserves special mention — the zinc coating boils off during welding and causes porosity, spatter, and the classic flu-like symptoms of metal fume fever. Our guide to welding galvanized steel with flux core covers how to handle zinc-coated material safely and cleanly.
Joint geometry is the other half. Flux core’s deep penetration capability is a genuine advantage — it tolerates wider root openings and poorer fit-up than TIG does — but it still has limits, and the joint design should match the process. For butt joints on heavier plate, a bevel (V-groove) gives the arc room to reach the root; a common single-V preparation lands around 45–60° total included angle with a root gap sized to your wire diameter. For fillet welds, the leg size should roughly match the thickness of the thinner member — oversizing a fillet wastes wire, increases distortion, and doesn’t proportionally increase strength (the effective strength lives in the throat dimension, not the leg length). Our overview of why weld joints are grooved explains the engineering behind these choices.
Fit-up discipline means tack welding your assembly before running final beads, checking square and alignment after tacks (tacks pull and distort — measure after tacking, not before), and planning your sequence so heat input distributes rather than concentrates. A warped assembly can’t be fixed by welding technique; it can only be prevented by preparation. This is also where you decide your starting and stopping points, where you’ll tie into existing welds, and where you’ll be welding out of position — decisions made in planning cost nothing and save hours.
Slag Management: Reading and Respecting the Report Card
We called slag a report card earlier, and it deserves its own section because how you handle it directly affects both your weld quality perception and your actual results. Flux core’s slag blanket does critical work while the metal cools — shielding the hot bead from oxygen, slowing cooling to reduce cracking risk, and shaping the bead profile. Once the weld solidifies, the slag’s job shifts: now it needs to come off cleanly, and how it behaves tells you what happened underneath.
Good slag lifts easily — often peeling up in long curls as the weld cools (thermal contraction of the slag against the bead helps it pop free). It’s thin, glassy or uniformly gray, and reveals a smooth, even ripple pattern beneath. Problematic slag comes in flavors: thick, crusty slag that requires heavy chipping suggests travel too slow or settings too cold (excess flux deposited relative to metal). Slag that’s welded into the bead — literally incorporated into the surface, creating hard inclusions — indicates the next pass was run over uncleaned slag, which is a serious defect in any code-governed work. And slag that hides porosity or worm tracks beneath it means the shielding or parameters failed during the pass itself.
The discipline is simple: clean between passes, every pass. Wire brush, chipping hammer, or angle grinder with a wire wheel — whatever it takes to remove ALL slag before the next bead goes down. Slag inclusions are one of the most common rejection reasons in multi-pass flux core welds, and they’re 100% preventable with thirty seconds of cleaning. Also clean the toes of the weld and any spatter that might interfere with the next pass’s arc stability.
One technique note specific to flux core: the start and stop of each pass are where slag problems concentrate. Craters at stops (caused by pulling away too fast without filling the crater) create depression defects that trap slag and crack; improper restarts overlap poorly and leave cold joints. Train yourself to fill the crater for a half-second at the end of every bead, and to restart slightly ahead of the previous stop, overlapping the termination to create a continuous metallurgical bond. These micro-habits separate welds that look machine-made from welds that look improvised.
Troubleshooting: Diagnosing the Seven Most Common Defects
Even with perfect habits, welds occasionally misbehave. The difference between a welder who improves and a welder who stagnates is diagnostic method — the ability to look at a defect, understand its mechanism, and change the right variable. Here’s the field guide. (For the extended version with visual examples, keep our complete troubleshooting guide bookmarked.)
Porosity (pinholes). Gas pockets frozen into the weld. Causes: contamination (oil, rust, moisture, paint), shielding failure (wind blowing away the self-generated atmosphere — flux core is wind-resistant, not windproof), wrong polarity, excessive stickout, or arc wander. Fix: clean the joint religiously, shelter from wind, verify DCEP polarity, check stickout, and inspect wire for rust (our guide to keeping wire from rusting covers storage). Porosity is also the signature defect of aluminum contamination — see our deep dive on porosity in welding.
Excessive spatter. Little metal BBs welding themselves to everything in a six-inch radius. The usual suspects: voltage too low relative to wire speed (the wire stabs and explodes), travel too slow, stickout too long (resistance heating the wire until it stabs erratically), wrong polarity, or a worn contact tip. Fix methodically: verify polarity, check stickout, then adjust voltage upward in small increments until the spatter settles. Our targeted guide to reducing flux core spatter gives you the full decision tree.
Lack of fusion / cold lap. The bead sits on the metal without wetting into it — rounded, rolled toes that never actually bonded. Classic cause: travel too fast (puddle never catches up), voltage too low (arc doesn’t have the force to break into the corners), or wrong gun angle. In joints, it’s often the root: insufficient penetration because the parameters were set for the cap pass rather than the root. Fix: slow down slightly, add voltage, verify angle, and on critical joints, use a grinder or file to check whether your bead actually fused at the toes.
Undercut. A groove melted into the base metal along the weld toe that the filler didn’t fill. Caused by too much heat in one spot (high voltage, slow travel with the arc focused on an edge), incorrect work angle (pouring the arc into one side of the joint), or excessive weave dwell on the edge. Fix: lower voltage slightly, correct angle, keep weaves controlled with even pauses. Undercut is a fatigue-crack starter in structural work — inspectors treat it seriously.
Worm tracks. Those squiggly, worm-like surface channels sometimes seen in flux core beads — typically caused by gas evolving through the slag at the wrong moment, often tied to excessive voltage or travel speed issues on certain wire types. Fix: reduce voltage slightly, ensure stickout is in spec, and verify the wire’s core hasn’t degraded from moisture (store flux core wire dry).
Inconsistent bead width (wandering). The bead swells and narrows along its length. This is 90% technique: variable travel speed, angle drift, stickout change, or body position forcing mid-pass adjustment. Fix: slow down your mental processing (new welders rush because they’re thinking instead of feeling), reposition for comfort before starting, and drill straight-line stringers on plate until width stays constant. This is the defect that says “practice,” not “machine.”
Crater cracks at stops. Depressions with cracks at bead terminations, caused by pulling the gun away abruptly and letting the puddle freeze unfed. Fix: hold position at the stop for a brief moment, back the trigger slightly to fill the crater with wire, then withdraw. On aluminum (where crater cracking is even more punishing), this habit is absolutely mandatory — see our aluminum coverage in flux core welding on aluminum for why that metal punishes every inconsistency.
Notice the pattern across all seven: each defect maps to a specific, adjustable cause. Welding isn’t mystical — it’s a controlled process with controllable inputs. When something goes wrong, resist the urge to blame the wire, the machine, or the steel. Change one variable at a time, run a test bead, evaluate, and repeat. That scientific loop — hypothesis, test, observe, adjust — is how skilled welders are built. It’s also exactly what our roundups of costly flux core mistakes and welding tips for beginners are organized around.
Safety: The Technique You Practice Every Second
Flux core’s fume generation is higher than MIG’s (the flux itself produces smoke), and taking that seriously isn’t cautionary theater — it’s career preservation. Welding fumes contain a mix of metal oxides and particulates whose composition depends on the base metal, coating, and consumable. Chronic exposure without protection is linked to respiratory and neurological harm, and the regulatory frameworks exist precisely because the effects accumulate silently over years. The OSHA welding, cutting, and brazing standards establish enforceable exposure limits for workplace settings, and NIOSH’s welding health resources summarize the science for professionals and hobbyists alike. Our feature on whether welding fumes are toxic translates that into practical shop decisions.
The layered protection approach looks like this: ventilation first — a fume extractor positioned near the arc (the first 12–18 inches of travel matter most), or cross-ventilation in open shop bays. Respiratory protection second — a properly fitted half-mask respirator with P100 cartridges for routine flux core work; our best welding respirators review covers models that welders actually wear all day. Eye and skin protection third — a helmet shade appropriate to your amperage (flux core’s heavier deposition often justifies shade 10–13), a welding jacket (never rolled sleeves — UV burns and spatter both punish bare arms), gloves matched to position (overhead welding demands gauntlets with no gaps), and fire prevention: clear combustibles, have a fire watch after hot work, because flux core’s spatter throws incendiary particles further than people expect.
Ergonomics is safety too. Welding positions that strain your neck, crush your shoulder, or force shaky unsupported hands produce not just discomfort but inconsistent welds — fatigue degrades technique long before it registers as pain. Adjustable hoods, proper lighting on the work, knee pads for floor work, and the discipline to reposition instead of stretch all belong in the technique conversation. The Bureau of Labor Statistics notes welders commonly work on their feet in awkward positions for extended shifts; how you manage that determines whether your career lasts twenty years or five.
The Practice Ladder: A Skill-Building Routine That Works
Derrick’s story at the opening had a sequel worth mentioning: Sal gave him a practice regimen — twenty to thirty minutes a day of deliberate drills on scrap — and within three weeks Derrick’s beads went from “mixed” to “consistent enough to run production.” Deliberate practice, not just hours, is what builds skill. Here’s the ladder, in order, that takes flux core technique from shaky to reliable.
Week One: straight-line stringers on plate. Flat position, single plate, no joint. Your only goals: constant angle, constant stickout, constant speed. Judge each bead by width uniformity — mark the start and end of intended travel and stay in your lane. Run ten beads a session and evaluate them side by side. This builds the motor pattern that everything else stacks on.
Week Two: bead-to-bead ties. Run a second stringer so it overlaps the first by about half its width (the classic “stacked dimes” overlap). Uniform overlap on both sides means your spatial judgment is developing. Then transition to T-joint fillets — the workhorse joint of fabrication — practicing gun angle bisecting the joint.
Week Three: parameter experiments. Same joint, deliberately varied settings: run a bead slightly cold, one ideal, one hot. Look at each, listen to each, read the slag. Build your internal reference library so you recognize what “wrong” feels like before it ruins a project.
Week Four and beyond: positions and joints. Add horizontal, then vertical-up (start with stringers on plate before weaves in the joint), then overhead. For each new position, expect your quality to reset to “beginner” briefly — that’s normal and correct; position-specific motor patterns are new skills, not extensions of old ones. Our positional guides (vertical-up, horizontal) give you the settings and sequencing to make that reset short.
Throughout the ladder, keep a simple notebook: date, machine, settings, wire, what you observed, what you changed. Welders who keep notes improve measurably faster than welders who rely on memory, because memory smooths over exactly the details you need to see. This habit — observation, documentation, adjustment — is also what professionals call “procedure awareness,” and it’s the same discipline that underlies formal procedure qualification in code work governed by standards from bodies like the American Welding Society.
Machine and Consumable Setup: Removing Variables Before They Bite
Technique happens at the gun, but it’s enabled at the machine — and a few setup decisions either support your technique or quietly sabotage it.
Drive rolls and tension. Flux core wire is tubular and slightly compressible; drive roll pressure should be set firmly enough to push the wire consistently without crushing the tube. Too little tension and the rolls slip (causing erratic feed that mimics parameter problems); too much and the wire deforms (causing feeding surges and tip wear). Knurled V-groove rolls are standard for flux core. Our explainer on drive rolls for flux core wire covers selection and tensioning.
Liner condition. A kinked, contaminated, or worn liner creates friction that makes wire feed pulse — and a pulsing feed delivers pulsing amperage, which shows up as an inconsistent bead even when your hand is steady. If your beads wander mysteriously despite good technique, inspect the liner before you doubt your skills. This diagnostic principle — suspect the machine before your ego, then fix whichever is actually wrong — recurs across all our troubleshooting content.
Contact tips. Replace tips when the bore wears oval or the tip deforms; a worn tip causes arc wander and erratic current transfer. Keep spares in your welding cart — running a weld with a failing tip is a false economy.
Wire storage. Flux core wire’s core chemistry is vulnerable to moisture. Store spools indoors, in a dry location, ideally in a sealed bag or container once opened. Damp flux core wire produces spatter, porosity, and unstable arcs — problems that look like technique failures but are actually consumable failures. (Related: our guide to what flux core welding is explains how the core chemistry functions, which makes the storage rules obvious rather than arbitrary.)
Machine selection and duty cycle. Finally, your machine’s duty cycle shapes your technique indirectly: an undersized machine that overheats mid-job forces breaks at the worst moments, breaking your rhythm and leaving restarts where continuous travel would have been better. Understanding duty cycle management helps you plan sessions so the machine doesn’t dictate your weld sequence. If you’re still choosing equipment, our reviews of the best flux core welders for beginners and best flux core welders under $300 focus on machines with feed systems stable enough to let technique shine.
Real-World Scenarios: Technique in Context
Scenario one — repairing a trailer frame outdoors. Wind is blowing, the steel has surface rust, and access is tight. This is flux core’s home turf: self-shielded wire doesn’t care about wind the way MIG does (though heavy gusts still matter), and the process tolerates imperfectly clean steel. Technique priorities: drag angle consistently, slightly longer stickout to compensate for imperfect ground surfaces, and higher travel speed as the plate heats up from previous passes. Prep still matters — grind the crack area to clean metal for the root pass even if the surrounding frame stays rusty.
Scenario two — vertical-up fillet on a column. The joint is in position, gravity is working against you, and appearance matters for inspection. Technique priorities: settings dropped from flat baseline (start ~10% lower wire speed), triangle weave with disciplined side pauses, body positioned so your gun angle stays constant through the climb, and short segments (4–6 inches) with careful tie-ins between segments. Re-read our vertical-up guide before attempting — the sequencing details matter.
Scenario three — out-of-position sheet work on equipment. Thin material, awkward position, limited access. Technique priorities: lower heat to prevent burn-through, stringer beads only (weaves on thin out-of-position material are a recipe for melt-through), fast confident travel, and accepting that sometimes the joint should be repositioned or the process changed — knowing when flux core vs MIG is the right call is itself technique, at the planning level. For thinner sheet specifically, our comparison of MIG with gas vs flux core maps the crossover points.
The Pro Tips Roundup
Collected from the patterns that show up consistently in professional practice — the small things that never make it into equipment manuals:
- Listen before you look. Arc sound diagnoses settings faster than visual inspection. Learn the frying rhythm and you’ll catch parameter drift mid-pass.
- Whittle your variables. When something’s off, change ONE thing — voltage, then speed, then angle. Change three at once and you learn nothing.
- Restart at the crown. Always restart into solid metal, overlapping the previous termination — never at the edge of the crater.
- Feed the crater. That half-second pause at the end of every bead prevents the most preventable defect in the book.
- Let slag cool before forcing it. Chipping hot slag smears it into the bead; let it cool, then tap lightly. Patience here preserves the surface underneath.
- Watch the toes, not the center. The middle of the bead takes care of itself; the toes are where defects live. Aim your visual attention at the edges as you travel.
- Your body is part of the gun. If you can’t hold position comfortably, you can’t hold it consistently. Kneel, brace, reposition — before striking the arc.
- Chase strong welds, then beautiful ones. Fusion first, appearance second — a gorgeous bead with cold toes is a failed weld in a pretty coat. Our guide to how strong welds really are explains why appearance and strength overlap but aren’t identical.
Seven Flux Core Myths That Stall Your Progress
Welding culture runs on folklore — rules of thumb passed from ear to ear, half-remembered from a YouTube comment or a gray-bearded old hand in the shop whose advice was correct for 1995 but not for today’s machines. Let’s clear out the myths that most often interfere with technique development, because believing any one of them will send your practice time in the wrong direction.
Myth 1: “Flux core is the beginner process — real welders move on.” This is perhaps the most damaging misconception in the trade. Flux cored arc welding is an industrial workhorse — it’s specified in structural steel construction, shipbuilding, heavy equipment, and pressure vessel fabrication worldwide precisely because of its deposition rate, position capability, and field tolerance. The process didn’t stop at “beginner”; beginners just happen to have easy access to it. Welders who treat flux core as a permanent craft — mastering every position, every parameter interaction, every defect diagnosis — build skills that transfer everywhere else in the trade. The versatility is real: our feature on welding with a flux core wire feed welder walks through the range of work this single process handles.
Myth 2: “Wire is wire — I can run MIG wire in my flux core machine.” They’re fundamentally different consumables. Solid MIG wire has no flux core, so a machine configured for self-shielded flux core (DCEP polarity, no gas) will produce garbage with solid wire — no shielding, no arc stability, no usable weld. Conversely, running flux core wire on a machine set up for gas-shielded MIG (DCEN with gas) gives you the wrong polarity and the wrong atmosphere. The wires look similar on a spool; metallurgically and electrically, they’re strangers. Our experiment-driven feature on using MIG wire in a flux core welder shows exactly what happens — and why the setup rules exist.
Myth 3: “Bigger wire means stronger welds.” Wire diameter isn’t a strength dial — it’s a deposition and machine-compatibility choice. .035″ wire deposits more metal per pass than .030″, but weld strength is determined by fusion, filler classification, and joint design, not by how much metal you stacked. On a 110V machine, oversized wire actually reduces quality: the machine can’t generate enough amperage to melt the heavier wire properly, producing cold, weak welds that look the part from a distance. Match wire to machine and material thickness — our .030 vs .035 comparison lays out the decision matrix.
Myth 4: “More voltage always means better penetration.” Voltage controls arc length and heat input, but penetration is a system outcome — voltage, current (via wire speed), travel speed, stickout, and joint geometry all contribute. Cranking voltage on a cold joint doesn’t fix fusion; it usually produces undercut, spatter, and a washed-out bead while the root stays untouched. Penetration problems are solved by evaluating the whole parameter set, not by turning one knob to its maximum. This systems view is exactly how our parameters framework is built.
Myth 5: “Flux core works in any wind.” The process is far more wind-tolerant than gas-shielded MIG — that’s one of its signature advantages — but it’s not immune. Strong gusts disrupt even self-generated shielding atmospheres, and outdoor welding in heavy wind still produces porosity. The accurate statement: flux core tolerates conditions that would make MIG impossible, while still rewarding you with shelter when the weather turns severe. Even the “gasless” positioning has limits, as our look at gasless flux core welding explains in context.
Myth 6: “Slag is just waste to scrape off.” We’ve covered this, but it bears repeating as a myth-buster: slag is simultaneously a protective system during welding, a diagnostic tool afterward, and — when left in a multi-pass weld — a genuine defect generator (slag inclusions). Treating slag as information rather than garbage is a genuine skill upgrade. Welders who read slag diagnose parameter problems without grinding test sections; welders who ignore it discover those problems during inspection instead.
Myth 7: “You need a $2,000 machine to weld like a professional.” Modern entry-level and mid-range flux core machines — including honest 110V units — produce arcs that would have been considered excellent in a 1990s fabrication shop. What separates a professional result from an amateur one is overwhelmingly technique, preparation, and consumable quality, not the price of the power source. That’s not marketing optimism; it’s observable in shops everywhere, and it’s why our reviews emphasize feed system stability and arc quality over feature count. If a machine feeds wire smoothly and holds a stable arc, your hands write the rest of the story. The broader market reality — are flux core welders any good as a category? — is covered in our honest assessment of flux core welders, and buyers comparing platforms will find our deep dive on flux core welding power a useful reality check.
Clear these seven myths from your operating manual and you’ll find technique development accelerates — because you’ll stop fighting imagined constraints and start interacting with the actual physics in front of you.
Frequently Asked Questions
What is the correct gun angle for flux core welding?
For self-shielded flux core, use a drag (trailing) technique with the gun tilted approximately 10–15° back from vertical in the direction of travel, with the work angle bisecting the joint (roughly 45° for fillet welds, near-vertical for butt joints). The drag direction keeps the self-generated shielding atmosphere over the puddle as you move. Push technique is generally wrong for gasless wire (though gas-shielded flux core and MIG sometimes use push). Consistency through the pass matters more than the exact number — drift causes more defects than a slightly-off but stable angle.
What contact tip to work distance (stickout) should I use?
Self-shielded flux core typically calls for 3/4″ to 1-1/4″ (about 19–32 mm), longer than MIG’s usual 1/2″, because the added wire length increases electrical resistance and thus amperage at the arc. Check your wire manufacturer’s specification for the exact target. The critical factor is consistency — varying stickout mid-pass changes your effective amperage and causes bead width variation. Keep it within spec and stable.
Why is my flux core weld producing so much spatter?
Excessive spatter almost always traces to parameters or consumables: voltage too low relative to wire speed, travel too slow, stickout too long, wrong polarity (self-shielded wire must run DCEP), a worn contact tip, or damp wire. Diagnose in that order — verify polarity first because it’s the most common and cheapest fix, then check stickout, then adjust voltage in small increments. Our dedicated spatter reduction guide walks through each step.
Why is my bead width inconsistent along the joint?
Inconsistent width is a technique symptom: variable travel speed, gun angle drift, changing stickout, or unstable wire feed (check liner and drive roll tension). Slow your mental pace — rushing is the most common root cause — reposition your body so you can move smoothly through the entire pass, and practice stringers on plate judging only width uniformity. If technique is steady and the bead still wanders, inspect the feed system: a pulsing wire feed mimics inconsistent technique perfectly.
What settings should I use for vertical-up flux core welding?
Start from your flat-position settings and reduce — a typical starting point is about 5–10% lower wire speed with voltage adjusted to maintain a stable arc force that holds the puddle without sagging. Use a controlled weave (triangle, crescent, or Z-pattern) with pauses at the toes and faster movement through the middle, building each segment on the shelf below. Exact numbers depend on wire, thickness, and machine — our vertical-up settings guide provides the full starting matrix and sequencing strategy.
Can I weld overhead with flux core?
Yes — and flux core is actually one of the better processes for overhead because its high deposition rate and flux blanket help control the puddle against gravity. Use the lowest heat setting that still produces good fusion, keep stickout tight and consistent, use stringer beads, and commit to confident, steady travel (hesitation causes sagging). Full coverage with jacket, gauntlets, and a helmet angled to protect your neck is mandatory — overhead spatter falls directly toward exposed skin.
Is flux core strong enough for structural work?
Self-shielded flux core produces welds with mechanical properties competitive with other processes when executed correctly — properly made FCAW welds routinely meet the same 70,000 psi tensile requirements as E70 stick and MIG electrodes, and the process is widely used in structural steel construction, shipbuilding, and heavy fabrication under code supervision. Strength depends on execution: correct classification, qualified parameters, proper technique, and inspection. See our explainers on how strong flux core welding is and weld strength fundamentals for the full picture.
How should I practice to improve technique quickly?
Use deliberate, structured practice rather than random welding: stringers on plate for angle and speed consistency, bead-to-bead ties for spatial control, deliberate parameter experiments to build your diagnostic ear and eye, then position progression (flat → horizontal → vertical-up → overhead). Twenty to thirty focused minutes daily beats occasional marathon sessions. Keep a notebook of settings and observations — welders who document their practice improve measurably faster because they can see patterns memory would hide.
Should I learn flux core or MIG first?
Both are excellent entry points, but they reward different learning sequences. Flux core teaches arc discipline and position work quickly (no gas bottle means easier setup and outdoor practice), and its forgiveness of imperfect prep builds confidence. MIG teaches precision feed control and clean bead aesthetics, and the skills transfer directly to aluminum later. Many training programs start with flux core for fundamentals, then add MIG. If you’re choosing one machine for a home shop, a multi-process unit gives you both paths — our comparison of flux core vs MIG and the broader stick vs flux core decision help you pick strategically.
Bringing It Together: From Derrick’s Bead to Yours
Remember what Sal told Derrick in booth three: the wire was fine, the machine was fine, and the difference lived entirely in the geometry and rhythm his hands produced. That insight — that technique is a learnable system rather than an innate gift — is the through-line of everything we’ve covered. Dial in your parameters until the arc sounds right. Lock your gun angle and stickout as fixed geometry. Move with consistent speed, weave only when the joint demands it, and pause where fusion lives — at the toes. Adapt your settings to position before the puddle adapts them for you. Prep the joint like the weld depends on it, because it does. Clean between passes, read your slag, and when a defect appears, diagnose it methodically instead of guessing.
None of this requires talent. It requires the willingness to practice deliberately, to film or observe your own hands, to keep notes, and to treat every bead as data. The welding industry supports this craft with deep standards resources — from the American Welding Society’s specification library to the practical knowledge bases at TWI, Miller’s resource center, and Lincoln Electric — so answers to almost any technique question you’ll ever have already exist somewhere in that body of knowledge. The welders who master flux core are the ones who go looking for those answers, test them on scrap, and fold what works into muscle memory.
Derrick’s sequel, by the way: six months after booth three, he was running vertical-up fillets that passed visual inspection without a single comment from the QA team. Same machine. Same wire. Different hands — because the hands had finally been taught. Now pick up your gun, set your angle, listen to your arc, and go weld the bead you’re capable of welding. The skill is waiting at the end of a few hundred intentional beads — and every single one of them starts with the decisions we’ve covered in this guide.